Mini Arcade Project


Print Profile(1)

Description
MINI ARADE PROJECT (v1.0)
Boost Me (for free)
Support me by giving a boost for this model. Thank you!
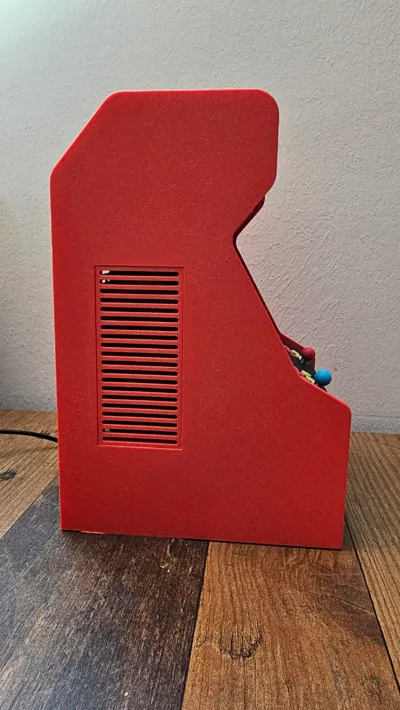
Welcome to the Mini Arcadee Project - Build your own mini arcade with a 5 inch screen to play your favorite 80s and 90s console games! This model has been tested with Raspberry Pi3 and Pi4 and works very well. Using an AMS makes the printing of this model with indivual colors very easy. Just paint as required in your slicer. All parts have been printed with a layer height of 0.2mm.
You will need the print bed size of the X1 or P1 printers (256x256x256), it will not fit onto the smaller bed of the A1 Mini (180x180x180).
Required hardware/tools for this build:
- 5 inch screen:
You will need a 5 inch screen with HDMI/USB connectors on the top of the screen module, not at the side (see photo). Otherwise you will not be able to fit the screen with all cables into the arcade, there will not be sufficient space.
My 5 inch screen has the following overall dimension, you want to look for something in the same spec range:
77.93mm x 121.11mm
- Sound module and speakers for the Raspberry Pi:
To get decent sound from the arcade, a WM8960 Audio-HAT-module an two speakers are required. You can get these via known online stores. Speaker size is approx. 45mm x 100mm (see photos). WM8960 and speakers usually come in a set.

- Flexible HDMI/USB cables and plugs
Normal HDMI and USB cables for the screen (video signal and power) will not work given that these are way too bulky and will not fit into the arcade. There are flexibles cables available on various shopping portals and you need the right plugs for your Rapsberry Pi model, for example HDMI plugs for the Pi4 (Micro HDMI) are different than those for the Pi3 (normal HDMI plug size). The same goes for the power supply (USB-C vs. Micro-USB). See photos for the cables and plugs I bought for the Pi4.

- Magnets
You will need 8 circular magnets with a width of 6mm and a height of 3mm (see photos).
- Screws
The following screws are required: 2x M2.5 x 6mm for the housing and 4x M2.5 x 5mm (or 4mm) screws for the Raspberry to be fixated on the Pi Baseplate.
- Bluetooth game controller(s)
You will need one or two Bluetooth games controllers to play with the arcade.
- Superglue
Use super glue to fix the joysticks to the housing.
Print instructions:
All*.3mf files provide for indivual settings, so no one-in-all print profile has been uploaded!
Assembly instructions:
IMPORTANT: Read note on facing of magnets before adding these to your prints!!
- Print “Housing Part A.3mf” with colors of your choice and fit m5 magnets into the holes in the build (2 on the bottom of the housing which will keep the Raspberry Pi in place and 2 at the back of the housing which will keep the backplate in place, see photo).
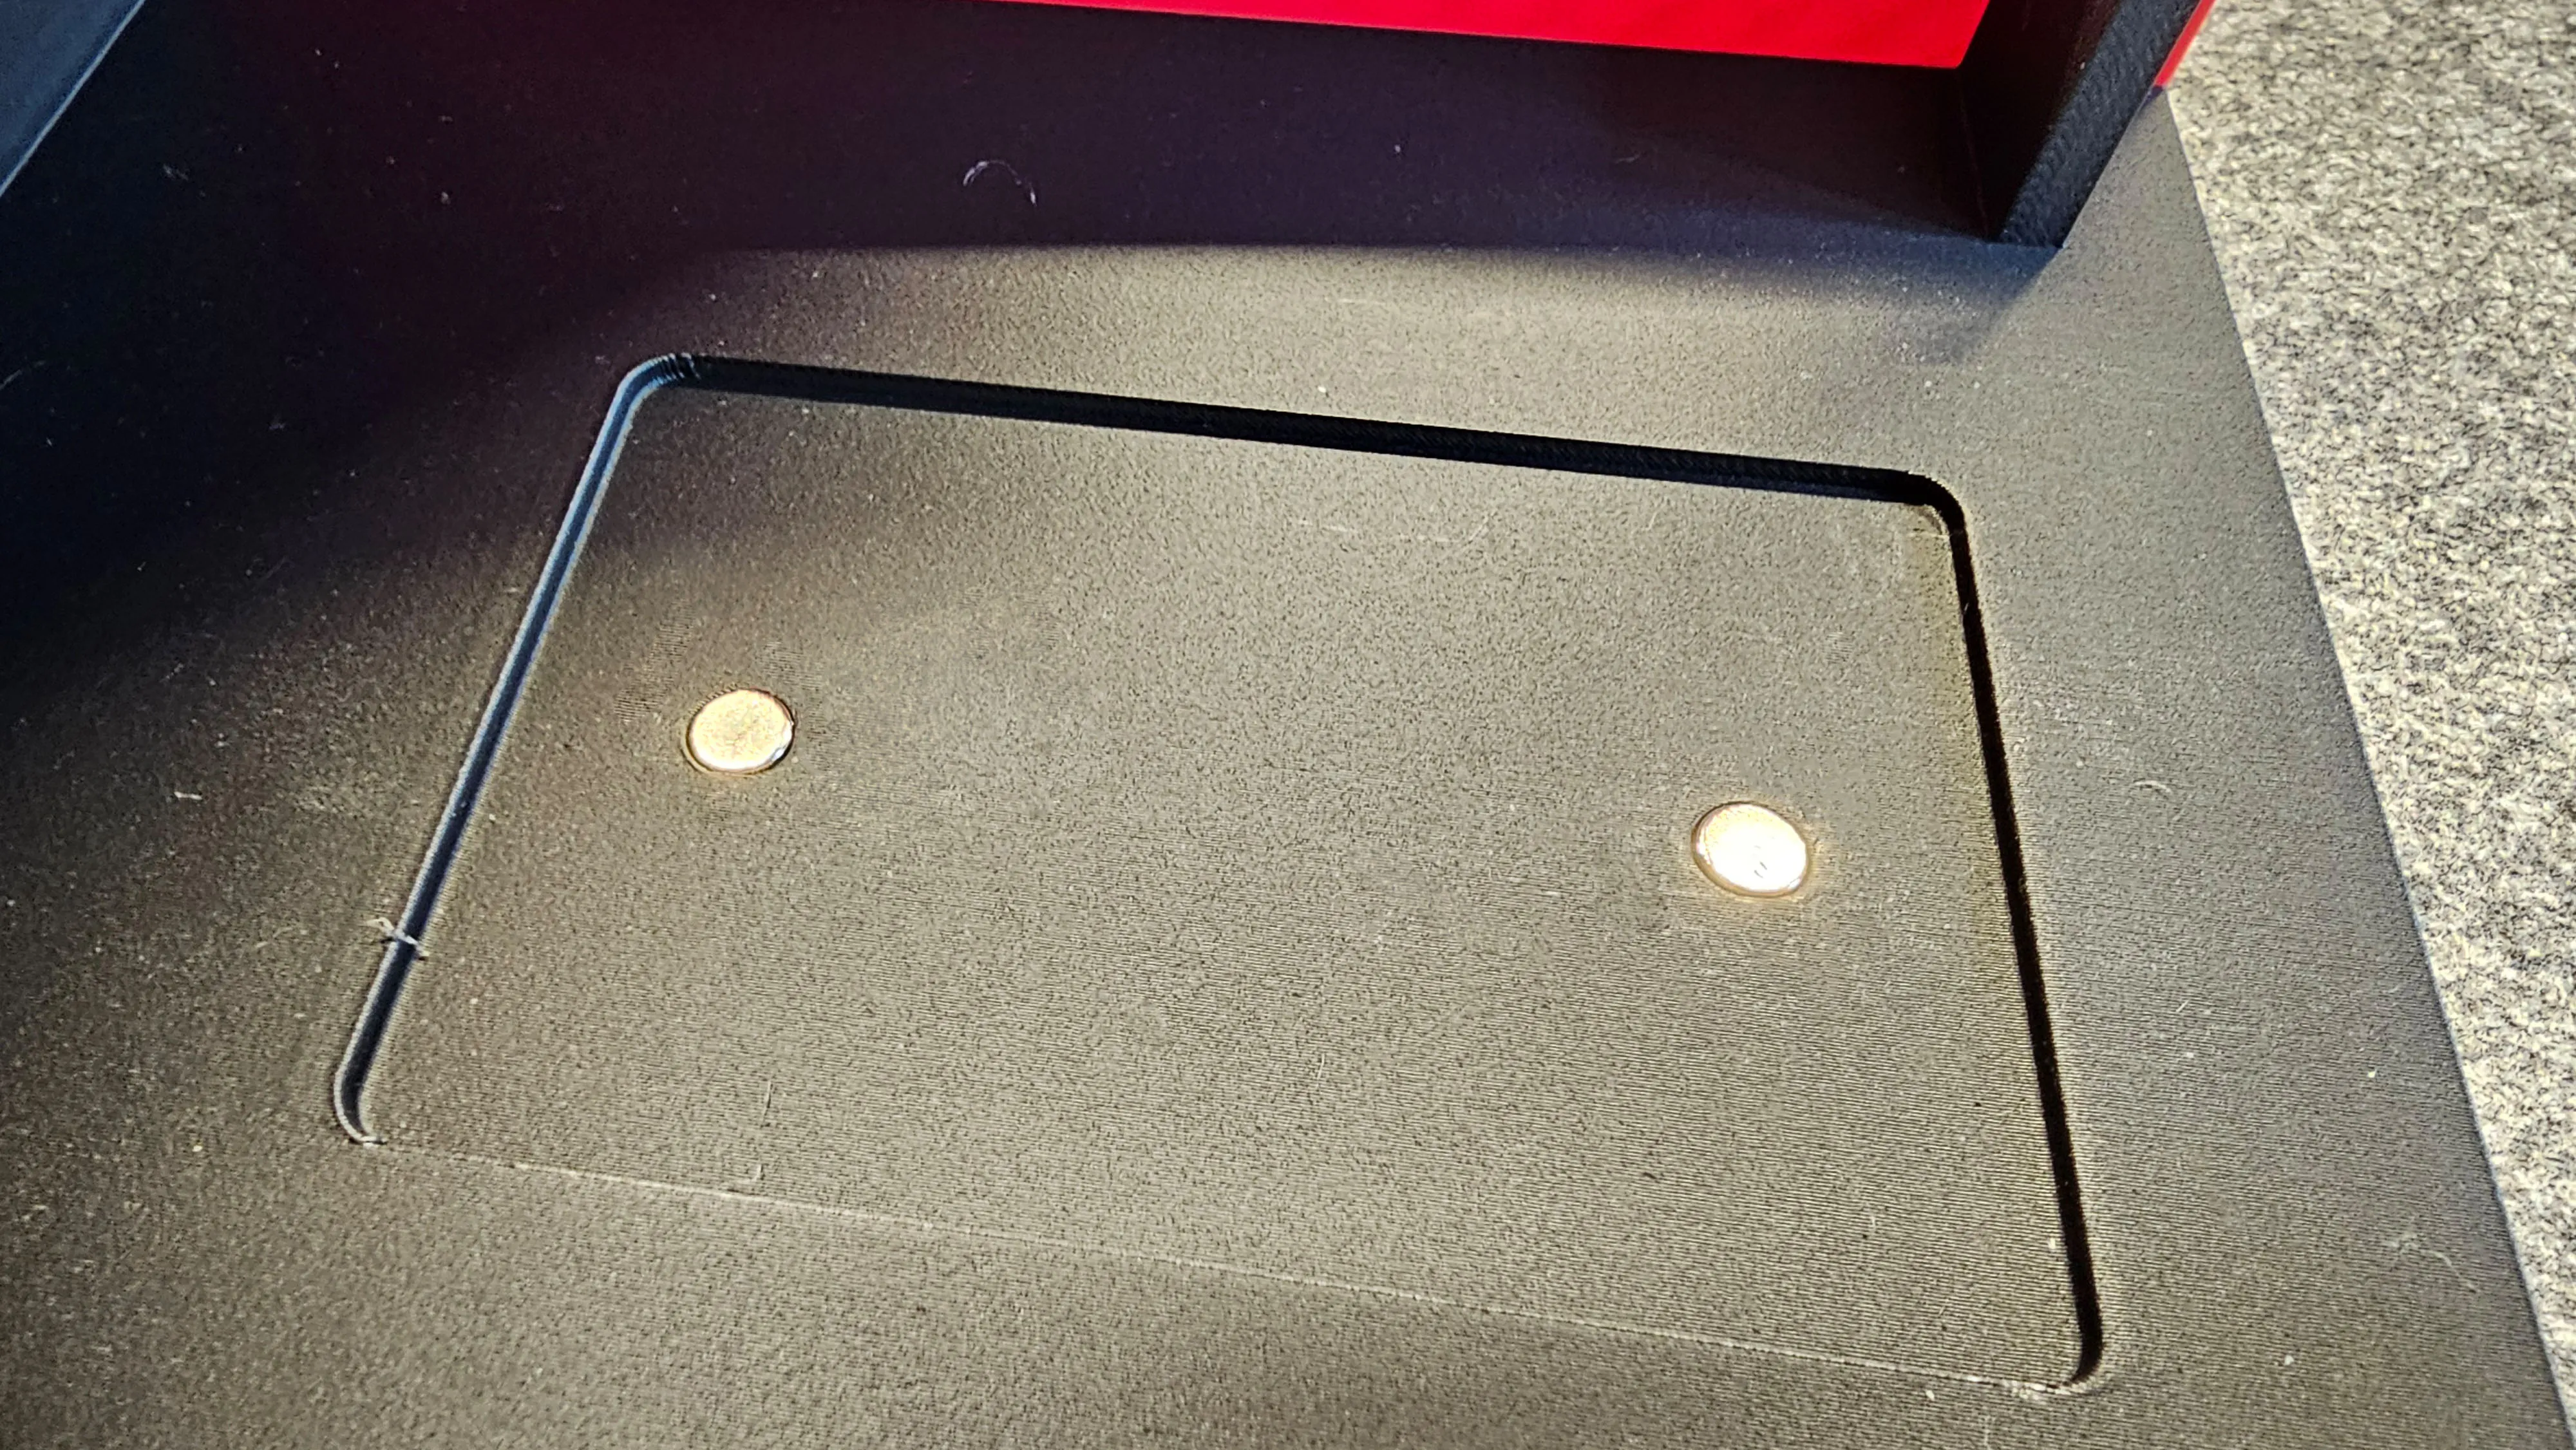
Important: After adding the magnets to the housing, place one further magnets on each of the magnets in the housing. Mark the top of the added magnets with a pen. You will need this to know how to place these markes magnets to the backplate correctly for the magnets to not push off themselves. If you do not follow this procedure you will not able to remove the magnets from the prints without damaging these!
- Print “Housing Part B.3mf” with colors of your choice. The .3mf files provides for the required supports and modifiers (100% infill), see image below.


- Print “Pi Baseplate.3mf” and add magnets to the baseplate from those added in step 1 above. The surface of the magnets you have marked in step 1 will need to face into the print, not facing out of the print!

- Print “Backplate.3mf” and add magnets to the holes using the procedure described in step 2 above - the marked surfaces of the magnets need to face down into the backplate.
- Print “5 Inch Screen Holder.3mf” and “Screen Fixation.3mf” (this one two times). Place your 5 inch screen on the screen holder and fixate it with the “Screen Fixation” brackets. You can move the brackets towards the center of the screen to make them stay in place better.
- Print “Large Speaker Holder.3mf” two times.
- Place the “5 Inch Screen Holder” with the mounted screen into the slot of “Housing Part A”. Be gentle, do not use force.
- Place “Housing Part B” on “Housing Part A”. The screen holder slot of “Housing Part B” needs to fit on the screen holder. Be gentle. do not use force. The pin on “Housing Part B” will move into and rest in cutout on “Housing Part A” (see photo). Using a gentle procedure will avoid that the pin will break off.

- Use two M2.5 x 6mm screws to fixate “Housing Part A” with “Housing Part B”, see photo for details.


- Mount your Raspberry Pi on the “Pi Baseplate" using the four M2.5 x 5mm (or 4mm) screws.
- Connect your Raspberry Pi and the 5 inch screen with the flexible cables and plugs.
- Add a power cable to your Raspberry Pi and guide the cable through the cutout at the bottom of “Housing Part A” (see photo).

- Push the speakers into the “Large Speaker Holder” prints. No glue or screws required. Then press the “Large Speaker Holders” with the attached speakers into the speaker-cutouts of “Housing Part A”.


- Add the "Backplate" to the back of the arcade which will stay in place with help of the magnets added to the parts.
- Print “Joystick.3mf” two times with a color of your choice.
- Print “Joystick Ball.3mf” two times with colors of your choice. Push the Joysticks into the Joystick Balls, a little force may be required, no glue needed. Place the Joystick into the cutouts of “Housing Part A” and use superglue to keep them in place.
- Print “Marquee.3mf” with colors of your choice. Push the marquee into the cutout of “Housing Part A”. If requied, use a small piece of dual sided sticky tape to keep the marquee in place.
- Print “Coin Door.3mf” with colors of your choice. Push the Coind Door into the cutout respective cutout of “Housing Part A”.
- Print “Button.3mf” 16 times with colors of your choice and push these into the button cutouts of Housing Part A". No glue required.
- Print “Round Speaker.3mf” two times with colors of your choice and push these into the cutouts of “Housing Part A”. Again, no glue required.
You can install Retropie on an SD-card and add your games - also install the drivers/settings for the 5 inch screen and the sound module according to the instructions of the relevant manufacturers. Do not forget to unmute the channels of the sound module if you cannot hear anything. Finally, connect your bluetooth game controller(s) with your Raspberry Pi and you are ready to go!
Happy to help with any questions you may have. This design took quite some time and test prints - if you would like to support my work, pleasde consider a tip using the link in my profile. Many thanks for your support!
License
You shall not share, sub-license, sell, rent, host, transfer, or distribute in any way the digital or 3D printed versions of this object, nor any other derivative work of this object in its digital or physical format (including - but not limited to - remixes of this object, and hosting on other digital platforms). The objects may not be used without permission in any way whatsoever in which you charge money, or collect fees.
Comment & Rating (17)