Search models, users, collections, and posts

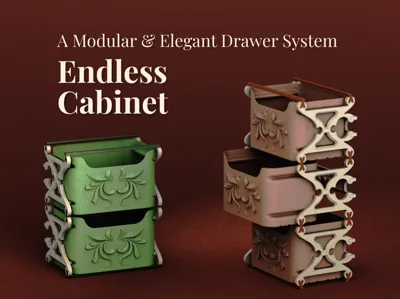
Endless Cabinet - Modular & Elegant Drawer System

Print Profile(4)

All
A1 mini
X1
X1E
P1S
X1 Carbon
H2S
H2D
H2D Pro
A1
P1P
P2S
H2C
X2D
A2L

Two Tier All Components - 0.2mm layer, 2 walls
Designer
8.7 h
7 plates
5.0(6)

"1 of each" Back wall & Side wall
Designer
59 min
1 plate
5.0(1)

"1" Shelf - 0.2mm layer, 2 walls, 5% infill
Designer
2.4 h
1 plate

"2 of each" X & Y Connections
Designer
29 min
1 plate

Open in Bambu Studio
Boost
452
1365
16
15
160
65
Released 

Bill of Materials

Bambu Filaments
Select all
Matte Dark Green (11501) / Refill / 1kg
Matte Desert Tan (11401) / Refill / 1kg

Description

Boost Me (for free)

Like my designs? Support me in creating more cool stuff by boosting me -  for free! 🚀

Hey there! ✨ :)


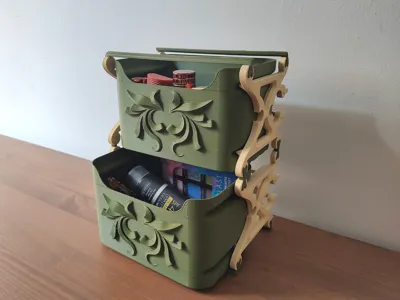
Ok, this is a design out of necessity. I recently moved to a new place with teeny-tiny IKEA everything, and very shallow wall shelves. So if you're like me, and you have tons of small stuff on tiny shelves that keep falling whenever you slightly touch them, you know what a pain in the a** that is.


So for that reason, I decided to make a tiny drawer system for the tiny shallow shelves. Of course, I needed to make them decorative and vintage-looking to fight the IKEA minimalism of the house. I also wanted to ensure it's practical and versatile, so if I wanted to extend the drawer system a few more tiers or completely dismount it and set it aside, I could.


So let me show you a before & after of one of my tiny shelves. Ready?

(Wow, so tidy! So fall-proof! :D)


Anyways. :D


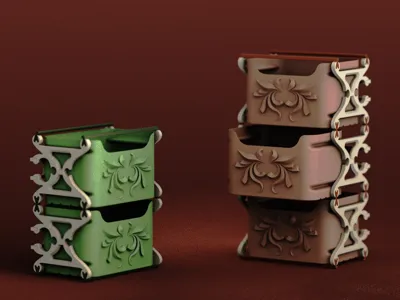
  • Before printing, keep in mind that this system is very compact and small, because of its context of use. The height of each tier is roughly 10 cm, it's 10 cm deep, and the width of each drawer is 15 cm.

  • I don't suggest scaling up the system since it messes with the tolerances, and components won't fit as tightly if you do. If you did scale up the components, do it uniformly and use glue between connections.

  • Note that this drawer system is open on the top.

Print notes:

  • Print all the components with 0.2 mm layer heights.

  • Choose a low infill for every component except for the X-shaped keys and Long, thin support bars with Y-section. For these two, choose a higher infill of about 30 or 40%, since they undergo most of the system loads.

  • I've uploaded a profile including all the components in quantities suitable for a 2-tier system, and then other profiles for each component separately, so you can print as many as you need.

Assembly notes:

  • According to the pics, use X-shaped keys between the tiers and Y-sectioned long bars to fix the lowest and highest ends of the structure from top and bottom.

  • Insert the rectangular backing components into the back of each tier to add more strength.

  • Insert the drawers, and enjoy! :)

I hope it'll be useful to you too, and happy printing! :) 🥂


If you really loved my work, you can always get me a coffee :)
(Commercial licences and high-quality renders also available on Ko-fi)

Comment & Rating (16)

(0/1000)

Boosted
Print Profile
Two Tier All Components - 0.2mm layer, 2 walls
Printed the drawers in PLA-CF. It almost feels like paper.
The profile uploader has replied
profile
5
Reply
Thanks a lot for sharing the pic and the boost! :)
0
Reply
Print Profile
Two Tier All Components - 0.2mm layer, 2 walls
amazing! I love everything I print from you!! wondering there’s a way to make stops for the drawers so they don’t pull out completely. maybe some cute little slide in bead for the sides?
(Edited)
The profile uploader has replied
profile
4
Reply
Thanks a lot, I'm so glad to see your print of this design! :) And sure, that's a good idea to add a stopper. I'll review the design soon to add a version with stoppers. Meanwhile, thank you so much for the feedback, and the boost! <3
(Edited)
3
Reply
Love this little drawer system!! I was wondering (I am very new and not familiar with settings very well) Is there a way to have the inside walls smooth? If only just the two side walls on the inside, smooth so that the indent for the slide isn't visible? I don't know if that makes sense. barring that - I am having some issues with the layers on the indent for the slide being very thin and the layers come away from eachother. How do I fix this? Or just reprint?
The designer has replied
designer
2
Reply
Hey, thanks for reaching out! :) Actually the pic you sent here is a problematic print, but as far as I know, it could be because of several issues, including filament problems. Here are a few of my tips: - Lower the print speed on the top surfaces; this usually improves the layer adhesion and surface quality. - Check if your filament is dry enough (There are several videos on Utube for better understanding this) - Change the "wall printing order", experiment to see which order gives you better results. - Reduce the layer "width"; this one is different from the layer height. If you're using a 0.4 mm Nozzle, you could reduce it to 0.4 mm (It's usually 0.42 or 0.46) to ensure your printer actually prints two walls or more in every thickness. Lemme know if these work! Hope it helps. :)
(Edited)
1
Reply
try increasing number of walls try scarf inner and outer walls, research online but I think you would start the scarf at 0%, with a length or width rather of about 15 mm
0
Reply
Functional and easy to assemble. Large bin space usable for a multitude of applications.
The designer has replied
designer
1
Reply
Thanks a lot for your feedback and boost! I'm so glad you enjoyed this. :)
0
Reply
I love these!! so whimsical - any chance they can be turned into small drawers to put under a riser on a desk for pens and stuff?
The designer has replied
designer
1
Reply
Hey, forgive me for the late reply! That's a very cool idea, and I'd love to prepare a design for that function. It might take a while since I'm working on various projects in a tight schedule, but why not! I'd love to give it a try! :)
0
Reply
Print Profile
"1 of each" Back wall & Side wall
I really like the design of this. I printed 3 layers and I glued the connectors in place. It looks nice and classy for tidying up things on the bench.
0
Reply
Print Profile
Two Tier All Components - 0.2mm layer, 2 walls
profile
1
Reply
Print Profile
Two Tier All Components - 0.2mm layer, 2 walls
profile
1
Reply
Print Profile
Two Tier All Components - 0.2mm layer, 2 walls
0
Reply
Print Profile
Two Tier All Components - 0.2mm layer, 2 walls
0
Reply

License

This user content is licensed under a Standard Digital File License.

You shall not share, sub-license, sell, rent, host, transfer, or distribute in any way the digital or 3D printed versions of this object, nor any other derivative work of this object in its digital or physical format (including - but not limited to - remixes of this object, and hosting on other digital platforms). The objects may not be used without permission in any way whatsoever in which you charge money, or collect fees.