Phone Holder Clamp with 1 Inch Ball - Modular


Print Profile(2)

Description
Boost Me (for free)
Did you know? MakerWorld gives out free Boost tokens to active users! These tokens can be used to support any model you love -- at no cost to you. You may not even know that you have Boost tokens. But they are a big help to creators. Please show your appreciation by boosting the models that you like.
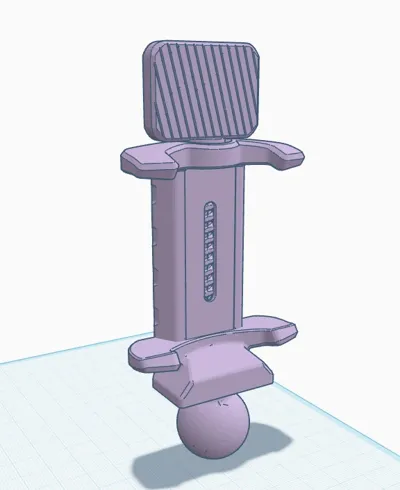
The modular 1-inch ball mount system offers exceptional versatility, allowing users to mix and match arms, bases, and device holders for nearly any mounting scenario—from desktops to vehicles to industrial rigs. Its compact ball-and-socket design provides secure articulation with minimal footprint, making it ideal for dynamic setups that demand both adjustability and stability.
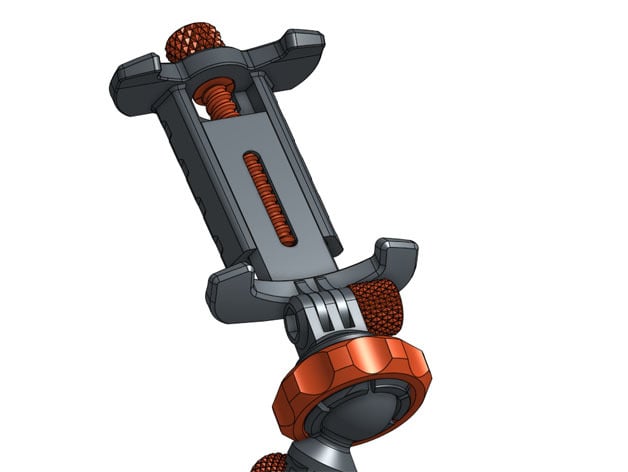
This phone holder should work with any mobile phone. Here are the features:
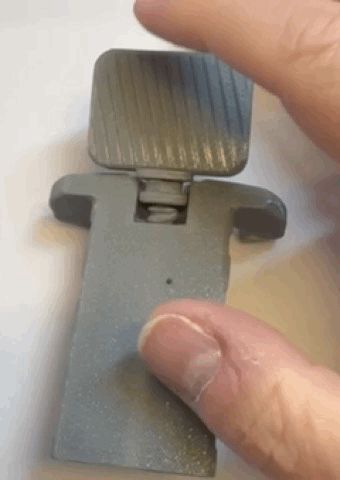
- Tightens around your phone and holds it securely, using a screw clamp
- Uses a 1 inch ball to attach to other parts. Very flexible.
- Can be used with RAM style ball mounts (see this excellent Mounting System) to make many different mounting configurations.
- If you want to use this mount to hold your phone while it sits on your desk, you can easily do that with my Desktop Base for Modular Ball Mount System.
Instructions
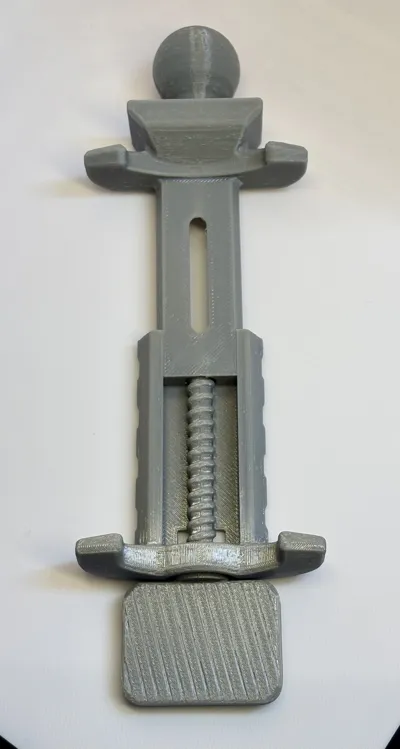
- Screw the 1 inch ball into the hole at the base of the clamp bottom.

- Insert the screw key into the hole at the back of the clamp top. Snap the semi-circular pivot joint into the receptacle.
- Insert the clamp bottom into the gap at the base of the clamp top. Turn the screw key to pull the parts together.
- Enjoy
This remix is based upon Gavitka's Printable phone holder for modular mounting system. I made these significant changes:
- Removed everything relating to the old connector, and replaced it with a socket for a 1 inch ball. Added a 1 inch ball to the model.
- Removed the old knurled knob. I wanted more torque when tightening, so I designed a new key shaped handle that provides the ability to tighten and loosen more easily.
- Combined the two halves of the tightening screw into one piece. I had trouble with the tightening screw when the parts had to be printed separately and assembled. The fit was iffy and it made the tightening/loosening process harder than it needed to be. I combined the two halves, and then removed several layers from the underside of the screw. This allows it to print okay, without significant overhangs. It turns much more smoothly.
- Combined the new key handle with the screw into one part that is printed together. Less need for assembly.
- Modified the upper part of the clamp by adding a larger gap near the handle. This lets you insert the whole key/screw assembly and snap it into place as one piece.
Membership
My models are always available for personal use here, for free. But if you would like to sell physical prints of my models, you can do that if you subscribe to my commercial licensing membership. Thanks for your support!
Comment & Rating (5)