A1 X-Axis Cable Articulated Gantry Mount


Print Profile(3)


Description
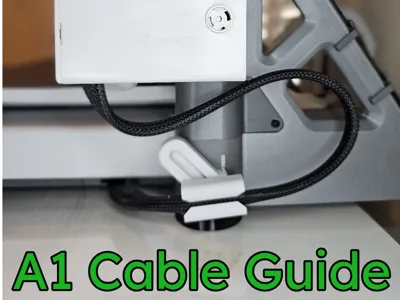
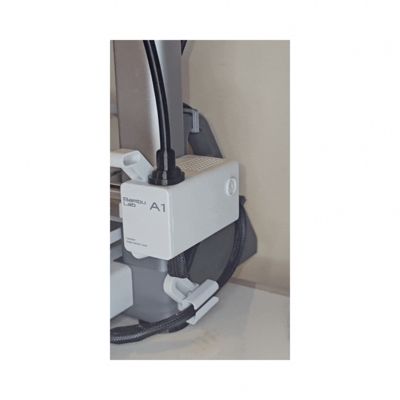
A1 X-Axis Cable Articulated Mount
This Articulated X-cable mount brings the best features of a clip and a drag chain together. It secures the X-Axis cable to the gantry base and manages the motion of the cable while still allowing movement through the full range of motion. I wanted to manage the cable in a way that reduced the amount of mass and resistance that the printer needed to compensate for during printing. This adds less than 20g of mass to the weight on the cable and minimal resistance to the operation of the axis motor. Prints in about an hour.
Installation:
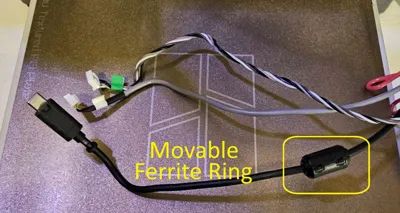
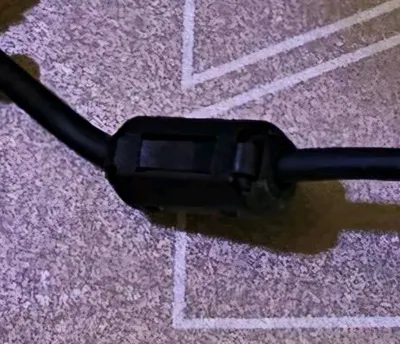
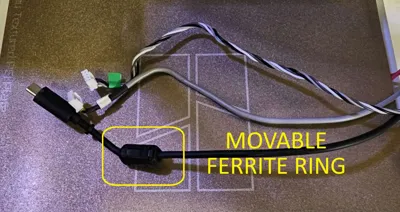
If the ferrite ring (bulge under the braiding) is in the way, it can be slid along the cable toward the heatbed to allow the needed clearance. (See Pictures) There seems to be no consistency in its placement during installation. IF your Ring is installed anywhere between 70mm through 140mm from the heat bed, IT WILL NEED TO BE MOVED! I would suggest moving it lower towards the heat bed to prevent the weight from possibly creating a pendulum motion during operation.
Insert the back catch of the bracket first, centered in the slots. Gently pull the bracket forward and press the front clip into the gantry to secure in place. There's a relief slot in the back bracket clip to allow a little flexibility. It is meant to be a tight fit so that it stays securly fastend.
To remove- center the base in the slots and reverse the above operations.
Insert the cable into the clip by flattening the wire bundle and insert the flattened edge into the gap in the clip. *
- When installed, the mount sliding up and down within the slots of the gantry is expected.
Considerations:
* Make sure your cable is not twisted. Twisting in the cable could make it seem shorter and cause the wires to wear against each other. Feel under the braiding; the wires should all line up parallel and not cross over each other when possible. If needed – disconnect from the base, straighten and re-attach following the original assembly instructions.
- After printing, apply a small drop of lubricant to the inside of the track to reduce wear and ease operation.
Boost Me (for free)
If you find this model useful, please consider boosting it. It is appreciated and helps tremendously.
License
You shall not share, sub-license, sell, rent, host, transfer, or distribute in any way the digital or 3D printed versions of this object, nor any other derivative work of this object in its digital or physical format (including - but not limited to - remixes of this object, and hosting on other digital platforms). The objects may not be used without permission in any way whatsoever in which you charge money, or collect fees.
Comment & Rating (304)