Mini Forcible Entry Door (Training & Display)


Print Profile(1)

Bill of Materials

Description
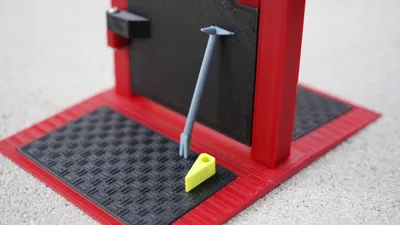
This Mini Forcible Entry Door is a 3D-printed scale model (approx. 1:10) of a classic breaching door used in firefighter and rescue training, only much smaller and desk-friendly.
It works both as a display piece and as a dry-training prop:
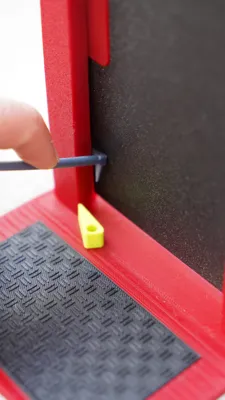
- You can set a mini Halligan tool into the gap, flex the door, and practice placing the wedge.
- Please note: the stiffness of the door is not comparable to a metal forcible entry door so training may not be 100% accurate.
Assembly
The model is printed in multiple parts and can be assembled easily.
Additional parts required:
- 2 × M3x20 screws
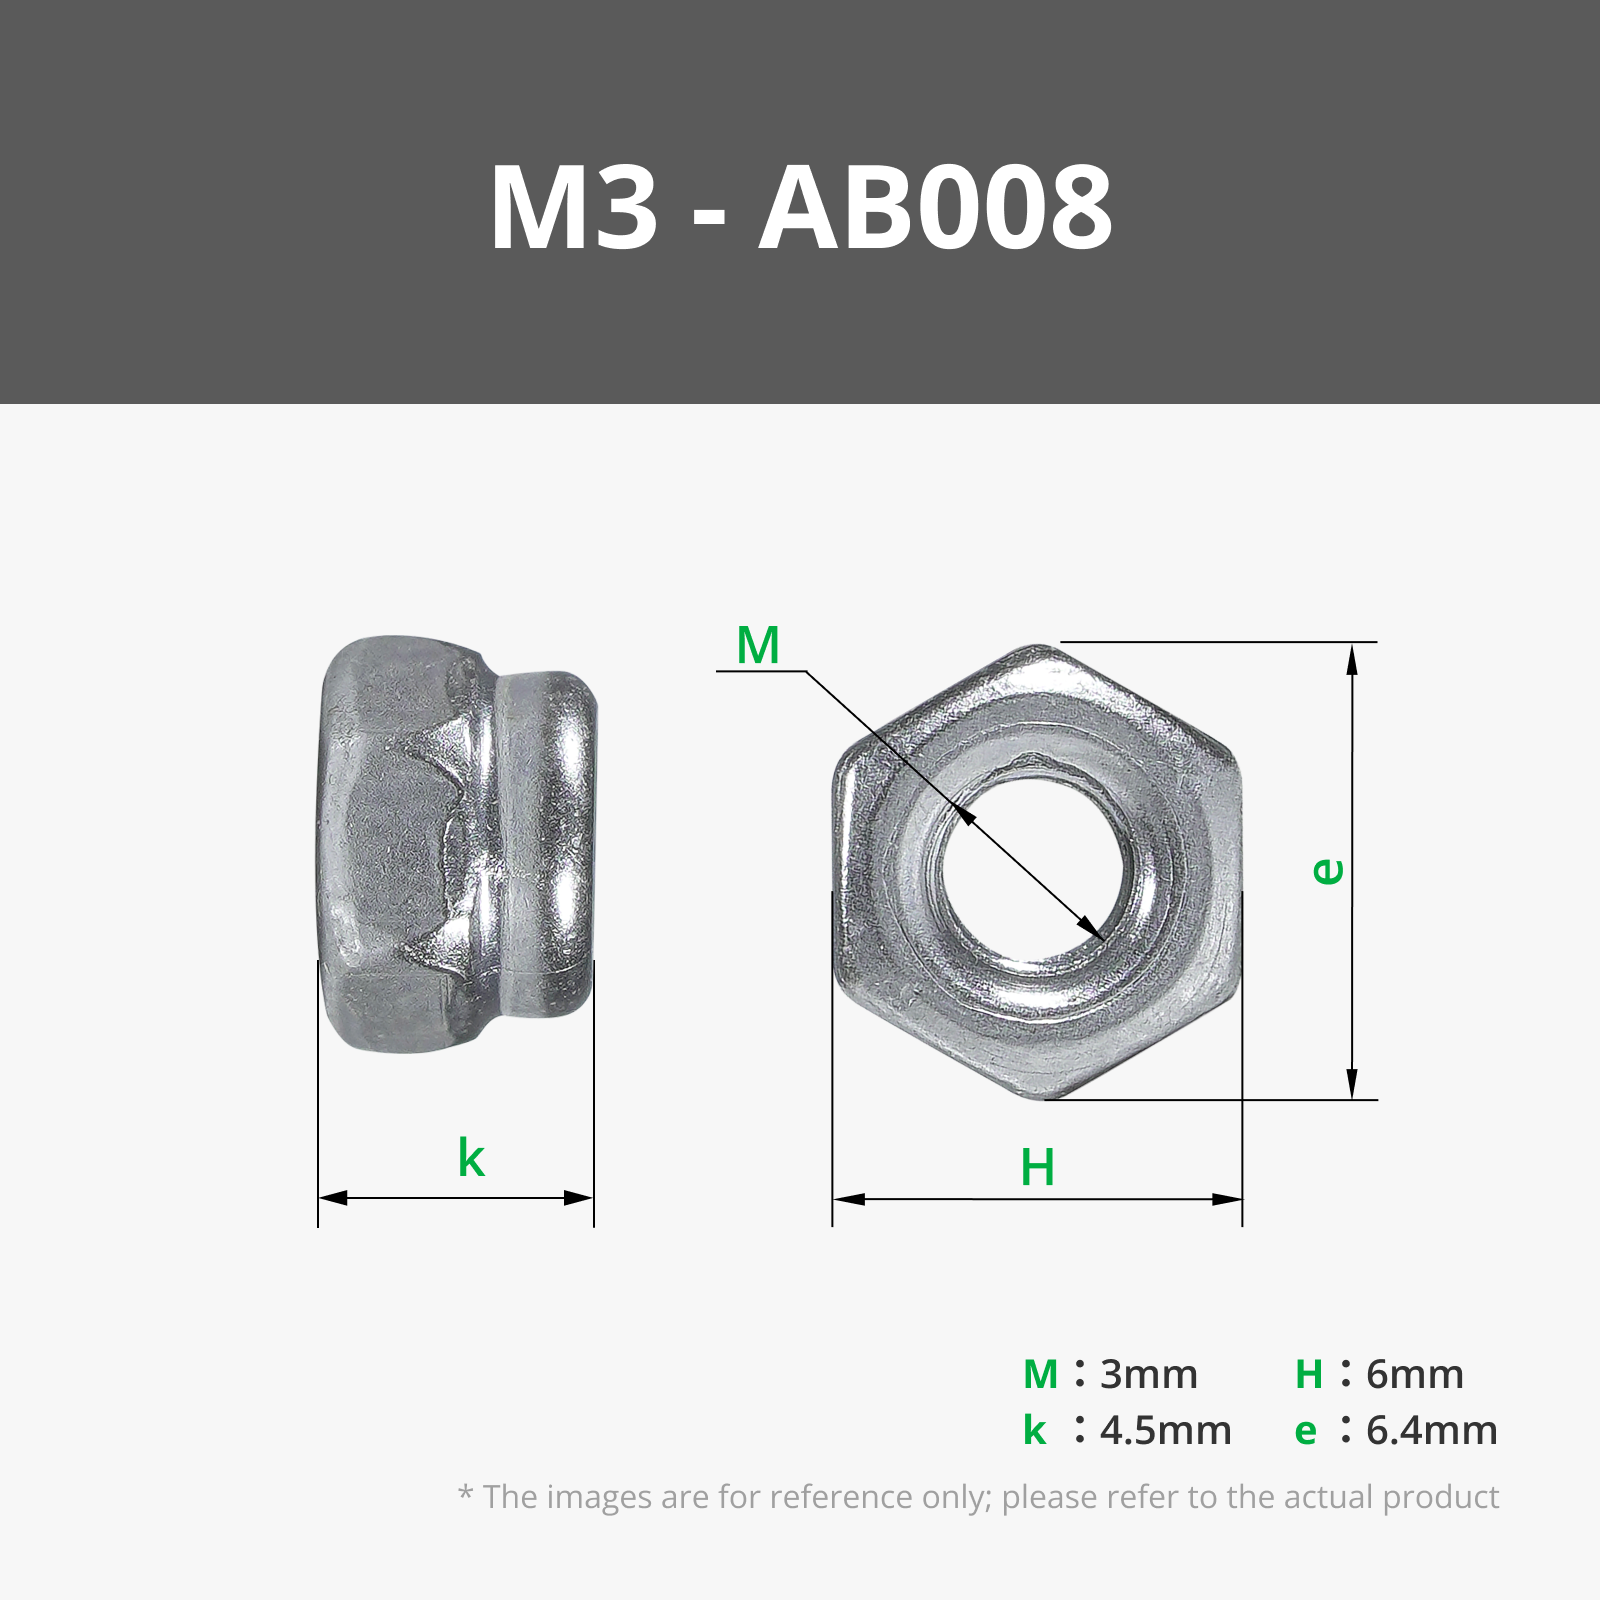
- 2 × M3 self-locking nuts
- A few drops of super glue
- Reinforcement pin: wooden skewer (higher stability but impossible to break) or balsa wood stick (recommended for extra realistic training).
Step-by-step Assembly
- Attach the protector to the door:
- Apply 2–3 drops of super glue into the recessed groove on the door.
- Slide the protector piece into the groove until it fits snugly.
- Mount the door to the frame:
- Screw the door leaf to the frame using the M3 screws and nuts.
- Prepare the base:
- Glue the floor plates into the ground plate.
- Assemble the frame onto the base:
- Insert the door frame onto the pegs of the ground plate.
- No glue needed – the fit is tight enough to hold securely.
- Finished!
- Your Mini Forcible Entry Door is ready for display or dry-training.
Print Recommendations
For best durability and functionality, the following settings are recommended:
- Main structural parts (door leaf, frame, ground plate):
- 6–7 perimeters (wall lines)
- 30% infill (e.g. gyroid)
- 5 top layers / 5 bottom layers
- Brim around the part for better adhesion
- Support only required for the door leaf (standard support is recommended, do not use tree-support)
- Accessories (Halligan tool, wedge):
- 100% infill (concentric) for maximum stability
- Layer height: 0.12 mm for high detail
- Floor plates:
- Standard print settings are fine
- Layer height: 0.2 mm
- Supports:
Only required for the door leaf (use standard support settings)
- Used Filament:
- Black: eSun ePLA-Lite
- Red: eSun ePLA-Lite, Fire Engine Red
- Grey: eSun PLA Basic
- Yellow: SUNLU PLA Matte, Bright Yellow
License
You shall not share, sub-license, sell, rent, host, transfer, or distribute in any way the digital or 3D printed versions of this object, nor any other derivative work of this object in its digital or physical format (including - but not limited to - remixes of this object, and hosting on other digital platforms). The objects may not be used without permission in any way whatsoever in which you charge money, or collect fees.
Comment & Rating (39)