
Modular Segmented Shooting Belt System
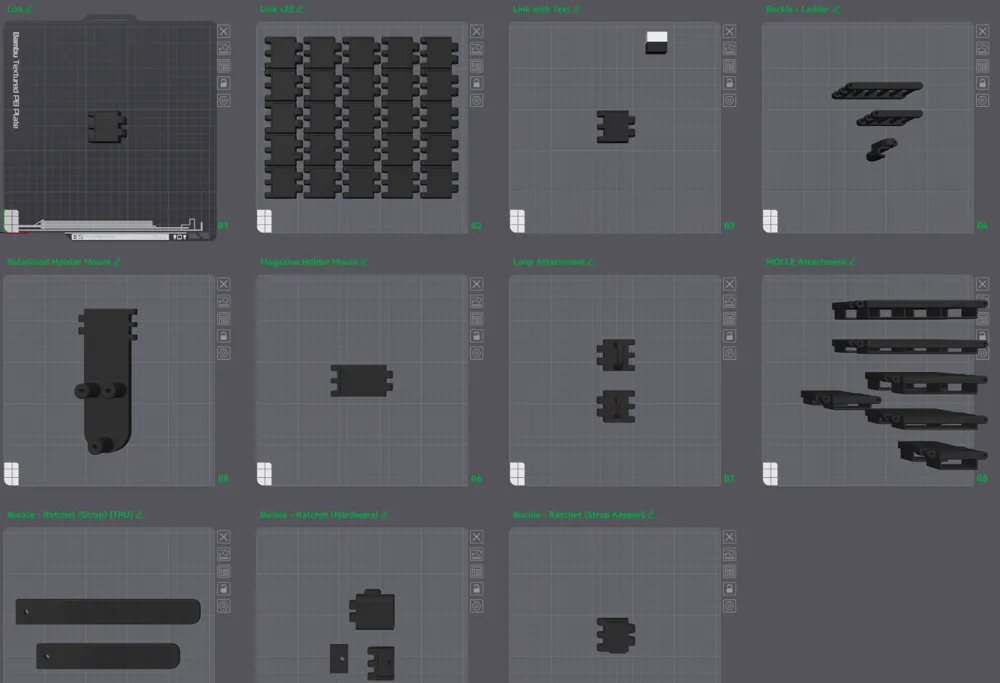
Print Profile(5)


Bill of Materials


Description
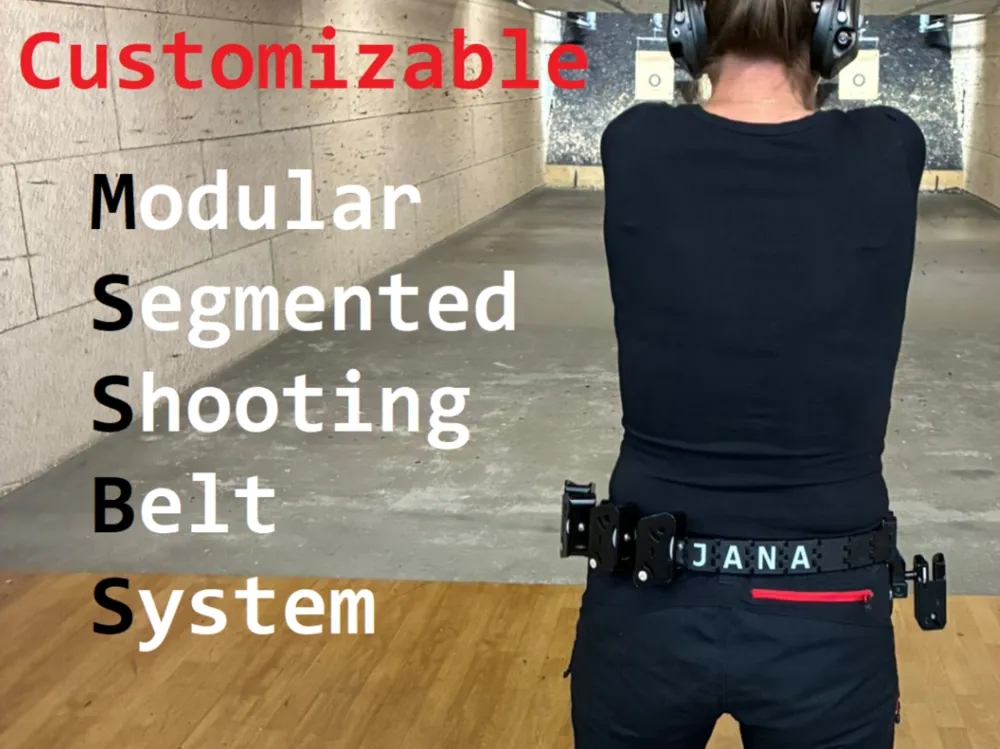
Modular Segmented Shooting Belt System
Updates
2025-11-26
- Uploaded a new segment for mounting a 42mm magnet to the belt
- Uploaded a reversed version of the ratchet strap (which has the strap pointing to the left, rather than the right)
- Uploaded print profile for high strength version (e.g. PA-CF), including adjusted wall count
What is this about?
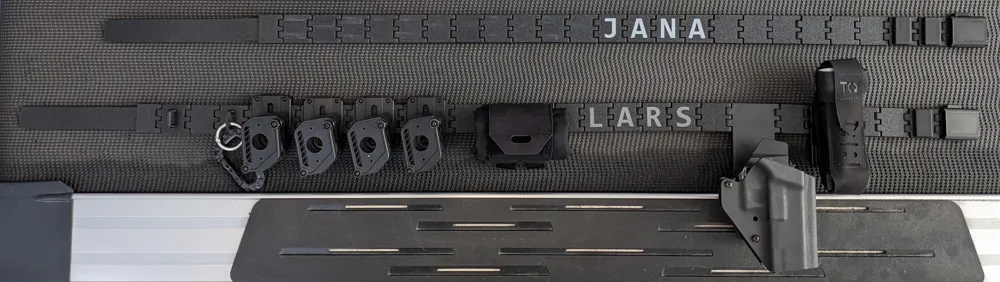
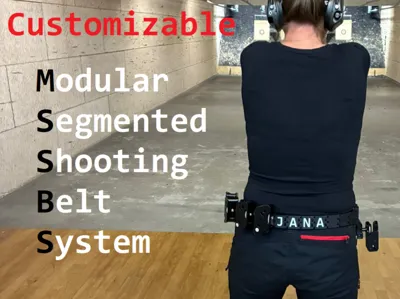
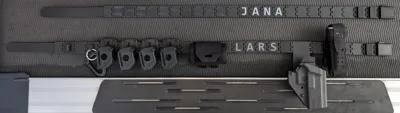
I was looking for a shooting belt setup that is comfortable to wear for extended periods (e.g. an entire day at an IPSC match), but also holds all my gear solidly in place. I was never quite happy with the traditional stiff nylon belts, but found the idea of the Double Alpha Academy Lynx belt system interesting. But they only offer the belt and buckle, no other modules. So I decided to design my own Modular Segmented Shooting Belt System.
How does it work?
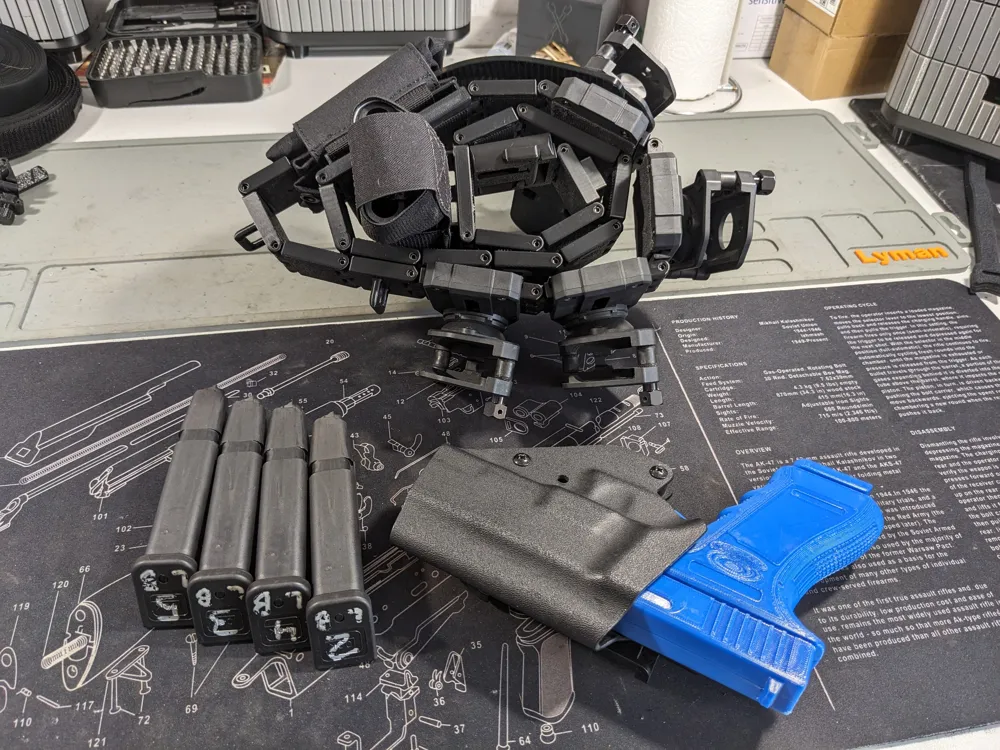
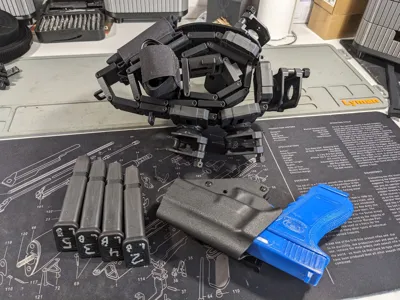
The belt uses individual printed segments which are linked together with M3x35 roll pins. This results in a belt that is very flexible along the curvature of the body, but at the same time extremely stiff in all other directions. This means that it is comfortable to wear, but also doesn't allow any equipment to tilt outwards away from the body, even without having the belt on super tight (as is needed with the nylon belt setups).
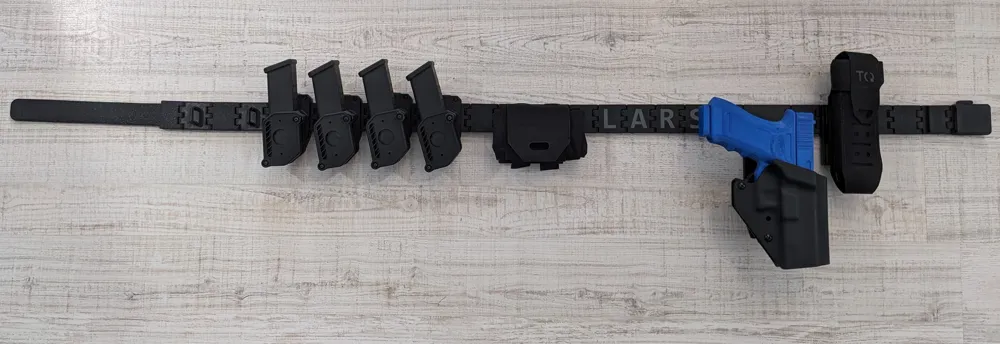
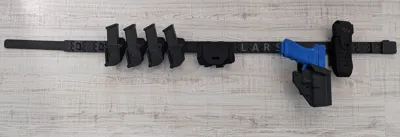
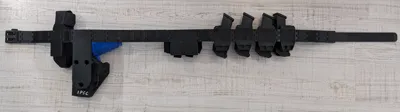
In addition to the regular belt segments, there are also specialized segments available. All are using the same linking interface, so they can be freely combined into whatever length and setup you need or want.
Available links
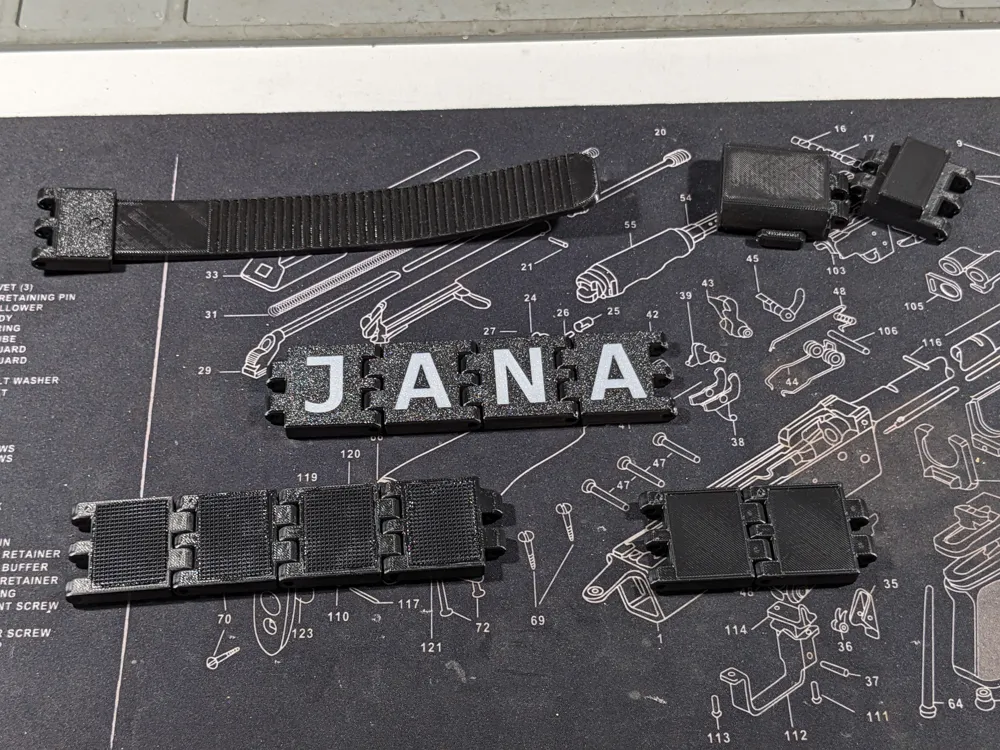
- Regular belt segments
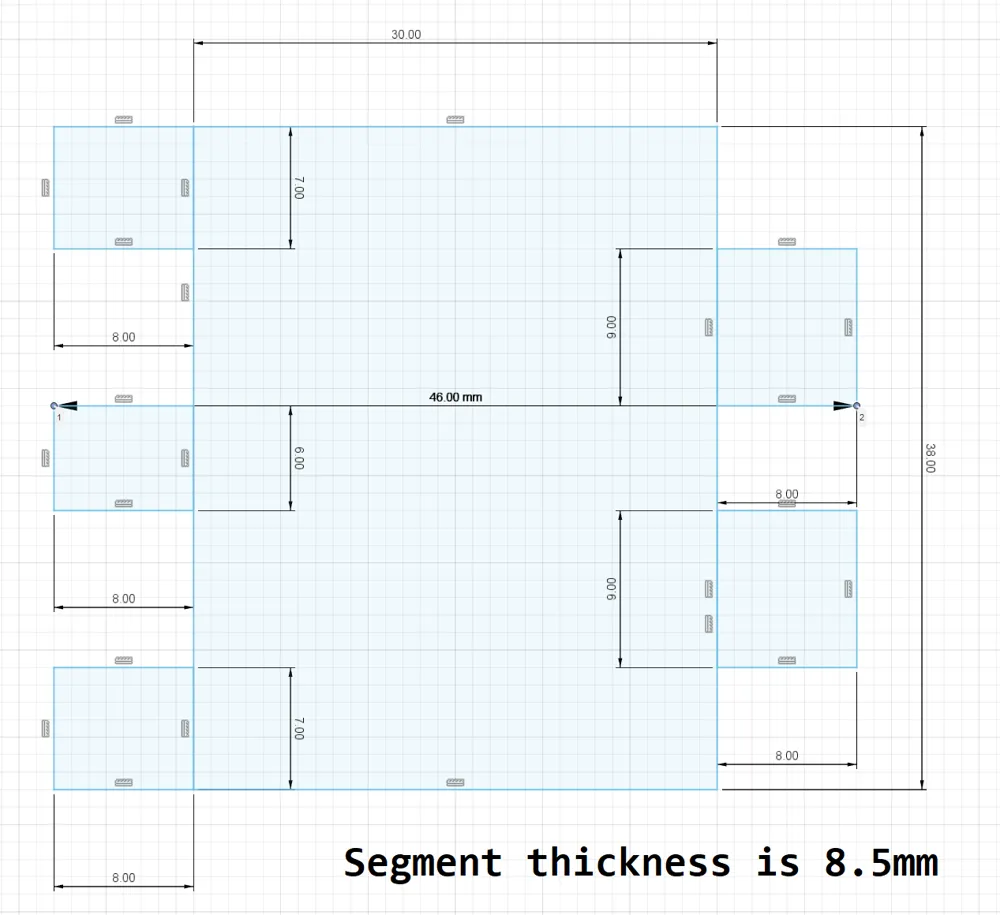
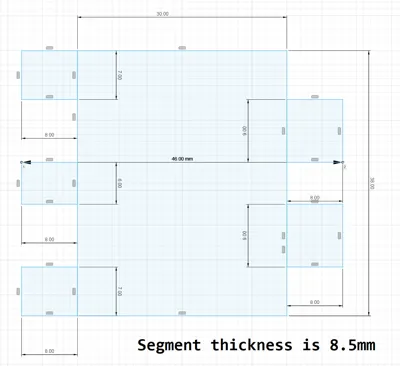
- Each segment extends the length of the belt by 38mm (they are actually 46mm wide, but the linking interface overlaps by 8mm)
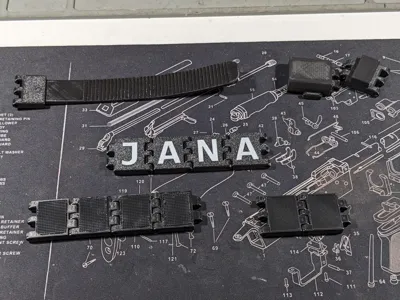
- Belt segment with customizable lettering
- Same physical dimensions as the regular segment, but it is set up with a text element in the slicer that can easily be modified
- This can be used to add your name or other text to the belt
- When changing the text, you might need to repaint the letter with the 2nd colour. This can easily be done with the Fill option and just takes a few clicks
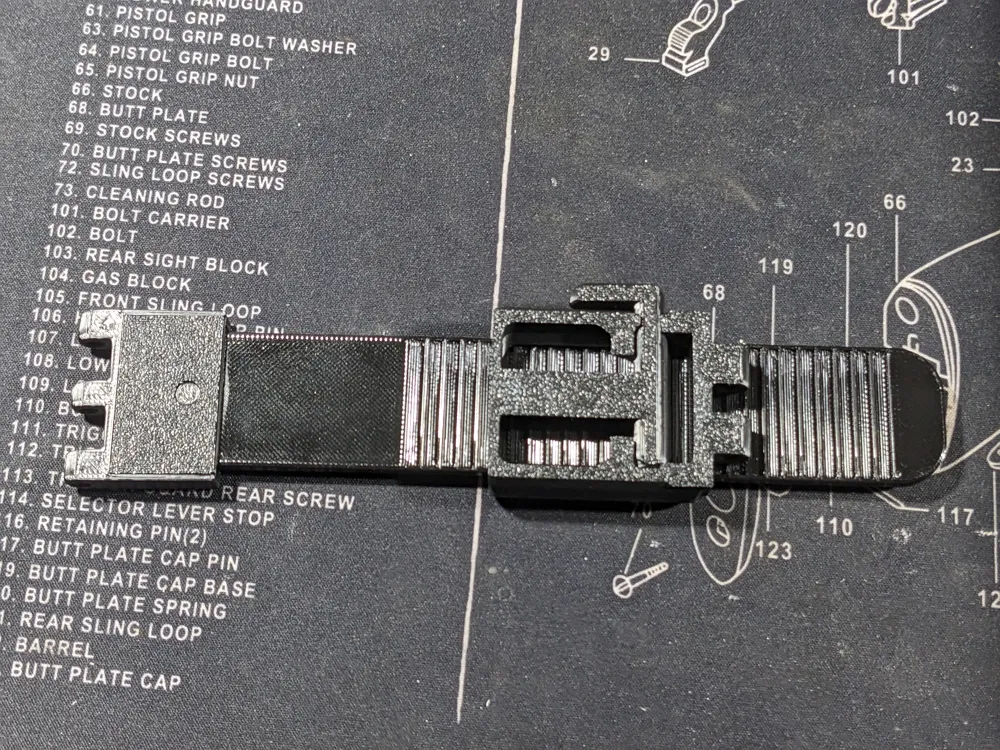
- Ratchet buckle
- To quickly adjust the belt to different clothing worn beneath, the ratchet buckle can be used
- The strap needs to be printed in TPU. PETG might work for the short one, but even then I had limited success with it (if you try this, reduce the wall count and infill of the strap to improve flexibility)
- The ratchet and connecting piece for the strap are printed in the same material as the belt
- The strap is inserted into the linking segment with the peg (ratchet side facing the body) and closed up with the lid. The lid has a friction fit which holds well enough to test out the sizing, but for long term use it is best to glue the strap into the link and the lid onto the strap
- The ratchet mechanism was designed by @jeff3dp as part of his Belt 2.0 design. I modified the ratchet to work with my modular belt system and designed the strap from scratch. Thanks to Jeff for allowing me to use his mechanism in my design <3
- There is also an optional strap keeper that can be added next to the ratchet segment to hold any overhanging part of the strap close to the body
- Ratchet buckle (strap to the left)
- Due to feedback from some users that would like to wear their belt with the buckle to the left, I have also included a version for this
- The TPU strap is the same as with the original version. Only the mounting interfaces and the ratchet segment are reversed
- Hook & ladder buckle
- If you can't or don't want to print TPU, you can use this ladder style buckle instead
- It is a much simpler design, but also offers less flexibility and is not as comfortable to wear (especially the longer version)
- I recommend using the ratchet buckle if you can
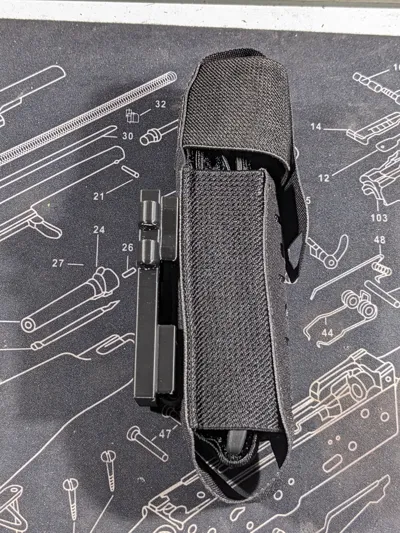
- Magazine holder mount
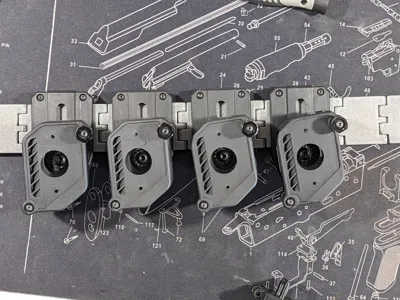
- Although most magazine holders should work with the regular belt segments, I wanted a custom one to fit my magazine holders
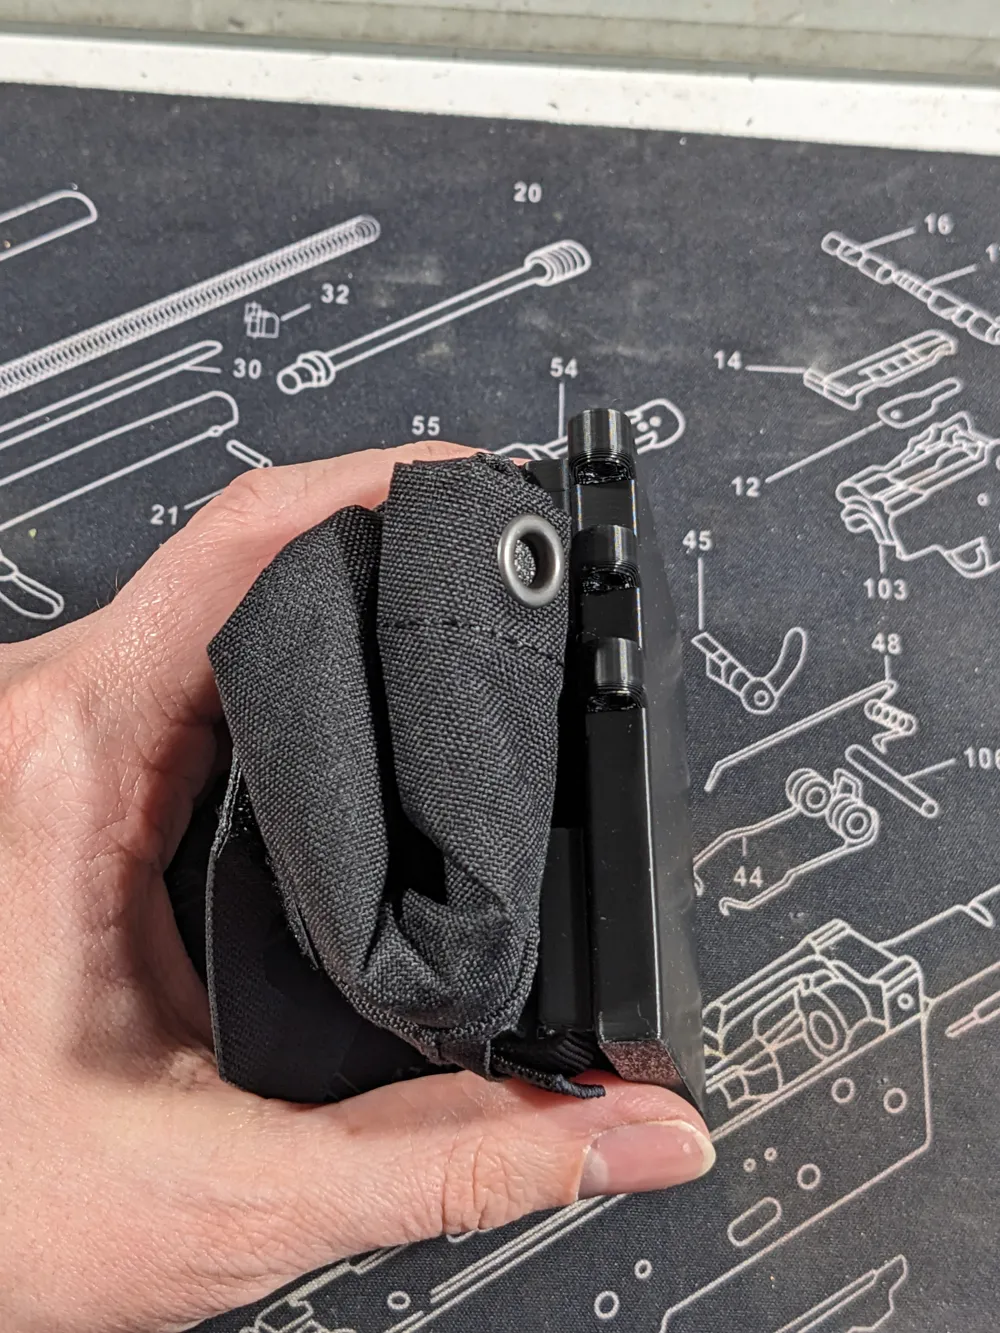
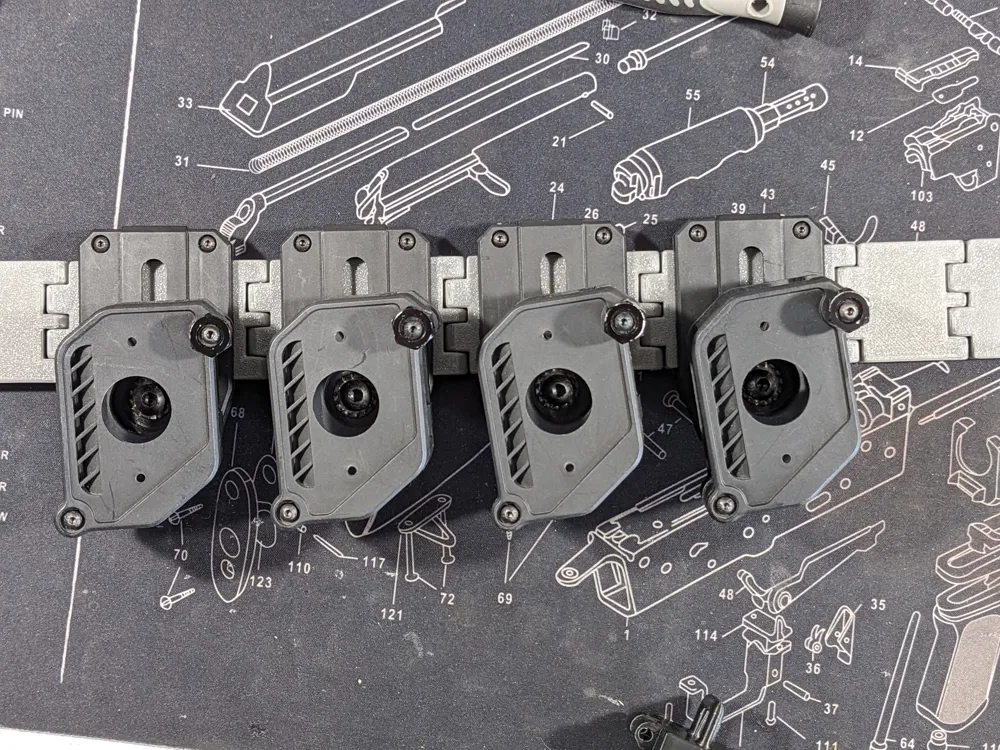
- Picture #10 shows the exact type. If you use the same magazine holders, I'd recommend to use these segments as well. They allow for the inside to be more flush with the belt, rather than sticking out and pressing into the body
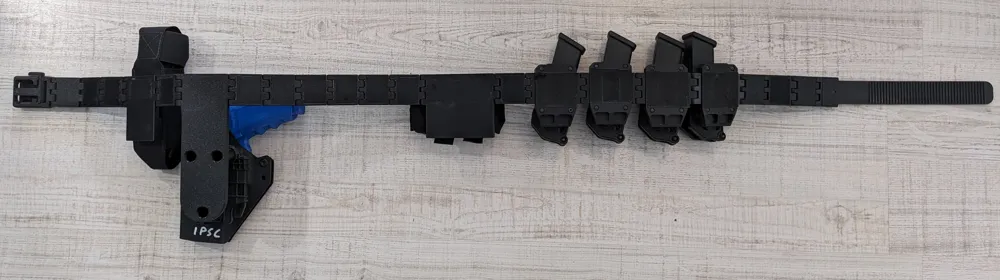
- Safariland holster mount
- As with the magazine holders, most holsters which are designed for 38mm / 1.5" belts should fit right over the regular belt segments. But since I am using a holster that uses the Safariland mounting pattern, I designed a special mounting segment that gives me the right drop and distance from the body. With the added QLS adapter, my Kydex holster and my Glock 17, it fits perfectly while still being within the IPSC regulations' dimensions for ride height and distance from the body
- This may not fit with your holster setup and gun, but as with all other segments, the Fusion360 project files are included, so feel free to adapt this as needed to your gear and desired setup
- Magnet mount
- Segment to mount a 42mm magnet to with an M6x15 screw and a small washer
- Perfect for holding even fully loaded Glock mags (probably too strong for metal mags, might be possible to adjust with some tape over the magnet)
- Loop attachments
- I like to have some loops on my belt to clip on other equipment like gloves or my target patch box
- There are two different versions included. One is 15x10mm, the other 18x18mm
- The smaller one is more low profile, but might not fit some larger carbine hooks. It is also less beefy, so if you plan on hanging some weight onto it, go with the larger one
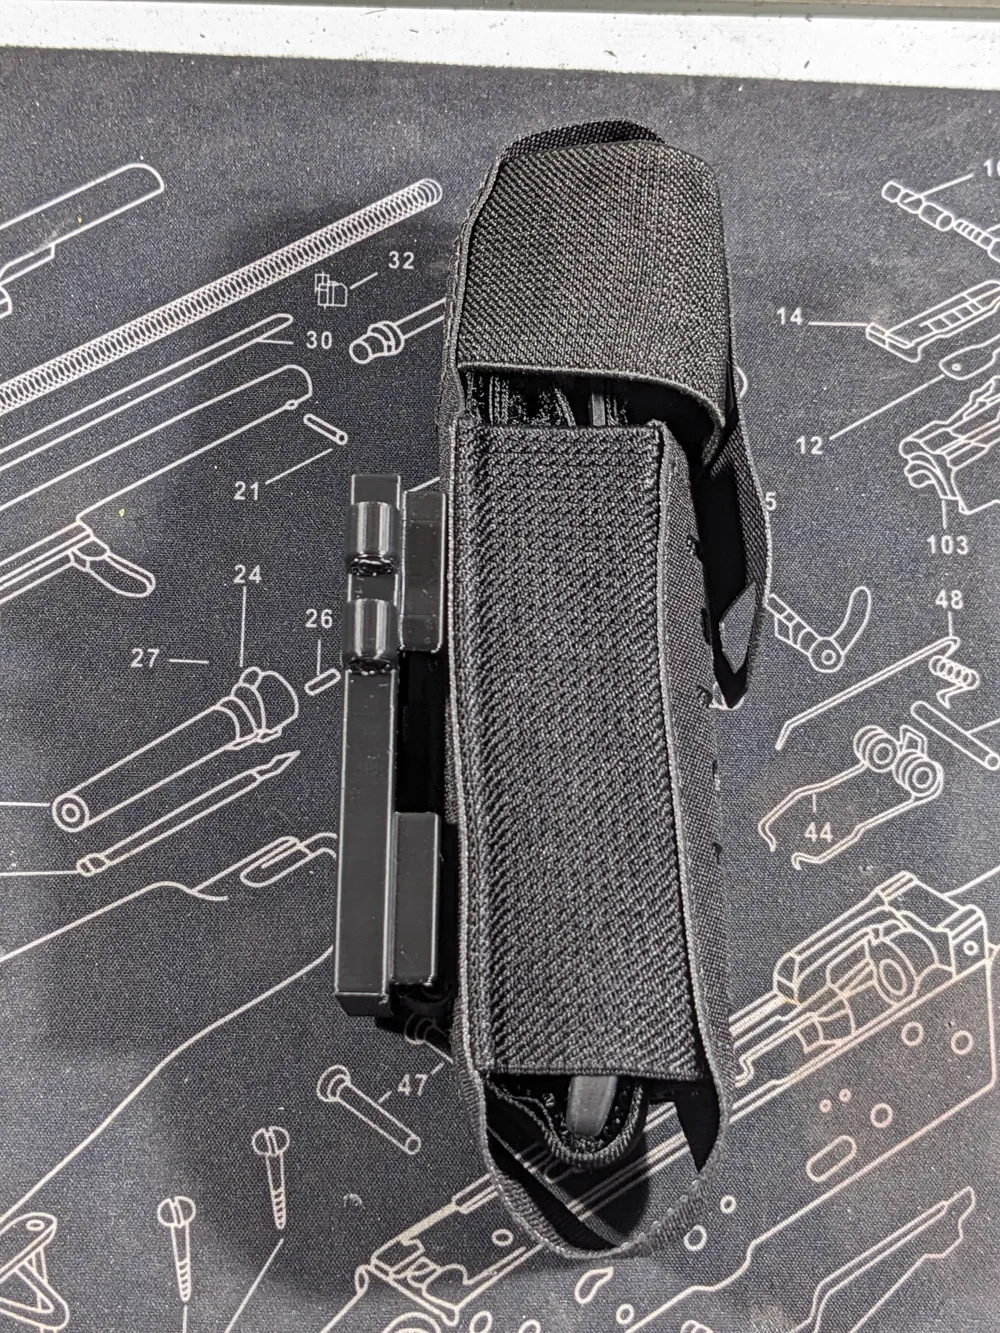
- MOLLE / PALS attachments
- Although MOLLE or PALS gear is uncommon on competition setups I'm used to it from my battle belt, plate carriers and chest rig. So I designed some segments for attaching equipment that uses this style of interface as well
- There are six different options, three widths (1x3, 2x3 and 3x3) and two loop heights (5mm and 10mm)
- The taller version (10mm) can be used with gear that uses push buttons. If this is not needed, go with the slimmer version, as it allows for more rigid mounting of the gear
- I use this to attach a tourniquet holder as well as an IFAK to my belt. This has gotten me a few strange looks at matches, but I follow the philosophy that if you carry the gear to make holes, you should also always carry the gear to deal with holes, especially in places were they were not intended to end up
- If you want a dedicated competition rig, you will probably not need these. But you still have the option to use them, if you want to :)
- Link interfaces
- Although not included in the 3MF, there is also a Fusion360 design file which contains just the link interfaces
- This can be used to easily design your own custom segments, while still ensuring compatibility with the other segments
- I actually used this as the basis for designing all my segments as well. Just add on to the linking elements and combine into a single object at the end
- Parametric Magazine Carrier adapter
- AuxArc has created a segment compatible with his Parametric Magazine Carrier system
- It can be found as an additional print profile on his upload
- Blade-Tech Holster Mount
- kaluzar has created a segment to mount this CZ Shadow 2 holster via the Blade-Tech interface to my belt system: Modular Belt Blate Tech holster mount
- It might also be useable to mount other Blate-Tech compatible attachments to the belt
How to print?
I printed all my parts in SUNLU Easy ABS and I would recommend ABS or similar materials (Easy ABS, ASA etc.) for this. PETG should also work, but I personally haven't tested it. I would not recommend PLA, at least when using the ratchet buckle. The ratchet uses a printed spring, which probably doesn't hold up well in PLA. But you are free to experiment with this and let everyone know in the comments how it went. I don't have the time to test every material combination, so I'd greatly appreciate any feedback you have.
For sizing, measure your waist circumference and subtract 15-20cm for the ratchet buckle (depending on which length you want to use). Divide the result by 3.8cm (the length of each segment) and you have your number of regular belt segments that you need. If you want to add any of the other segments, print them first, click them together (don't add the roll pins) and measure the total length. Then subtract that from your previous result and print the regular links in the needed number. It also doesn't hurt to have some spares if you want to play around with different configurations.
How to assemble?
The links are connected with M3x35 roll pins. For a single belt you will need around 25-30 pins. Since they are usually sold in packs of 50 or 100, just get some spares and you are set. Once you show up with this rig at the range, you will probably get some requests from shooting buddies to print some for them as well ;)
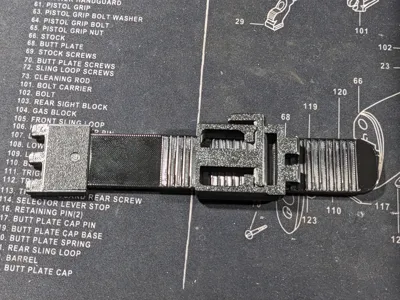
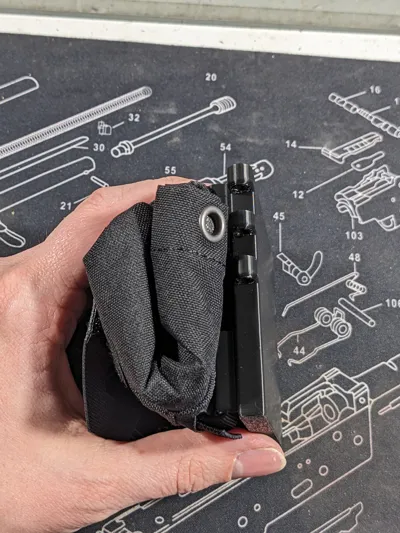
To attach the belt to the typical under belt that loops through your pants, you will want to add some Velcro to the inside of the segments. The regular segments already include an indentation to place the Velcro inside. If you only use a few other segments (e.g. the buckle and maybe the holster mount) you don't need to add Velcro to the other segments. But if you use a lot of them, especially one after another, you should also add Velcro to the back of them. Picture #3 shows the inside of my setup with the Velcro glued in place. I used 25mm hook & loop straps from Aliexpress, cut the hook part to the right length (my inner belt uses the loop part) and glued them in place with super glue. You can also get straps with the glue already attached, but I couldn't find any in the needed length at a price I liked.
Final notes
I spend a lot of time designing this system and the various segments, including testing it in multiple competitions as well as hours and hours of practice on the range. My setup printed in SUNLU Easy ABS has held up perfectly so far. That said, you alone are responsible for ensuring that your setup if safe to carry a loaded firearm in. Test your setup with a blue gun or your unloaded gun, before ever holstering a loaded firearm in it.
I'm also publishing this for personal use only. Feel free to print this for yourself or your friends at no cost. If you print this for your friends and they pay you more than the material cost and print time, please donate any profits to u24.gov.ua or any other charity, thanks.
Thanks for checking out my designs. If this has been useful to you, I'd appreciate a like or comment. If you are having any issues, please let me know in the comments as well and I can try to help you address them.
Boost Me (for free)
I'd gladly take any boosts you have to spare <3
License

You may create derivative works based on this object, provided that all such derivative works are published exclusively on the MakerWorld platform and include proper attribution to the original creator. You may not share, upload, host, distribute, or publish this object—or any derivative work of this object—on any other digital platform, marketplace, or distribution channel. Commercial use of this object and any derivative works is strictly prohibited. This includes, but is not limited to, selling, renting, sublicensing, or using the object in any context in which you receive monetary compensation or other financial benefits.


Comment & Rating (234)