Ender 3 adapter to install Sprite SE to NEO


Print Profile(0)
Description
This is for users who would like to install Sprite Extruder SE (4001020069) into a Ender 3 machine with NEO extruder.
Effectivly upgrading from 4001020069 to 4001020070
Sprite SE kit part number: 4001020069
- Ender - 3/Pro
- Ender - 5/Pro/Plus
- CR-10
Sprite SE NEO kit part number: 4001020070
- Ender 3 Neo/V2NEO/MaxNEO
- Ender 2 Pro
The only difference between those two kits is a aluminum bracket.
This bracket is too thin to be printed, even printing using resin it was bending in Y axis when extruder was swiching between extraction and retraction.
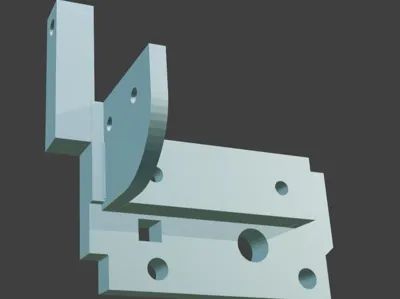
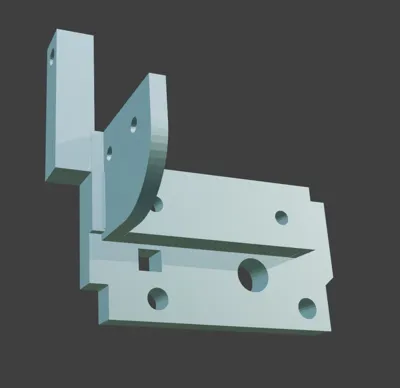
I made this reinforced version, it have additional holds in Y axis, reinforcements, thicker walls, and extra hook on top to hold cables to.
Post processing:
- Ensure that two large holes are drilled to 5mm and bolts are passing clean
- Ensure that four small holes are drilled to 3mm and bolts are passing clean
- Remove burrs
BOM:
- Discard original bolts (M3x6mm)
- Discard original wheel bushings.
Discard original bracket
- 4 pieces of M3x9mm bolts (two in place of original holes and 2 extra into Y axis holes)
- 4 pieces of M3 flat washer for those bolts
- 2 pieces of M5 flat washers instead of discarded wheel bushing (without it extruder would be angled and wheels would jam!)
- A small section of PTFE tube as per original manual
Assembly following original instruction + add two extra bolts at the side. Should be obvious enough ;)
Note - whole idea of how we are supposed to assembly this kit to original carriage is flawed. If you would like REALLY good setup, you have to replace whole extuder carriage to ensure that it cannot bend in Y axis. At this point I am not willing to design such setup, I am satisfied with this reinforced bracket.
I made my “final ” bracket from Standard gray resin on SLA machine.
Comment & Rating (0)