Search models, users, collections, and posts

Four Noble Persons traditional Chinese lantern(四君子中国传统灯笼)

IP Report

Print Profile(1)

All
P1S
P1P
X1
X1 Carbon
X1E
A1
H2D
H2D Pro
H2S
P2S
H2C
X2D
A2L

0.24mm layer, 2 walls, 8% infill
Designer
6.4 h
3 plates
4.9(88)

Open in Bambu Studio
Boost
1471
3568
130
147
1.7 k
714
Released 

Description

Content has been automatically translated.
Show original

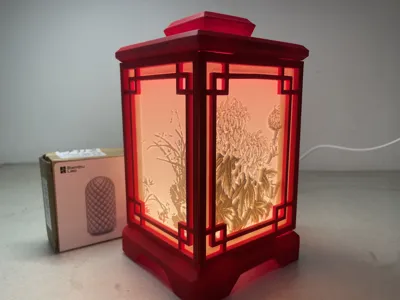
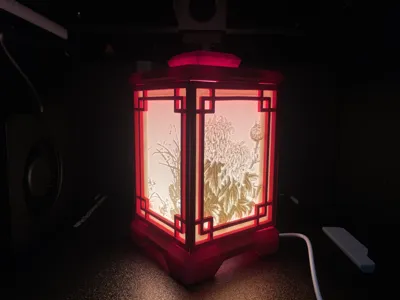
Four Noble Persons traditional Chinese lantern (四君子中国传统灯笼)

Introduction(简介)

The "Four Gentlemen" refer to the following plants: plum blossom, orchid, bamboo, and chrysanthemum. They are regarded as the "Four Gentlemen" with each representing a specific quality: pride, elegance, modesty, and leisure, respectively. Referred to as the "Four Gentlemen ," they symbolize the aspirations of the Chinese people and are commonly depicted in poems, writings, and artworks as an allegory for various virtues.You can see their figures on this lantern, and I hope you also like them. Wishing you a delightful time.


【“四君子”分别是指:梅花、兰花、翠竹、菊花。被人称为“四君子”,其品质分别是:傲、幽、澹、逸。“四君子”成为中国人借物喻志的象征,也是咏物诗文和艺人字画中常见的题材。你可以在此灯笼上看到它们的身影,希望你们也喜欢它们,祝你们玩的愉快。】

Printing Instructions(打印注意事项)

To illuminate the lantern, you need to have the LED Lamp Kit-001. If you have already printed the LED Lamp 001, you can disregard the following content.

  • Purchase LED Lamp Kit-001
  • Search for the model of LED Lamp Kit-001 on MakerWorld. You only need to print the LED base.


【为了让灯笼亮起来,您需要拥有001号LED灯套件,如果你已经打印了LED Lamp 001那么下面的内容可以忽略。

  • 购买001号LED灯
  • 在makerwolrd里搜索001号LED灯套件模型,只需要打印led底座即可】


I really like the built-in textured PEI print bed of the P1S. If the model's outer surface is flat, I often directly print it on the print bed without using a raft, and this allows me to achieve a good surface finish without activating the bed heating. When printing, please:

  • Clean the oil stains on the print bed to prevent poor adhesion of the printed parts.
  • When printing the first layer, I often activate the silent mode, significantly increasing the probability of achieving a perfect first layer.

【我非常喜欢P1S自带的纹理PEI打印板,如果模型的外表面是平面的话,我经常把外表面就直接打在打印板上,这样就不需要开启熨烫,就能获得比较好的表面,打印时请:

  • 清理打印板上的油污,避免打印板粘不住打印件
  • 打印第一层时,我经常开启静音模式,大大提高获得完美首层的概率】

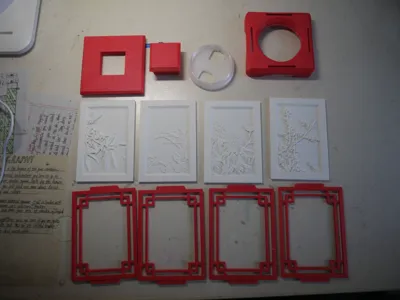
Assembly Instructions(组装注意事项)

This is everything printed out. You also need to prepare a roll of double-sided tape.

【这是打印出来的所有东西,您还需要准备一卷双面胶】


Step 1: Affix the 3D image onto the red border, paying attention to the orientation.

【第一步:将立体图片贴在红色边框上,请注意方向】


Step 2: Install the LED light.It might be a bit tight; you may need to apply some force.

【第二步:安装led灯,可能有些紧,需要用力】


Step 3: Insert the red border into the base; you may need to apply some force..

【第三步:将红色边框插在底座上,可能有些紧,需要用力】


Step 4: Install the lantern top. It might be a bit tight, so you may need to apply some force.


【第四步:安装灯笼顶,可能有些紧,需要用力】


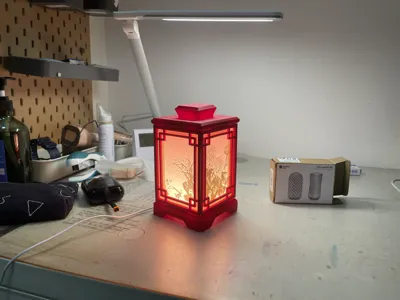
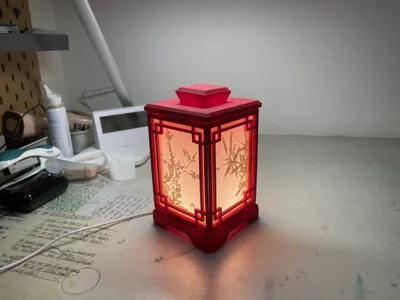
Mission accomplished!


【大功告成】


Comment & Rating (130)

(0/1000)

Print Profile
0.24mm layer, 2 walls, 8% infill
Très joli
profile
6
Reply
Would you mind if I remix this? I would like to make it more of snap on so it doesn't require force and 2 sided tape if possible. I like the design would be great to try and perfect it.
The designer has replied
5
Reply
Thank you for your suggestions for improvement, I don't mind .please just do it.
2
Reply
Hi , I would like to know if you magaged to remodel the chinese lamp, I really like the look of it and would love to print one myself. thanks Colin
0
Reply
Replying to @colin_edwards :
Still working on it in my spare time. So far on the base, I've redesigned the top and bottom clips to be thicker and snap in without so much force plus added some pins so we can eliminate the need for 2 sided tape. Still tweaking around and doing some test prints before I upload anything. Also, the screw on the lamp base for the kit on the original felt a little tight so swapping it with one that I have used in the past for other lamps that use Kit 001. Will post once I have a clean print, and my lamp kit should be coming in this week (gave my old one way) so I will be testing this weekend.
1
Reply
I don't understand how any of you are able to fit the piece inside. the tolerance on this print is impossible.
The designer has replied
1
Reply
maybe you need a hummer,It really takes a lot of force to push it in.,
0
Reply
Print Profile
0.24mm layer, 2 walls, 8% infill
Part turned out pretty good.
(Edited)
profile
3
Reply
Print Profile
0.24mm layer, 2 walls, 8% infill
Really nice model. Easy print and it looks good :)
profile
3
Reply
awesome 😎 thanks for the design dude
designer
3
Reply
Print Profile
0.24mm layer, 2 walls, 8% infill
prints out really well, rather tight to put together but I used pliers and gentle force and all went together nicely - I did have to shave off some pla around the light fixture as it wouldn’t go in - maybe the tolerances in my X1C are a bit too super accurate
(Edited)
2
Reply
I love the design, but found it very difficult to assemble. So i've created a remix that both resolves the issues of over-tight fit, and also allows a multi-colour print of the sides with AMS. No tape required. This remix can be found at https://makerworld.com/en/models/1936116-four-noble-persons-chinese-lantern-remix#profileId-2078866
1
Reply
I've just added a 'Remix #2' profile to my remix that adds curved edges to the sides. This reduces any light leakage at the corners. As multi-coloured parts, they can only be loaded via the profile.
0
Reply
Print Profile
0.24mm layer, 2 walls, 8% infill
great design! you should be proud of what you made
profile
2
Reply
Print Profile
0.24mm layer, 2 walls, 8% infill
Sehr schön
profile
2
Reply