Search models, users, collections, and posts
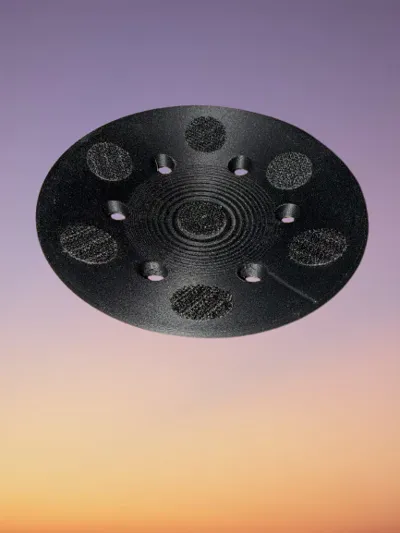
125mm Sanding Cup for Bowling Ball Resurfacing
IP Report


Print Profile(1)

0.2mm layer, 4 walls, 15% infill
Designer
4.8 h
2 plates
Open in Bambu Studio
Boost
49
164
6
3
288
173
Released
Description
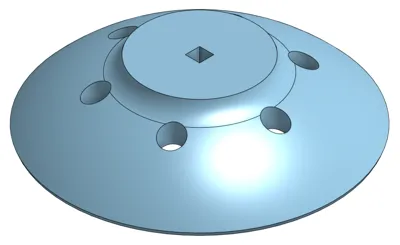
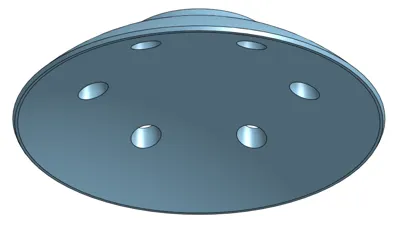
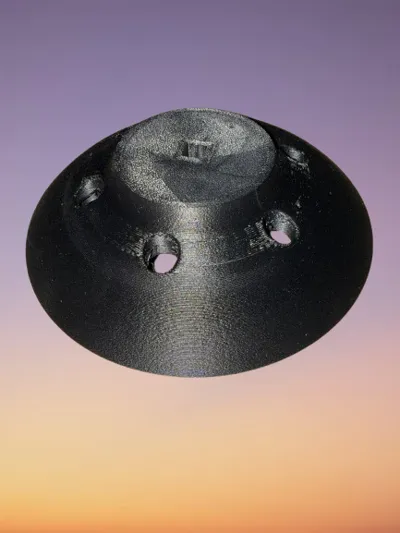
This is a custom-designed sanding cup for bowling ball resurfacing and polishing.
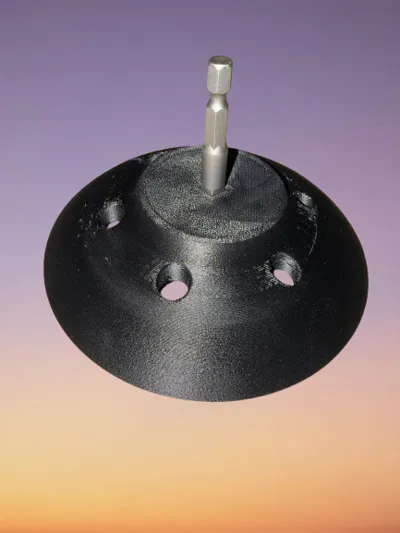
It holds a 125mm (5") round sanding pad using hook & loop (Velcro) stickers, keeping the pad firmly in place during use. On the backside, the cup is designed for a 1/4" hex bit adapter, so you can attach it to any drill or driver.
Best used together with a spinning ball cup holder: this way, the drill remains stationary while the bowling ball can freely rotate in the cup, making the resurfacing process smoother and safer.
A great tool for bowlers who want to maintain their equipment at home without the need for an expensive resurfacing machine.
There is also a M10 Nut version, to add different options
🔑 Features
- Fits 125mm (5") sanding pads
- Hook & loop (Velcro) compatible for quick pad changes
- Designed for 1/4" hex bit adapters or M10 Nut
- Works with drills or drivers
- Perfect for bowling ball resurfacing and polishing
- Works best with a spinning ball cup holder
⚙️ How to Use
- Place hook & loop (Velcro) stickers inside the sanding cup.
- Attach a 125mm sanding pad of your desired grit (500, 1000, 2000, 3000, etc.).
- Insert a 1/4" hex bit adapter in the back of the cup.
- Mount it onto your drill/driver.
- Secure your bowling ball in a spinning ball cup holder.
- Keep the drill steady while allowing the ball to rotate freely for even sanding or polishing.
🖨️ Print Settings
- Material: PETG or ABS recommended (more durable than PLA)
- Infill: ≥15%-40% for strength
- Walls: 4 for strength on the torque
- Layer height: 0.2 mm
- Supports: May be required depending on print orientation
⚠️ Safety Notes
- Always secure the ball in a ball cup holder before starting.
- Use moderate drill speeds (too fast may overheat or damage the pad).
- Wear safety glasses and a dust mask when sanding.
License
This user content is licensed under a
Creative Commons Attribution-Noncommercial-Share Alike
Comment & Rating (6)