1-axis Solartracker with 2040 and IKEA Kvartal


Print Profile(1)

Description
These are the printable components of my 1-axis solar tracker which is controlled with Home Assistant.
The special feature is that IKEA Kvartal curtain rods can be used as aluminum profiles. IKEA Kvartal profiles are very inexpensive (often given away) and roughly correspond to a 2040 aluminum profile.
Since we are outdoors, please only use filament that can withstand the weather (reinforced PETG, ABS, ASA, …).
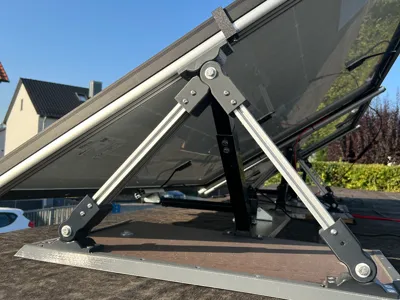
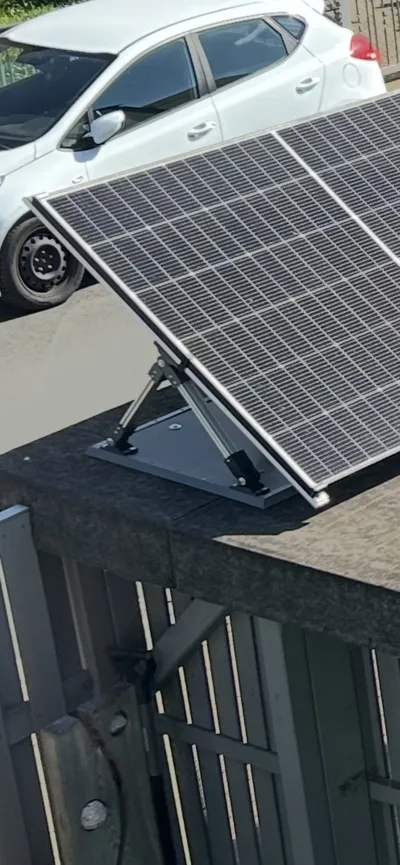
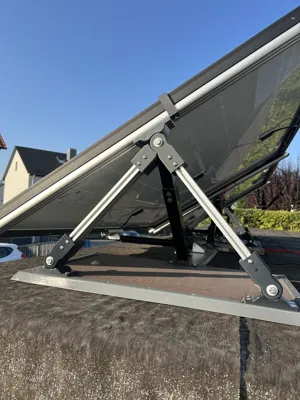
The goal of the project is to be able to pivot a solar module by approximately 30° in each direction along its longitudinal axis. This allows the sun's angle of incidence to be optimized depending on the installation situation. The module, controlled via Home Assistant, should follow the course of the sun and always be at the optimal angle. The drive is provided by an outdoor-capable linear motor. Control is via an L298N module, which is driven by an ESP32 chip via Tasmota in shutter mode.
The angle is calculated mathematically based on the location coordinates and the alignment of the module.
No additional sensor (light sensor) is needed here.
The panel is brought into a neutral position at night and in case of impending bad weather, so that it has minimal wind load.
For this project, I use the following components:
- 2 x Kvartal 3-track profile 140cm
- Solar module profile connector
- 4x 2040 aluminum profile approx. 30cm length
- 12x 608 ball bearings
- 6x M8 x 60 screw or longer
- 6x M8 nut
- 1x solar module mounting kit which can be used to stabilize the axis
- M5 screws and T-nuts for attaching the aluminum profiles
- Countersunk screws for attaching the base to wooden panels or the roof
- 1x set of printed parts
- Linear motor with 30cm stroke
- Control for the linear motor e.g. L298N + ESP32 with Tasmota
- Solar module
- Optionally wooden panels (screen printing plates) for mounting and fastening on the roof
- Home Assistant for calculation and control
- Optional: End caps for Kvartal profiles
The print profile contains all printed parts for one solar module:
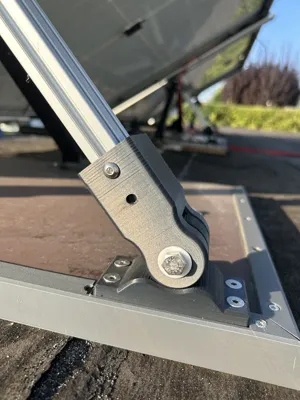
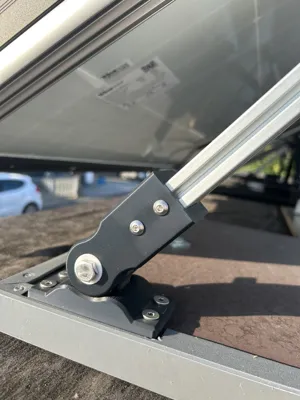
- SolarTracker_Base (4x)
Roof-side mount for the axle holders. - SolarTracker_Base2040 (4x)
Connects to the base and holds the 2040 aluminum profile - SolarTracker_Axis1/2 (2x each)
Axis elements, which are screwed to the Kvartal Mount and thus represent the rotational axis - SolarTracker_KvartalMount (2x)
Panel-side mount. Is screwed to the Kvartal profile, on which the solar panel is then attached
I have currently equipped 2 modules in this way. They have been running flawlessly for 6 months now and significantly improve the yield.
The mounts are designed so that you can adjust the angle (and thus the height of the pivot axis) to your needs.
I will document the setup in Home Assistant. If interested, please feel free to contact me.
Have fun with the project
Comment & Rating (4)