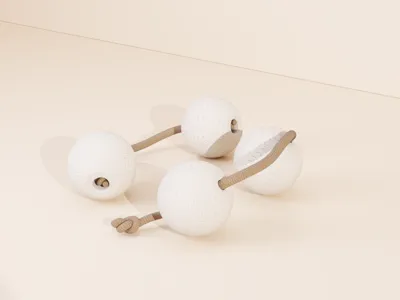
Shaker KassKass/Asalato


Print Profile(1)
Description
🛠️ GUIDA AL MONTAGGIO KASS KASS
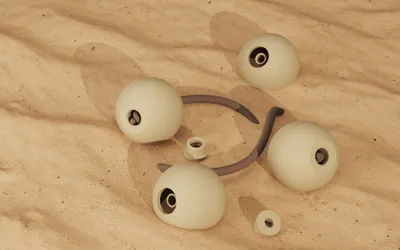
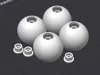
Materiale occorrente: 4 sfere, 4 tappi, 1 cima (corda) da circa 50 cm, perline di silicio.
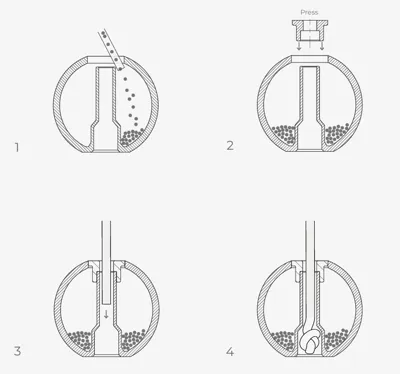
1. RIEMPIMENTO
- Prendi una sfera e usa un cucchiaio (o un imbuto di carta) per inserire le perline di silicio.
- Dosaggio: un cucchiaio di perline per ogni sfera.
- Ripeti l’operazione per tutte e 4 le sfere.
2. CHIUSURA
- Prendi un tappo e posizionalo sul foro superiore della sfera.
- Premi con forza finché il tappo non è completamente a filo con la superficie della sfera.
- Ripeti per tutte e 4 le sfere.
3. MONTAGGIO CIMA (Coppia A)
- Fai un nodo semplice all’estremità della cima ancora intera.
- Infila la cima nella Sfera 1 e tirala fino a bloccare il nodo.
- Infila la cima nella Sfera 2.
- Prova la misura: tieni le sfere in mano e distanziale di circa 20 cm (regola la distanza in base alla grandezza della tua mano).
- Una volta trovata la misura corretta, fai il secondo nodo di blocco all’uscita della Sfera 2 e taglia la corda in eccesso.
4. MONTAGGIO CIMA (Coppia B)
- Ripeti esattamente i passaggi del punto 3 con la cima rimasta e le altre due sfere.
⚠️ ATTENZIONE: Passa la cima e prova la misura sulla tua mano; tagliala solo dopo aver fatto il secondo nodo di blocco!
Ora le tue Kass Kass sono pronte. Buon ritmo!
🛠️ KASS KASS ASSEMBLY GUIDE
Materials needed: 4 shells, 4 plugs, 1 cord (approx. 50 cm), silica beads.
1. FILLING
- Take one shell and use a spoon (or a paper funnel) to pour in the silica beads.
- Dosage: one tablespoon of beads per shell.
- Repeat for all 4 shells.
2. CLOSING
- Place a plug over the top hole of the shell.
- Press firmly until the plug is completely flush with the surface of the shell.
- Repeat for all 4 shells.
3. CORD ASSEMBLY (Pair A)
- Tie a simple knot at the very end of the long cord.
- Thread the cord through Shell 1 and pull until the knot locks inside.
- Thread the cord through Shell 2.
- Check the fit: hold the shells in your hand and set them about 20 cm apart (adjust the distance based on your hand size).
- Once you have the right length, tie a second locking knot at the exit of Shell 2 and cut the excess cord.
4. CORD ASSEMBLY (Pair B)
- Repeat the steps in point 3 using the remaining cord and the other two shells.
⚠️ ATTENTION: Thread the cord and test the fit on your hand first; only cut the cord after tying the second locking knot!
Now your Kass Kass are ready. Enjoy the rhythm!
License
You shall not share, sub-license, sell, rent, host, transfer, or distribute in any way the digital or 3D printed versions of this object, nor any other derivative work of this object in its digital or physical format (including - but not limited to - remixes of this object, and hosting on other digital platforms). The objects may not be used without permission in any way whatsoever in which you charge money, or collect fees.
Comment & Rating (3)