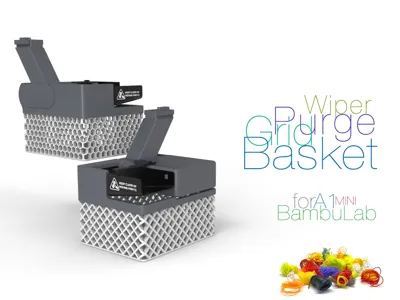
Purge Wiper Grid Basket for BambuLab A1 Mini


Print Profile(1)


Description
Purge Wiper Grid Basket for BambuLab A1 Mini
How It All Started — and Why This Basket Even Exists
Two days ago, my new printer arrived — the Bambu Lab A1 Mini. To be honest, I wasn’t particularly excited in advance. I had my doubts: just another entry-level, budget-friendly printer, right? What could possibly surprise me? But as it turns out, I was wrong. My surprise bordered on shock — in a good way.
This little guy prints just as precisely as the X1 Carbon. Seriously. The only real difference is in how it’s meant to be used: the A1 Mini is an open-frame printer, so of course that limits the range of filaments. But I bought it exactly for PLA, PETG, and TPU — simple, non-fussy materials. And you know what? It handles them quietly, reliably, and… with remarkable confidence.
The Engineering Is Outstanding
The build is tight, solid — no play, no rattles, every element thought through. I have to give huge credit to the Bambu Lab engineers. They put everything they knew into this little machine. And how they managed to hit this price point? No idea. It’s a small miracle. It’s now proudly sitting on my workbench among the other “workhorses.”
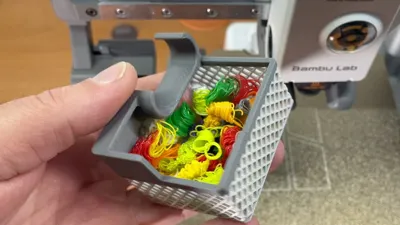
And as you’d expect, it has massive upgrade potential. Naturally, I started with the most immediate issue — those little blobs of plastic during color changes. This printer loves to fling hot purge blobs sideways. And trust me, if you don’t catch them, they’ll shoot halfway across the room (okay, maybe just a meter — but still annoying).
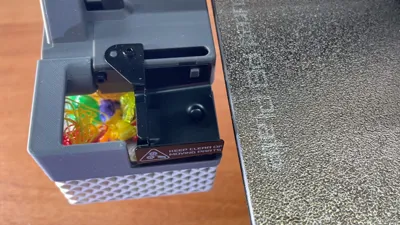
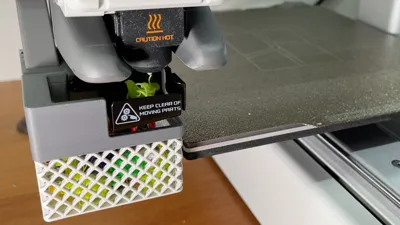
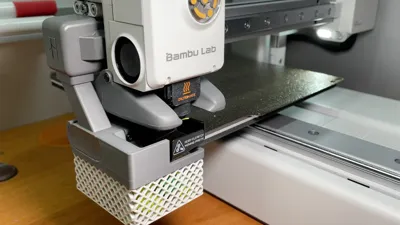
The First Mod — Purge Wiper Grid Basket
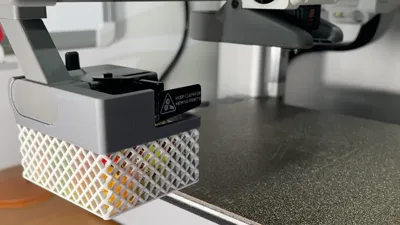
So I designed a basket — lightweight, reliable, with a mesh bottom. It mounts directly beneath the purge nozzle. Now every bit of purge filament during color changes lands neatly inside. No bouncing, no plastic flying across your desk. Everything stays contained. This is the Purge Wiper Grid Basket for A1 Mini I’m sharing with you here. It’s a simple thing — but a really helpful one.


Boost Me (for free)
If you enjoyed my work and would like to support the development of future projects, you can do so through boosts. It helps me move forward, develop new ideas, and share them with you. Every boost is a contribution toward future models that may bring you even more satisfaction.
Printing Details
Everything’s ready to go. Inside the archive, you’ll find a pre-configured 3MF file with optimized print settings. My recommendations:
- Layer height: 0.1 mm
- Nozzle: 0.2 mm
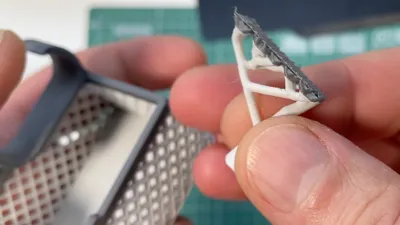
Why? Because of the mesh structure. That’s key. It’s better to print slowly and get clean, crisp geometry. If you go with a 0.4 mm nozzle — well, let’s just say it’ll look rough. But that’s entirely up to you. I chose dark gray and light gray PLA to match the printer’s color scheme. No tower used. I printed it with tree supports placed only where truly needed. You’ll see this clearly in the slicer. At first, I made a bigger basket. Then I realized — overkill. The small one works perfectly: it catches everything, even during frequent color changes. You can see through the mesh when it’s time to empty it. It mounts securely — no wiggle, no rattle. You can remove and reattach it with one hand. I’ll show all of this in the upcoming video.
Downsides? Just One — The Plate.
Let me be upfront: there’s only one thing I didn’t like about this printer — the stock build plate. The texture is way too coarse. That, I definitely disagree with. I’ve already ordered a smooth one. For now, I printed on my X1C. But of course, you can use the A1 Mini too — it’s a regular build surface, regular print quality.
Final Thoughts
Other than that — it’s a fantastic little machine. Sure, there are some compromises:
- The motherboard is less powerful
- The camera isn’t great
But it’s all fair — and expected in this class. The part cooling is well-designed. The overall construction is smart. This is not a toy — it’s a real tool.
I can confidently recommend it. And if you’re tired of sweeping purge blobs off your desk — give this basket a try. I think you’re going to like it.
PS: What I liked most was the sticker with the infographic, a short instruction. It reminded me of… tube TVs… black-and-white ones… from the 70s. You had to smack it to get the picture to show up. Same here—one tap in the front, two taps in the back. At first, I didn’t even read it.

Of course, it’s actually about distance. But it cracked me up. I’m still laughing at that graphic.
See the video for details:

If you liked this thing - let me know by putting like!
Links to used tools:
My new machine:


My favorites:

Thank you for every tip or donation,
it means great recognition for me and helps a lot to keep going!

BTC: bc1qplpzq36ghw84hty4nn2zzu4ps4sdh4th0v93j8
ETH: 0xc766ebbeAa76aaf629788c8F99C33A8d80d48977
My some other things:


License
You shall not share, sub-license, sell, rent, host, transfer, or distribute in any way the digital or 3D printed versions of this object, nor any other derivative work of this object in its digital or physical format (including - but not limited to - remixes of this object, and hosting on other digital platforms). The objects may not be used without permission in any way whatsoever in which you charge money, or collect fees.
Comment & Rating (7)