Fast-Lock Dumbbell Clamp – Customizable Model


Print Profile(6)


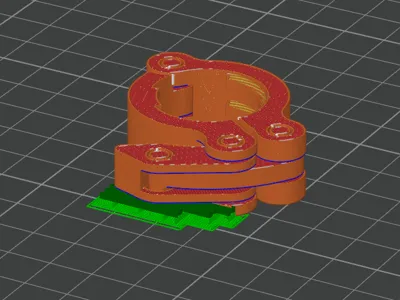
Description
Boost Me (for free)
If you like this model, consider giving it a boost! Your support is really appreciated 😊
After checking out all the dumbbell clamp models online, I realized none of them are actually customizable—which makes it tough to find something that really fits different bars and thread sizes. So, I decided to make my own in Fusion 360, and set it up so anyone can easily tweak the design to fit their needs.
What makes this model different:
Parametric & Easy to Tweak:
The Fusion 360 (.f3z) file gives you full access to customize just about everything—bar diameter, clamp size, wall thickness, joint size, thread type, fitting gaps/clearance, and more—all in a few clicks. Remix is absolutely encouraged! Feel free to improve, modify, or totally remix the design to fit your style or equipment.Stronger & Faster to Print:
I made the clamp more compact, reinforced the joints (the weak spots on most models), and trimmed extra material—so it prints quicker but is still super sturdy.Minimal Supports Needed:
This model is set up to use minimal supports. With suggested settings ("Treshold angle" = 1, "On build plate only" checked) in BambuStudio, you can print it all in one piece. Once it’s done, just snap the breakaway bits to free the joints—no tools or complicated assembly.Ready-to-Print Sizes:
I included the two most common sizes—25mm and 30mm—so you can just pick, print, and go.
Update
Arrow Indicator: I realized most of the time the clamp won’t tightly fit against the dumbbell, and you will need to screw it up a bit after clamping on. Therefore, I added the option to print with arrows at the bottom to indicate the tighten direction. Please note you need to print with the handle pointing to the right on the build plate in order to have the arrow showing outward after clamping on the dumbbell bar.
Individual Printing Profiles: Additionally, to make it convenient for people who want to download and print a specific size without further selection inside the file, I created individual print profiles for each size, with and without the arrow.
Parametric Model Maker: Now, the Parametric Model Maker also supports Fusion 360 files, making it easier to customize online. However, loading a complex model can sometimes be unstable and may not always work as expected. If you run into issues, the best option is to download the source file, open it directly in Fusion 360, make your edits, and export your custom version for printing.
Joint Wall Thickness & Model Limits: I’ve now exposed the parameter for joint wall thickness, allowing you to customize the strength of the clamp at its weakest point. This has been tested to work up to 5 mm. The clamp wall thickness now scales automatically with the joint wall thickness, simplifying the design process. Additionally, the maximum clamp size has been adjusted to 34 mm to prevent model breakage beyond this size.
How to Customize in Fusion 360
You’ve got options:
Pick a Size Fast:
Use the dropdown in Fusion 360’s Configurations panel to pick any preconfigured size —done!
Full Control:
Want a custom setup? Head to the Parameters tab in Fusion 360 and dial in the clamp size, wall thickness, joint size, thread, horizontal and vertical fitting gaps, and anything else you want to change for your perfect fit.
Tested and Approved
I printed a bunch of these using a 0.6mm nozzle and glass fiber reinforced PETG, and they worked perfectly—nice and strong. It should work just as well with a regular 0.4mm nozzle and normal PETG too.
If you notice the fit is too tight or too loose, just tweak the horizontal and vertical clearance settings in the parameters. That’s it!
Got suggestions, want to share your print, or have feedback? Let me know—I’d love to hear what you think.
Happy printing!
Comment & Rating (71)