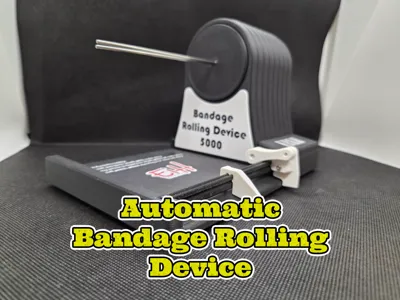
Bandage Rolling Device 5000


Print Profile(1)

Description
Bandage Rolling Device 5000
—a machine for rolling up bandages of various sizes, because I’m lazy and have strange hobbies...
I built this using parts I had lying around, so the choice of components is... a bit random.
The controller board is based on a WEMOS S2 Mini ESP32 module and a StepStick DRV8825 stepper driver, combined with a 28 mm NEMA17 stepper motor.
I designed a custom PCB for the project – but you can easily cobble something together if you prefer.
That said, I still have a few unpopulated PCBs left. If you want one, I’ll gladly ship it (at your cost).
Just note: postage might be more expensive than ordering a batch from PCBWay, SeeedStudio, or wherever you normally get your boards.
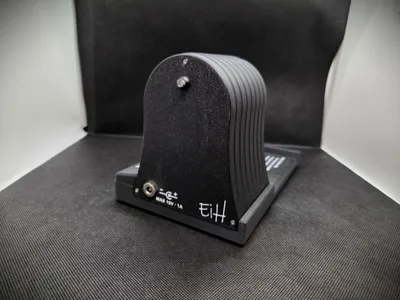
Note: I printed this in PLA, which isn’t very temperature resistant.
So make sure to set the current limiting correctly on your stepper driver to prevent the motor from running too hot — otherwise, the motor mount may soften or deform.
Note on print features:
- Text in the Base, Sign, Back Cover, and logos is embossed by 0.05 mm to allow for easy painting in the slicer.
If painting is removed, the embossing will be ignored by the slicer and printed as a flat surface. - Some holes are designed as closed (non-through) with a thin end wall (equal to one layer thickness).
This improves bridging and allows for clean printing without supports.
The thin wall can simply be punched through when installing a screw.
STEP - files can be provided upon request.
Function and Operation
Main Functions
- Single-button operation: Start / Stop
- Sensor-controlled automatic stop when the roll-up sequence is complete
(can be bypassed by holding the start/stop button for more than 1 second) - Adjustable guide wings for different bandage widths
Operation
- Connect the power cable
- The LED in the button should now begin flashing
- Slide the left Wing Assembly to its leftmost position
- Thread the bandage under the Guide Beam at the Base
- Continue threading the bandage between the two Rods on the Spindle
(ensure that at least 10 mm of the bandage extends through the rods) - Adjust the left Wing Assembly to match the bandage width
- Prepare the bandage for rolling – make sure there are no knots and minimal twisting
- Start the Sequence
- If using the Auto-Stop function:
- Ensure the Sensor Stylus is in contact with the bandage
- Briefly press the Start button
- The rolling sequence will begin, and the LED will turn solid
- When the bandage is fully rolled, the Sensor Stylus will trigger the Reed Switch, stopping the device automatically
- Alternatively, you may press the Start/Stop button at any time to stop the sequence manually
- If not using the Auto-Stop function:
- Press and hold the Start/Stop button for more than 1 second
- Release the button – the LED should now remain solid
- The device will continue to run until you press the Start/Stop button again
- If using the Auto-Stop function:
Once the bandage is fully rolled, it can easily be removed from the rods
Assembly Instructions
Here is a quick video showing the assembly of the device. However, I recommend taking a look at the drawings provided in the documentation section here on MakerWorld.
Please note that no documentation is provided for wire creation, soldering, or the assembly/production of the controller board. Likewise, the process of uploading firmware to the ESP32 module or adjusting the current limit on the stepper driver module is not covered.
Additional information / files
Firmware and gerber files for PCB fabrication can be downloaded at my web-page: www.eih.no/brd5000/
Comment & Rating (0)