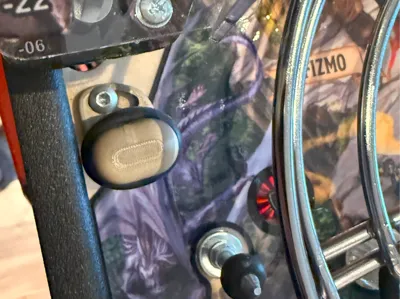
Stern Outlane Cheater's Post :)


Print Profile(1)
Description
This is an original model but listed as a REMIX because it wouldn't exist without the original idea for this by David Veach.
The look/design is different from the original and there are two versions, one for tables like the D&D table in the pics and another for tables with less room around the post.
What does it do?
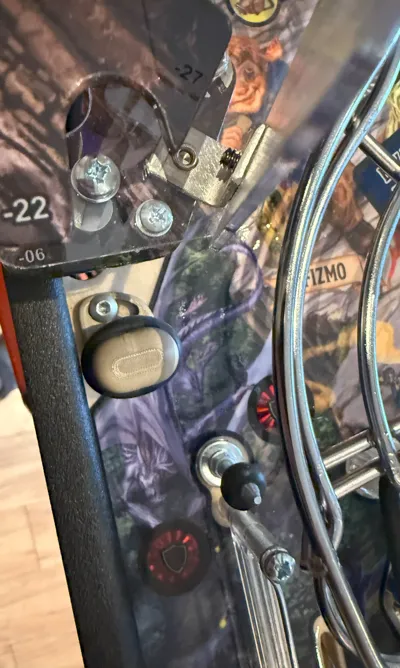
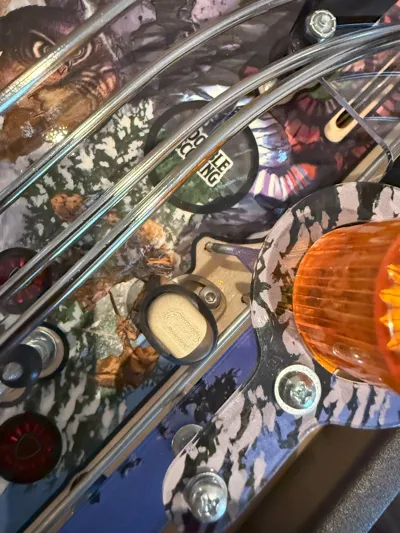
Pushes over the top of the existing metal outlane post(s) and reduces the width of the outlane by the amount you choose. Potentially it can close the outlane altogether if that's how you want to play the table.
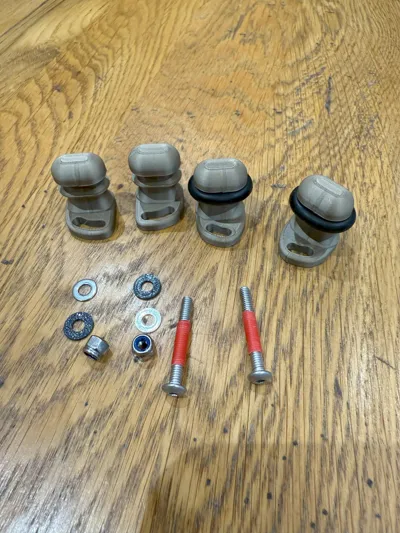
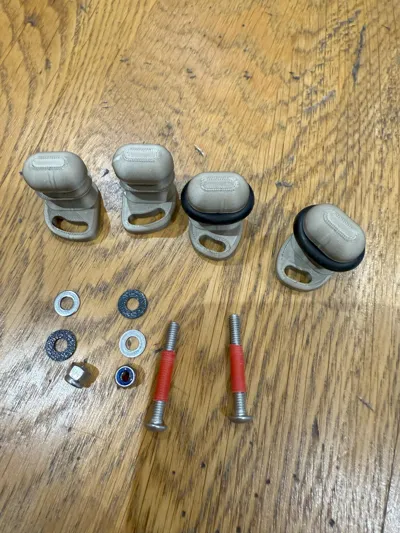
You will need:
Button head (ideally) M4 25-30mm machine screw with lock nut and washer.
https://www.amazon.co.uk/dp/B0F6NCR4V6?ref=ppx_yo2ov_dt_b_fed_asin_title
7/16" Rubber ring:
https://www.pinball.co.uk/spares-accessories/rubber-parts/7-16-rubber-ring/
Optional:
Heatshrink tube 14mm per bolt
Optional printed plastic washer 1mm to suit.
Installation:
Note that the post will need THREE positioning holes available. If the post doesn't have this then you won't be able to put the adjustment screw through.
If necessary move the existing post to the closest hole to the opposing post.
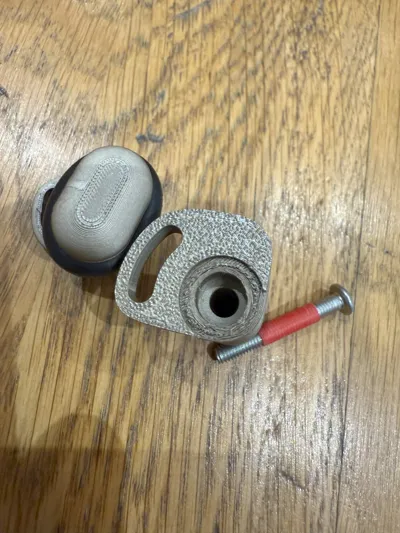
Scrape off any support material from the bottom of the part
Remove the rubber bumpers on the existing post(s)
Push fit the part over the exposed pin and check that the base sits on the table.
Insert the screw through the slot, attach optional plastic washer, metal washer, nut. Tighten. Adjust the gap and check with a ball. Final tighten, it is tight enough when you cannot push the post to adjust it.
Play a few games and check that the post hasn't moved.
Optionally:
Install approximately 14mm of heat shrink onto the screw to protect the table hole - not really necessary, Stern don't bother with this :)
Printing:
My pictures show a print with a 0.2mm nozzle using Bambu PLA- METAL
The print pushes into place over the pin. It is important to get the printed dimensions correctly adjusted to suit your printer and allow for hole shrinkage. On the Bambu H2D I would recommend:
0.4mm nozzle, PLA - try X-Y Hole compensation of 0.3
0.4mm nozzle, PETG HF - try X-Y Hole compensation of 0.14
0.2mm nozzle, PLA - try X-Y Hole compensation of 0.125
Support the underside of the part on the two small inner rings with normal or tree supports.
This remix is based on

License
You shall not share, sub-license, sell, rent, host, transfer, or distribute in any way the digital or 3D printed versions of this object, nor any other derivative work of this object in its digital or physical format (including - but not limited to - remixes of this object, and hosting on other digital platforms). The objects may not be used without permission in any way whatsoever in which you charge money, or collect fees.
Comment & Rating (0)