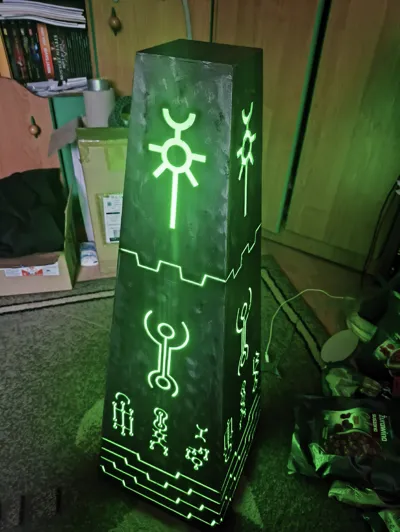
Big necron obelisk terrain


Print Profile(1)

Description
Boost Me (for free)
If you can boost me, it is very nice form of appreciation. I do those model mostly for myself, but post it for others as I think they are cool enough.
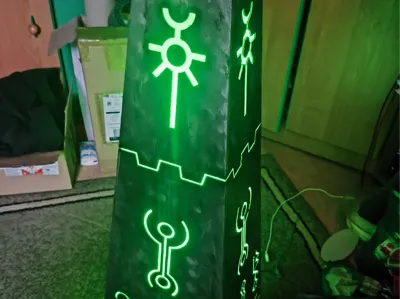
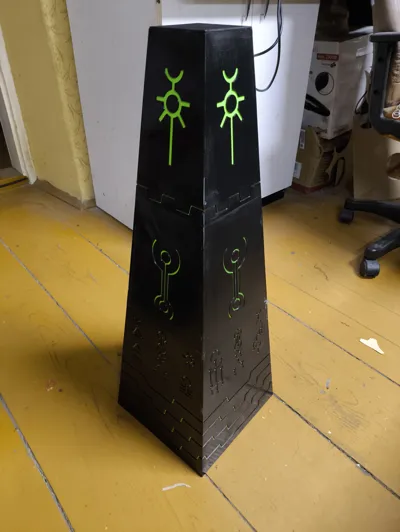
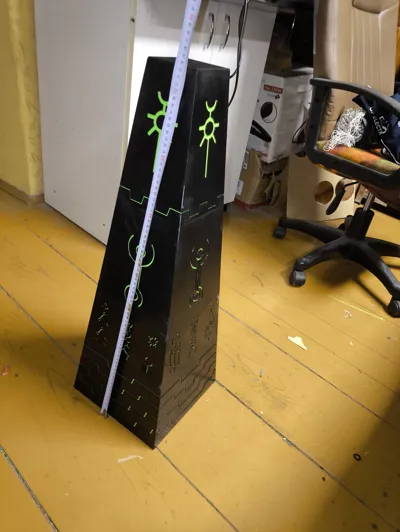
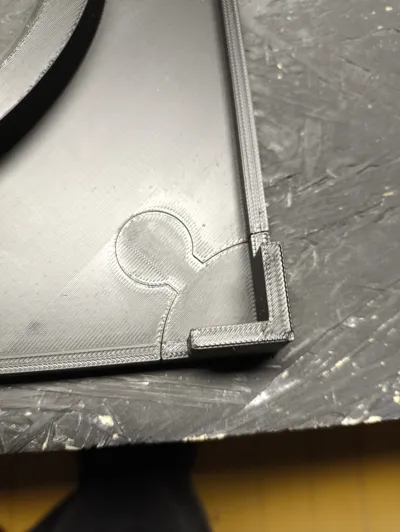
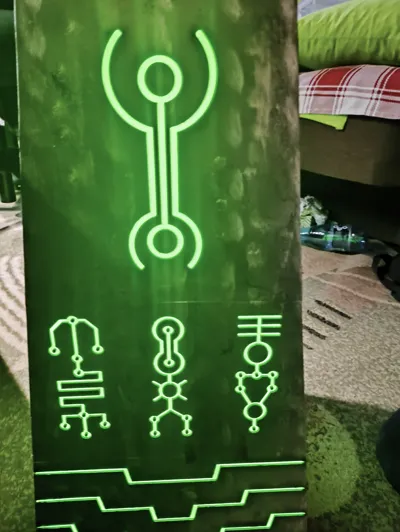
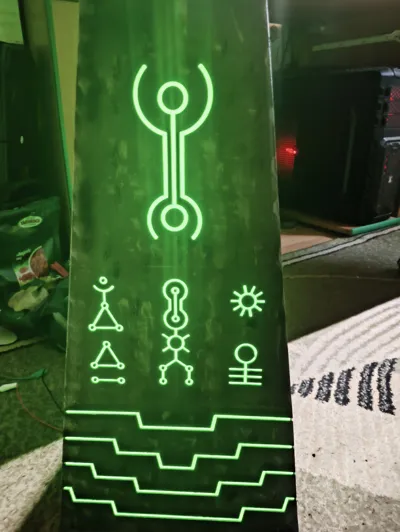
Another Necron inspired building following the same style and place for LEDs on the inside. To print with AMS. First glue sides together, then glue one of sides with frames, then 2 more sides and finally last side. To have good fit, you need to sand down gluing tabs in side elements till you touch it and it is flush.
It feel flimsy until last part is glued. After that it is rigid. I printed it from PLA, glued with cyanoacrylate glue, filed gaps at corners using CA+baking powder and sanded everything with 220 grit sandpaper with water.
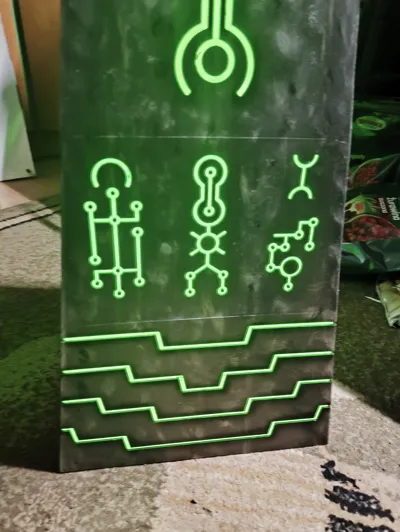
To allow for green color (and eventually light go through, you cannot paint it with primer. I sanded whole surface before applying gloss varnish from spray can with 500 grit sponge for better adhesion.
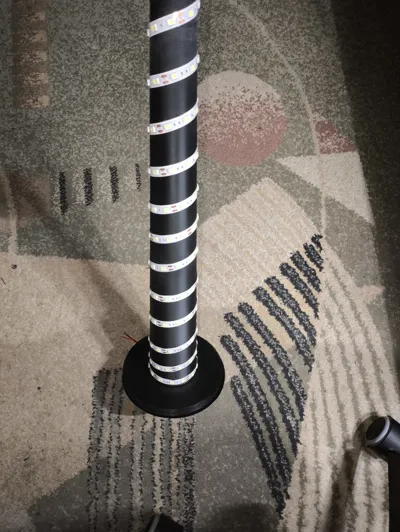
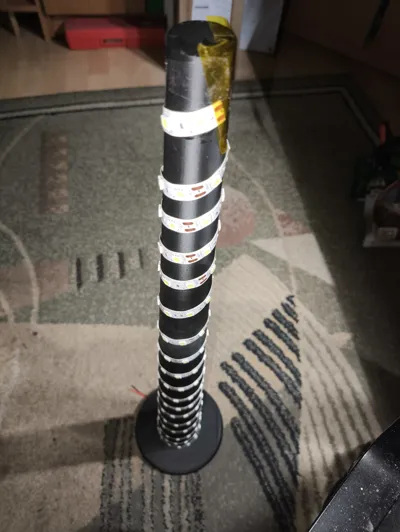
I will update this model with "LED module subassembly" when I create it. M150 thread is integrated into base for purpose of screwing LEDs. Base is in 2 parts due to small area of bed being blocked by filament cutter. It fits very well. I will also post pictures after I will paint it.
If anyone wants different dynasty symbol reach out and I see what I can do.
UPDATE
As promised, screw in led module is added. I used around 2 meters (205 cm to be exact) of white LED strip with 60 led/m. The closer to the top the closer you should wind it to keep constant illuminance on the surface of obelisk. There is hole in the model for wires to go through a it consumes a quite a lot of power I will power it from external power source.
Painting tips: Use liquid mask to mask all recesses of the pattern then airbrush and then remove liquid mask with tweezers.
UPDATE 2
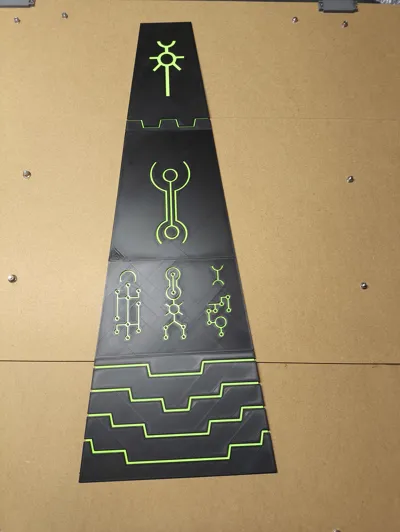
You need to print this parts 4 times for full building:
BIG_OBELISK_TOP
BIG_OBELISK_BOT
BIG_OBELISK_MIDTOP
UPDATE 3
I merged both 3MF files into one, and duplicated number of plates that need to be printed several times. As per feedback recived.
License
You shall not share, sub-license, sell, rent, host, transfer, or distribute in any way the digital or 3D printed versions of this object, nor any other derivative work of this object in its digital or physical format (including - but not limited to - remixes of this object, and hosting on other digital platforms). The objects may not be used without permission in any way whatsoever in which you charge money, or collect fees.
Comment & Rating (20)