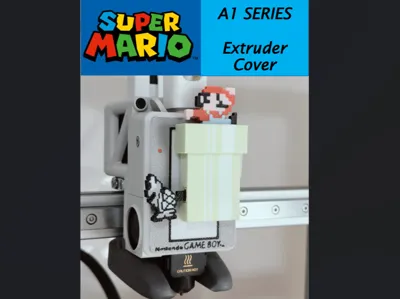
Super Mario A1 Series Extruder Cover


Print Profile(1)


Description
Boost Me (for free)
Appreciate a Boost if you like this model!
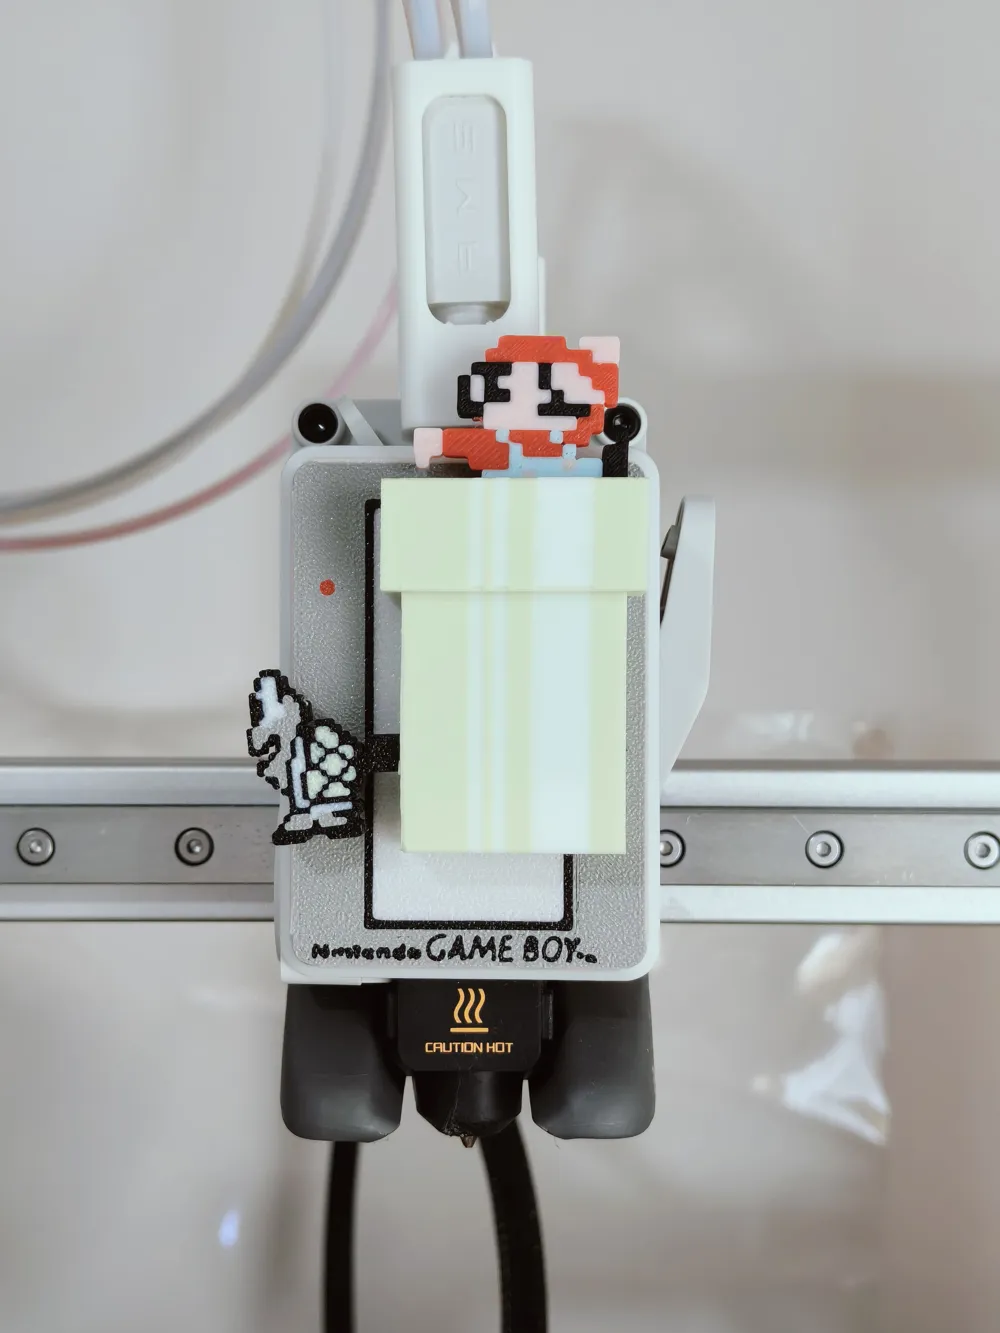
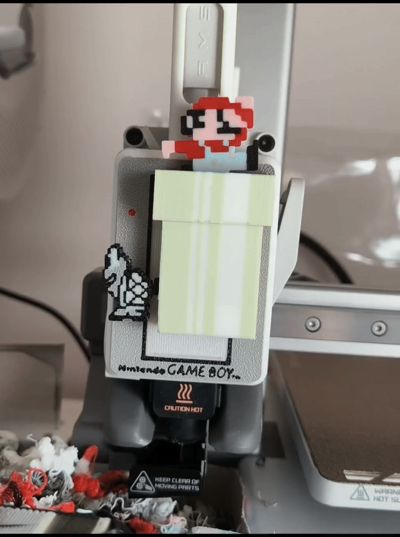
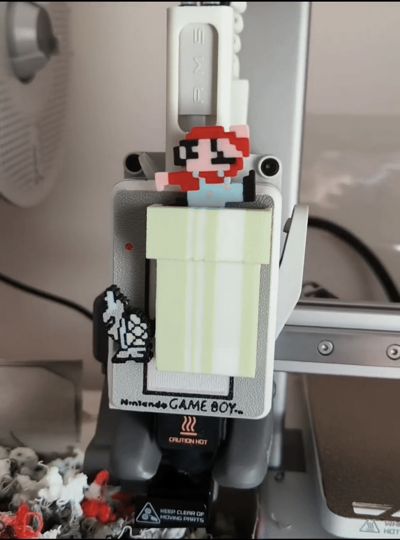
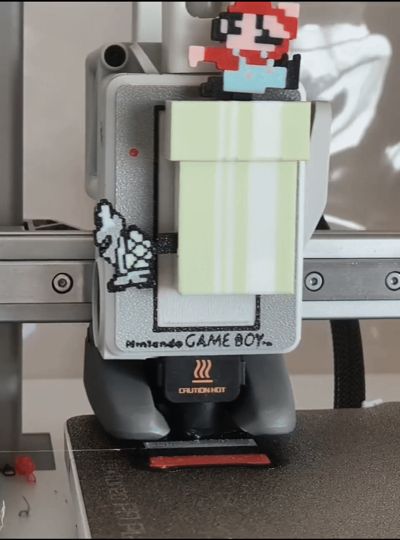
SUPERMARIO A1/A1 Mini Extruder Front Cover
Looking for something interesting to spice up your printer?
Look no further!
- The SuperMario Extruder Front Cover features interesting 3D characters at the front
- On the cover are Mario, Koopa Troopa, and a chimney for Mario to enter!
- Both Mario and Koopa Troopa are movable when the extruder gears move!
- Mario moves vertically and Koopa moves horizontally.
- The main cover is a Gameboy classic inspired design!
- This cover is suitable for Bambu Lab A1 and A1 mini series printers!
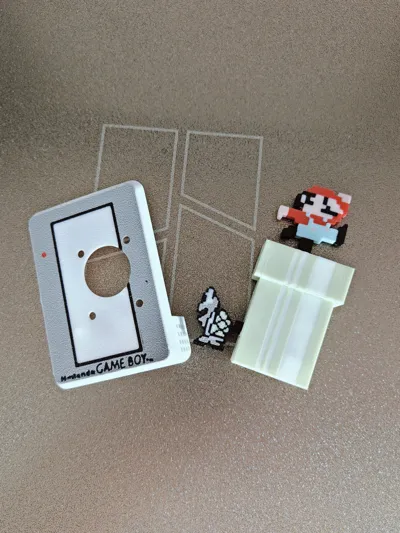
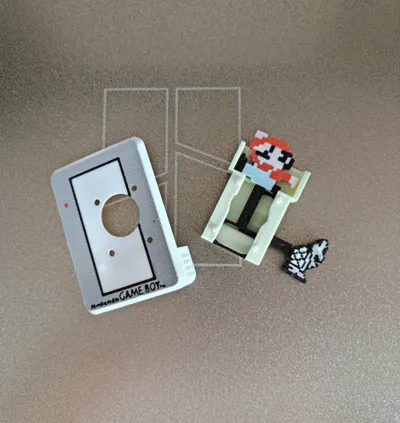
Assembly instructions:
- Plate 1 contains the main cover
- Plate 2 contains Mario and his holder
- Plate 3 contains Koopa Troopa and his holder, you will need to press-fit them together once the holder is placed into the chimney
- Plate 4 contains the chimney
- Plate 5 contains the cylinder for the rotating shaft on the extruder assembly
Step 1 - remove the original A1 / A1 mini cover.
Step 2 - install and press the new main cover onto the A1 / A1 mini extruder assembly.
Step 3 - take the chimney, insert the holder that is on plate 3 and slot it inside the chimney's side hole.
Step 4 - press fit Koopa Troopa into the end of the plate 3 holder
Step 5 - insert the Mario and holder into the chimney
Step 6 - take the cylinder printed in plate 5, press fit into the rotating shaft of the printer's extruder assembly
Step 7 - (this step requires some patience!) install the chimney assembly onto the cylinder, align holders to match the cylinder location. Once done, press the chimney onto the main cover.
Enjoy and have fun!
License
You shall not share, sub-license, sell, rent, host, transfer, or distribute in any way the digital or 3D printed versions of this object, nor any other derivative work of this object in its digital or physical format (including - but not limited to - remixes of this object, and hosting on other digital platforms). The objects may not be used without permission in any way whatsoever in which you charge money, or collect fees.
Comment & Rating (13)