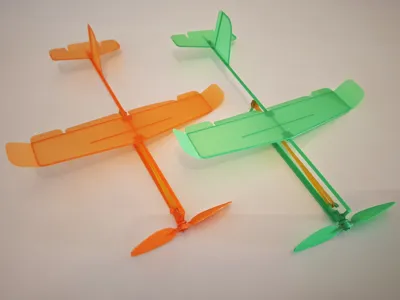
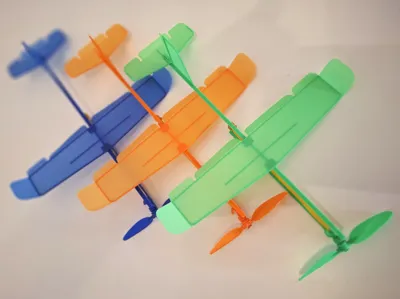
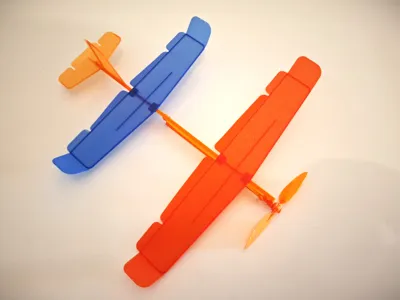
Mini Aircraft "Sparrow"


Print Profile(1)

Bill of Materials


Description
SIMPLE. FLYING. FUN.
After developing the HeliEgg Mini and JetBuzz models, I was still captivated by the search for the most optimal shape for a small wind-up airplane. The goal was to create a simple model that could both fly and glide reasonably well. After a loooong….

….and fun series of tests with various modifications, the optimal configuration was finally found. I'm excited to introduce to you: Sparrow!
1 - Model
This lightweight and playful micro aircraft features a 160 mm wingspan, measures 215 mm in length, and weighs just around 5 grams (without rubber motor). It flies nicely both indoors and outdoors (in calm weather). Despite its simple design, the model offers adjustable control surfaces — including flaps, elevator, rudder, and ailerons. You can also fine-tune the center of gravity by shifting the wing position, allowing for various flight behaviors and customization.
2 - Model Print
The model was tested exclusively using Bambu Lab PLA Basic filament. During test flights, no issues with structural strength were observed. Only after 50 or more launches and impacts against hard surfaces did the model begin to show signs of damage.
I recommend printing it on a standard textured PEI build plate — it gives good grip and clean results.
After printing, let the plate and parts cool for about 5–7 minutes before removing them.
3 - Assembly
The model consists of 6 parts, as shown below.

1 – Fuselage, 2 – Wing, 3 – Stabilizer, 4 – Pin, 5 – Spacer, 6 - Propeller
By default, no glue is required for model assembly.
As the first step, attach the propeller to the fuselage.
Before assembly, pay attention to the special marking on the propeller (two dots).
This marking should face forward to ensure the propeller is installed correctly.

After placing the propeller onto the pin, it needs to be secured.
Melt the tip of the pin and press it down as shown in the illustration below.

Before installing the stabilizer, bend the elevator up by about 10–15 degrees, as shown in the figure.

Install stabilizer of fuselage.

Deflect winglets of the wing as shown on figure.

Install the wing onto the fuselage as explained below.
First, insert the sharp end of the fuselage into the correct slot (Step A).
Then, with a slight twist and gentle pressure (Step B), fit the flat side of the fuselage beam into the wing connector slot. To remove the wing, simply reverse the steps.

Install the rubber motor as shown in the illustration.

For preliminary balancing, the trailing edge of the wing should be positioned 10–12 mm ahead of the rear attachment point of the rubber motor.

If desired, you can deflect the flaps slightly downward, but in this case, the wing should be shifted a bit further back.
The installed rubber motor should be long enough to avoid excessive friction.
If, after winding it 10 turns, the motor unwinds them freely – the length is sufficient.
A recommended rubber motor length is 95–105 mm.
4 - Model Flight
Before launching with the motor, check the model’s gliding behavior.
Launching of the model should be done with a gentle push forward.
After the first test flight (with installed motor), if necessary, adjust the elevator deflection angle or wing position to achieve a smooth, straight flight.
If the model pitches UP:
– Reduce the elevator’s upward deflection angle,
– OR reduce the flap’s downward deflection angle,
– OR move the wing slightly rearward.
If the model pitches DOWN:
– Increase the elevator’s upward deflection angle,
– OR increase the flap’s downward deflection angle,
– OR move the wing slightly forward.
After trimming the model for gliding, you can proceed with powered launches.
To launch, wind the motor about 120–150 turns (approximately 85% of the maximum capacity), depending on the quality of the rubber.
As an additional option, the model can be launched without the rubber motor at all, as a glider with a freely spinning propeller.
My child loved this option and had a great time experimenting with different control surface settings.
5 - Maintenance and Customization
If any parts get damaged, they can be replaced. If needed, parts can also be glued together.
If the wing-to-fuselage connection becomes too loose, just place a small strip of thin office paper inside the wing slot to tighten the fit.
The parts of this model are fully interchangeable with the parts of the "Swallow" model: https://makerworld.com/en/models/1538229-mini-glider-swallow#profileId-1613978
This model is a great playground for customization and experimenting with different control surface settings.

Happy Flights and Smooth Landings!
Boost Me (for free)
If you like my models, hit that Boost button like it's a launch switch! 🚀
License
You shall not share, sub-license, sell, rent, host, transfer, or distribute in any way the digital or 3D printed versions of this object, nor any other derivative work of this object in its digital or physical format (including - but not limited to - remixes of this object, and hosting on other digital platforms). The objects may not be used without permission in any way whatsoever in which you charge money, or collect fees.
Comment & Rating (110)