Mini A pillar roof molding


Print Profile(2)


Description
Read the description before printing !
This is a replacement part for Mini R50 / R53. I’m not sure if it fits a R52 or not, please comment if you try it!
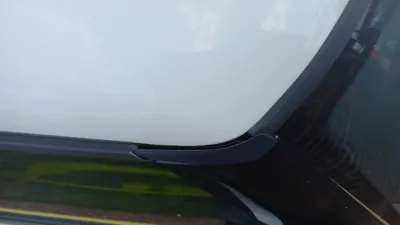
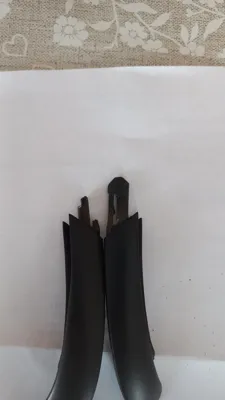
This replaces the front part sitting on top of the A-pillar of the roof molding / rain gutter with part number 51137112079 / 51137112080 / 7112079 / 7112080, which is apparently prone to be snatched by automated car washes, and that will break due to age anyway due to being plastic, as evidence from pictures of my own.
The main trim part should be printed in PETG or better. I’ll call it “trim”.
The rubber channel part should be printed in TPU 95A. I’ll call it “channel”.
This is designed based of off the used parts taken from a 2002 Mini R50, so I make no guarantee of fitment on other Minis, let me know how well it fits!
I stopped improving at “good enough” but it’s by no means a perfect replacement, as the curved parts are horrible to replicate in CAD. Feel free to improve it. It’s still better than a missing trim (and also way better than the other freely available model I saw on printables), and I can attest it holds up just fine at highway speed (I have not tested a car wash yet, but I’m pretty confident it will hold up).
Ideally you should replace the clips, part number 51137058122, as they are more than likely to be broken.
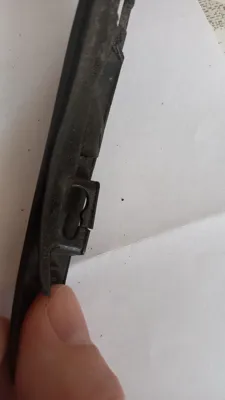
To remove the old trim (if any), pull it toward the front of the car first: notice the notch on the printed part, that’s what holds the trim in place.
Then you can tug it toward you, so that the clip can slide out of the bigger hole (it stays on the car there). Then pull the clip out of your car with pliers.
You’ll generally notice 3 things:
- the clips will very likely be broken, or break when you remove the trim. I had both clips broken.
- the part of the trim which the clip slides in will very likely be broken, due to poor design. Again, both my trims were broken.
- the rear part of the trim where there’s the notch might be broken. I attribute that as to why car washes snatches them. I only had one broken, and based the design on the other one.
To install, first seat the new clip on your car. Press firmly to seat it.
Then, start sliding the rear part of the PETG part in the molding.
Once the bigger hole lines with the clip, push the clip inside. That’s the tricky part, as the new clip (at least the VVO branded one I got from Amazon) fully pressed doesn’t give enough space from the car to let the trim in. You might need to move the clip knob a bit up with pliers until it goes inside the trim.
Once that’s done, push the rubber gasket in (if you put it in before it’ll fall off). It should sit on the channel on the trim and not move, but feel free to use a bit of double sided tape.
Then push the trim all the way back until it lines up with the roof molding. You might need to use pliers to push it all the way if there is a remaining broken part inside, or just because tolerance is tight. Tolerance is tight on purpose so it doesn’t get easily snatched again. Be careful if you’re using pliers, as it’s easy to break the clip at a layer line.
And if you lose or damage that print … You can always print more for pennies, no big deal!
For better results, you should use the provided print settings, but in particular:
- the trim should be printed upside down to use less support. Supports are mandatory. Use 3 walls so that it’s fully solid, there is no reason to use any infill.
- the channel should be printed with the rear side on the build plate. The main reason to do that is to avoid the need for supports inside the hollow rain gutter. Supports are mandatory but really minimal. The downside of that orientation is that the front part of the channel will not print well due to the physics of printing TPU.
- if you do not like that or it doesn’t work for you, you can try the same upside down orientation as the trim, but be wary of how the rain gutter is printed so that it’s not obstructed.
- both sides are a mirror of each other, the mirroring is done in the slicer.
No matter what, after printing, slide something inside the channel rain gutter to ensure it’s clear.
If you print it, please let me know how it goes, good or bad!
Boost Me (for free)
If you read this far, I assume you have some interest in that part, a boost would be much appreciated!
Comment & Rating (10)