Search models, users, collections, and posts
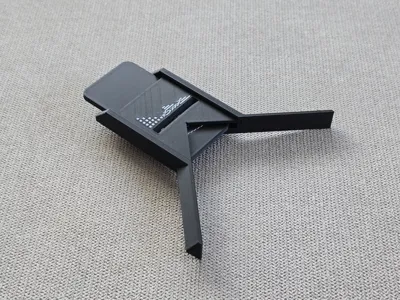
Radius measuring tool/gauge (1-60mm)
IP Report


Print Profile(2)

0.4mm nozzle full set
Designer
1.6 h
2 plates

0.2mm nozzle slider and bracket (no frame)
Designer
2.4 h
1 plate
Open in Bambu Studio
Boost
25
44
6
1
35
10
Released
Description
Some time ago i wanted to measure the corner radius of my amp for my other project. I looked if anyone had already created a radius measuring tool and mainly found big gauge sets and caliper add-ons. So i wanted to create a tool that didn't need printing out 20+ gauges and didn't need for you to have calipers. I'd say it turned out pretty well and is accurate inaf for now. In the future i might try making some sort of gear down system to get tenth of a milimeter accuray.
NOTE: Make sure to print the slider and top bracket first so you can insert the bracket in the frame later when the print pauses.
Assemly instructions after the use tutorial.
Boost Me (for free)
It takes quite some time to design and perfect these model so if you like them please give a boost, it means a lot!
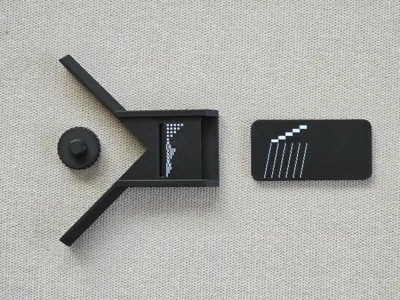
How to read the measurements and examples.
Measurement accuracy ~0.5mm. if you can see two lines that are equally showing from the slit then its a number between the two. The squares show the tens and the roman numbers show the ones.

Examples


Difference between 0,2 and 0,4 mm nozzle
You can still get a decent reading from the 0.4 mm nozzle, but i recomend the 0.2 for the clearest result as the other requires your extrusion to be calibrated well to avoid bad surface quality because it has many little extrusions and it can look worse.

Assembly
Print out the slider and the bracket

Wait for the frame print to pause and insert the bracket in the hole. MAKE SURE ITS COMPLETLY INSERTED SO THE PRINTER WONT CRASH INTO IT AFTER UNPAUSING

After the print is finished you can insert the slider and the screw in the screw, make sure it's not at an angle. Now you can lock in the slider after geting the measurement.
I hope you found this tool helpful
This model took quite a bit of time and versions so if you like the model a boost is appreciated!

My other useful models:


License
This user content is licensed under a Standard Digital File License.
You shall not share, sub-license, sell, rent, host, transfer, or distribute in any way the digital or 3D printed versions of this object, nor any other derivative work of this object in its digital or physical format (including - but not limited to - remixes of this object, and hosting on other digital platforms). The objects may not be used without permission in any way whatsoever in which you charge money, or collect fees.
Comment & Rating (6)