


Print Profile(1)

Description
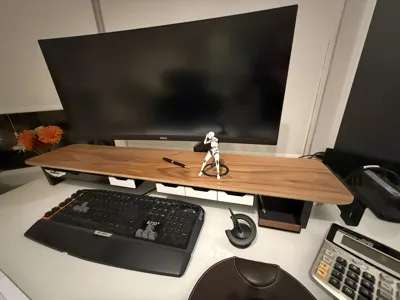
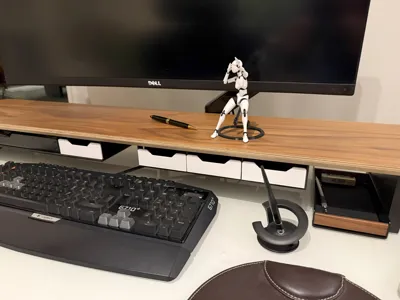
A Drawer System for the Balolo Setup Cockpit Monitor Stand
NOTE! The correct “all in one” 3mf file to grab is Balolo Drawer SYSTEM V4.3mf.
For some reason when I try to download the default 3mf file I just get "drawer.3mf" which is just the drawer print.
This is a printable drawer system for the excellent Balolo Desk Shelf / Setup Cockpit Monitor Stand Large = available here:
https://www.balolo.de/en/products/setup-cockpit-large
I haven’t tested it with their smaller stand but it will probably work just as well.
The reason I made this is that Balolo not only don’t do something quite like this but their small drawers are quite heavy, not as long and are a lot more expensive especially when you add in the tray! 😊
Requirements:
For one drawer:
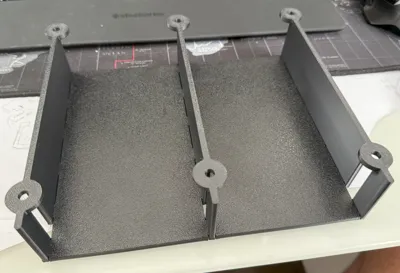
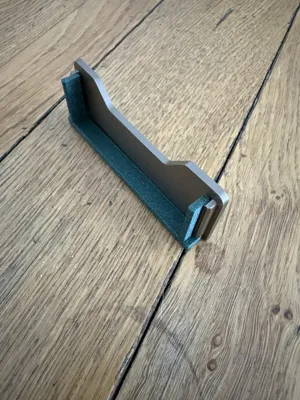
1x Left Wall,
1x Right Wall
1x Drawer Base
1x Drawer
4x Dome/Button head M5 x 12 machine screws with hex sockets, 16mm is probably the max
https://www.amazon.co.uk/dp/B08XZ684TF?ref_=ppx_hzsearch_conn_dt_b_fed_asin_title_2
More than one drawer:
As above plus:
1x Intermediate Wall
1x Drawer Base per additional drawer.
Printer settings for walls and drawer base:
25% Sparse Infill density – Gyroid although the default settings were also fine when I was testing.
Printer settings for Drawers:
25% Sparse Infill density - Gyroid
3 wall loops (this was really to make the drawer front more opaque with certain material types.)
I printed both the walls, drawer bases and the drawers with both PETG and PLA with no strength problems.
The drawer is made of parts. To change the colour/material of the drawer front:
In Bambu slicer (on PC) go to the “Process” panel on the left below the “Project Filaments” panel. Next to “Process” you should see “Global” and “Objects”. Click “Objects”. You should see the Drawer(s) listed in the panel below. Right click on a drawer, click “Split”, click “To Parts”.
You should now see the drawer parts listed, there should be three. The third one should be the drawer front. Right click this, select “Change Filament” and click the filament you want.
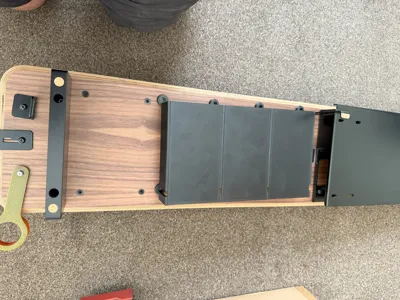
Assembly:
Fit the drawer bases to the printed walls to suit your installation.
The drawer bases will push fit to the walls tightly (you may need to use a fair bit of force) and once the whole structure is mounted on the stand it is really rigid. I didn’t use any glue at all but if your structure feels too flimsy or falls apart then a little superglue will help!
Note: I chamfered the mortices slightly to let the base fully meet up with the walls. It doesn’t really matter if you get a small gap, you won’t really see it when it is installed.
I would strongly recommend you attach the drawer frame to the shelf with it upside down!
Lay the drawer frame on your stand and line up the holes. Insert the screws and tighten with the Allen/hex key that came with the Balolo unit.
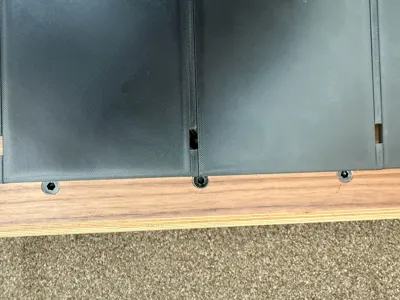
Once installed, the drawers just slide in. There should be a small gap between the drawer fronts (see pics).
Alternative options:
Because this is meant to fit in aesthetically with the Balolo shelf I made some effort to provide different methods of printing the drawer front.
The original print the drawer and front at once version worked fine for me but not for everyone which I suspect is filament dependent.
My V4 Main 3mf file should contain all the different options!
You can now print the drawer itself seperately:
Balolo Drawer Bottom Only V1.stl
Then choose from printing the front flat which is the most “perfect” option but will take the texture from your build plate and will look 3D printed with smooth or shiny filaments:
Balolo Drawer Front Only V1.stl
A second option is to print vertically with auto supports, this is likely to come out with a slight curve although it isn't noticeable from the front (in my prints!):
Balolo Drawer Front ALTERNATE UPRIGHT WITH SUPPORTS.3mf
A third option is to print with my designed supports. In my tests this keeps the front straight during the print but you may some very small layer shifts, note that I have a photos attached which show the three types together.
Balolo Drawer Front DESIGNED SUPPORTS.3mf
In my test print I can just about see a faint line when looking down from an angle on one of the tests I did.
EDIT! 5-1-26
A user (@keithrobertson) reported a problem with what I think is shrinkage of the drawer bottom making the drawer front have (in his case at least) a very noticeable line on it. I have now added some alernate files as 3mf and stls to print the main part of the drawer and the drawer front independently. You will need to use CA glue to attach the drawer front with this version but the drawer front will have a more consistent look. The drawer front should ideally be printed face down on the plate. To achieve the original look you would need to print the front upright and add supports to prevent the part from moving during the print and support the the locating walls at the bottom. I have uploaded a couple of photos of this alernate version.
My test print was on a textured plate, strength - infill gyroid, 25%.
Filenames:
Balolo Drawer Front and Bottom ALTERNATE.3mf
Balolo Drawer Bottom Only V1.stl
Balolo Drawer Front Only V1.stl
EDIT2: 5-1-26
Added a vertical supported drawer front. My test print looked great. There is a slight curve on the print but imperceptible unless you look very closely from the side. Two added files, a complete project file with all the parts including alternates (Balolo Drawer SYSTEM V2.3mf) and a file with just the drawer front.
Filenames:
Balolo Drawer SYSTEM V2.3mf
Balolo Drawer Front ALTERNATE UPRIGHT WITH SUPPORTS.3mf
EDIT3: 15-1-26
Added another drawer front option - Balolo Drawer Front DESIGNED SUPPORTS.3mf
This version has supports I designed to try to get the best possible look if you are using a shiny filament like PLA metal or silk and want a smooth look. The backing support keeps the front as flat as possible.
As with all the versions it may not be 100% perfect. I have added some photos comparing the three different looks:
Original which prints with the drawer itself and may show some layer shift especially at the base depending on what combination of filament you have.
The print flat version which takes the build plate texture
The vertical version with auto supports which looks good but isn't completely flat
The new vertical version which is flat but might have the odd very minor layer shift when printed. The one in the photo has a couple of lines which can be just about seen at certain angles with the naked eye.
License
You shall not share, sub-license, sell, rent, host, transfer, or distribute in any way the digital or 3D printed versions of this object, nor any other derivative work of this object in its digital or physical format (including - but not limited to - remixes of this object, and hosting on other digital platforms). The objects may not be used without permission in any way whatsoever in which you charge money, or collect fees.
Comment & Rating (25)