Espresso Cup Protector


Print Profile(1)

Bill of Materials


- Hlukana Porcelain Espresso Cups x 1: https://www.amazon.com/dp/B0CRKD19MP
Description
Want to enjoy your espresso in style while hiking or camping? This design utilizes the soft TPU 85A filament to create a cushion that can help protect your porcelain cup while you're traveling. As can be seen in the GIF attached to this post - I tested the design by throwing it at rocks and logs - not that I would recommend being that rough!
Device Options
Although only one print profile is included, this project is flexible to be printed on a variety of devices.
H2D Laser
- The .lac file for cutting the leatherette and etching with the laser is available in this profile.
- Dual-color along the Z axis works well with the H2D but would be wasteful with single-nozzle printers.
All other devices
- Printable on all models including A1 Mini
- There's an optional TPU strap that can be used if you don't have access to a laser cutter.
- Colors can be reassigned in Bambu Studio or handy for single-nozzle printers.
Parts

- Strap (leatherette or 3D printed)
- Cover (H2D Laser version only)
- Rim (H2D Laser version only)
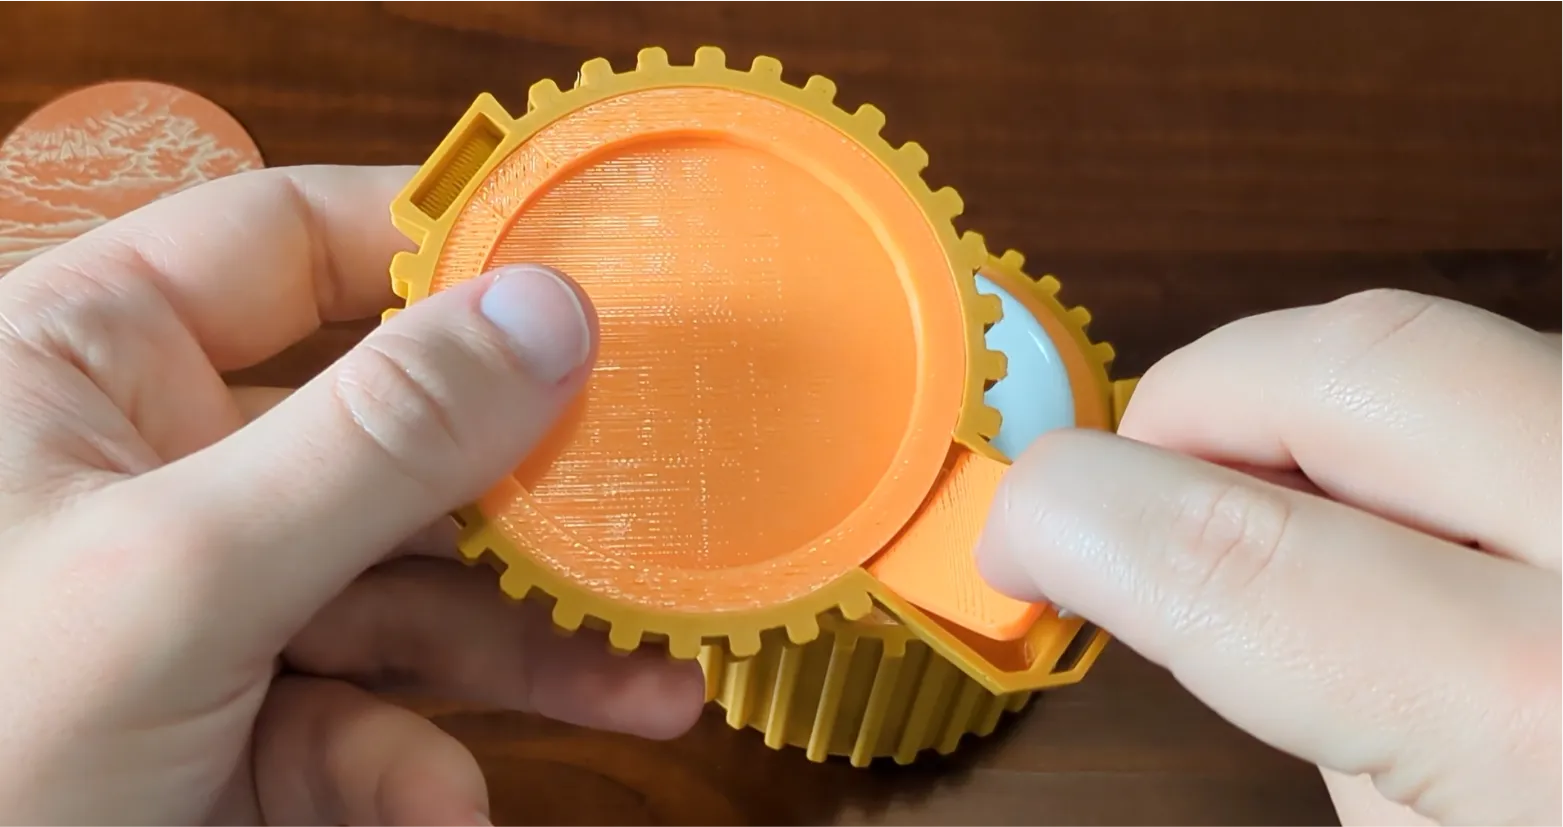
- Lid
- Case
- TPU Handle
- TPU Lid
- TPU Base
Assembly Instructions
 | Place the TPU base into the base. Because of the rubbery nature of the TPU, glue should not be needed but can be used if you'd like. |
 | Pres the TPU lid into the lid - leave the open area pointing out. |
 | Place the TPU handle into the lid. The beveled portion should be oriented towards the back. |
 | H2D Laser version only: Apply a small amount of glue to the top of the lid. |
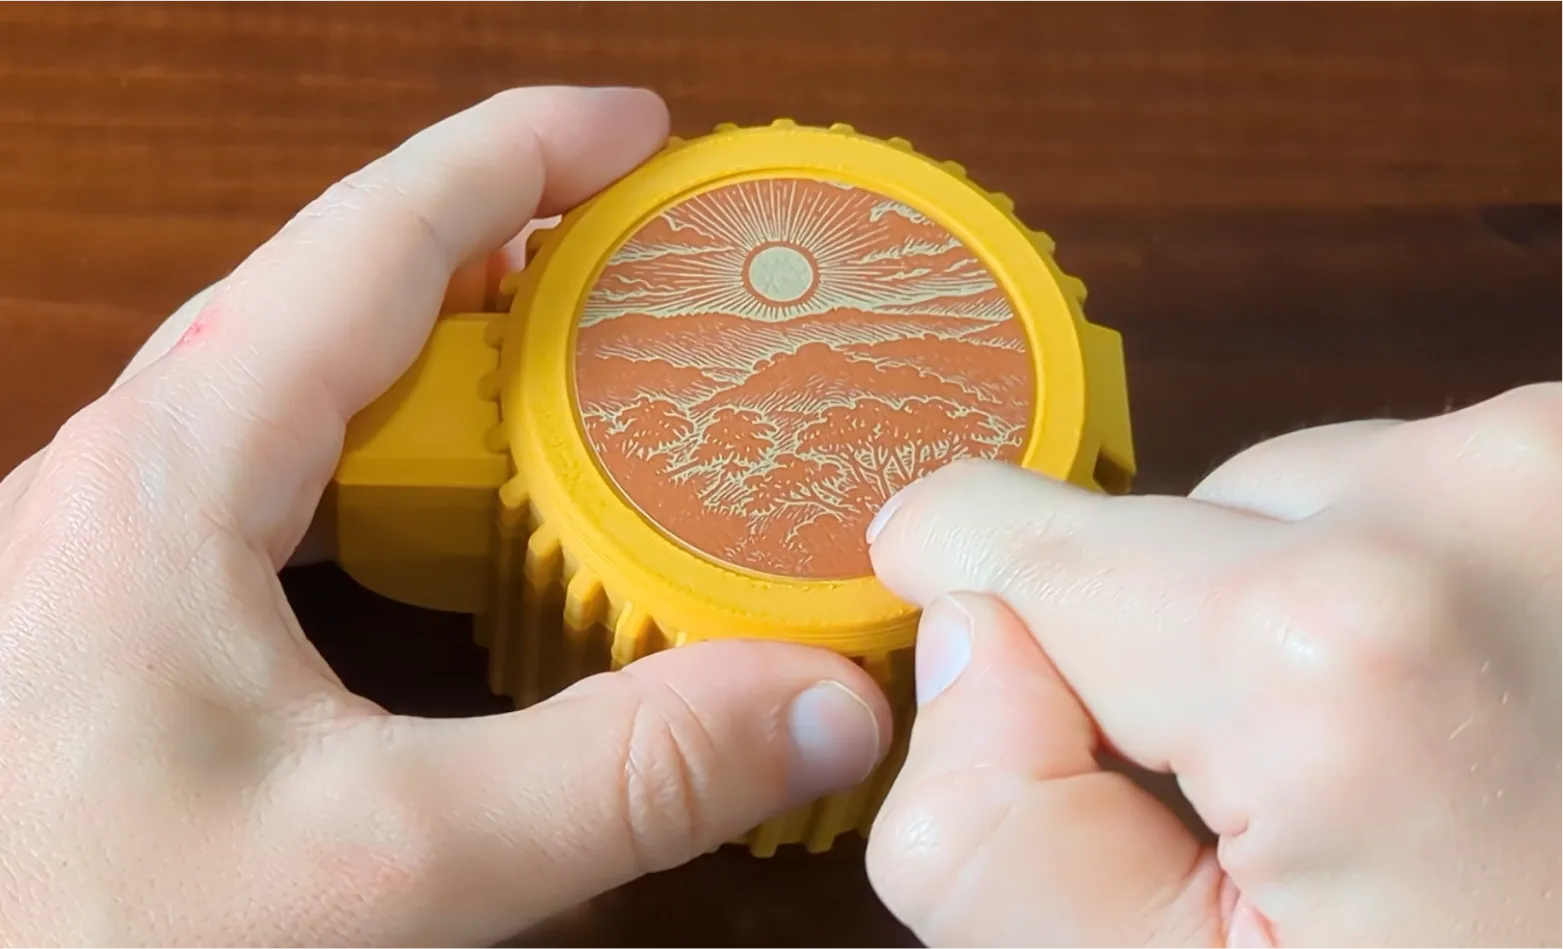 | H2D Laser version only: Place the cover graphic |
 | H2D Laser version only: apply glue to the outer rim between the graphic and the lip. |
 | H2D Laser version only: Place the rim onto the lid and press it until it dries. |
 | Attach the strap by feeding it through the gap in the handle and then over the peg. |
 | Pull the strap across the top of the lid to hold it secure. Then, press the hole on the strap over the nub to hold it in place. |
Printing Tips & Project Notes
- I have only tested the interior cushion with TPU 85A and recommend following the wiki carefully for this process.
- The included print profile utilizes the dual nozzles of the H2D for multi-color along the Z axis but this can easily be reassigned to a single color in Bambu Studio or Handy.
- Smooth PEI plate recommended for the most consistent surface quality.
- AI usage: although I create illustrations and sourced images for the card, I used an AI process to apply the woodcut effect. After that step, I locally created and cleaned up the vectors that are used for the cards.
Boost Me (for free)
If you enjoy my models and would like to support me, please consider sharing a boost!
Membership
Want to sell prints of my models? This Commercial Membership grants you a license to all of my MakerWorld models!
I love creating models to share for free, personal use. If you enjoyed this model, please consider buying me a coffee or joining me on Patreon.
License
You shall not share, sub-license, sell, rent, host, transfer, or distribute in any way the digital or 3D printed versions of this object, nor any other derivative work of this object in its digital or physical format (including - but not limited to - remixes of this object, and hosting on other digital platforms). The objects may not be used without permission in any way whatsoever in which you charge money, or collect fees.
Comment & Rating (16)