3D-Printed Rifle Bipod – Foldable and Adjustable


Print Profile(5)


Description
Hello everyone!
Update 03.07.2025: Uploaded Picatinny rail adapter !

Instructions for Use:
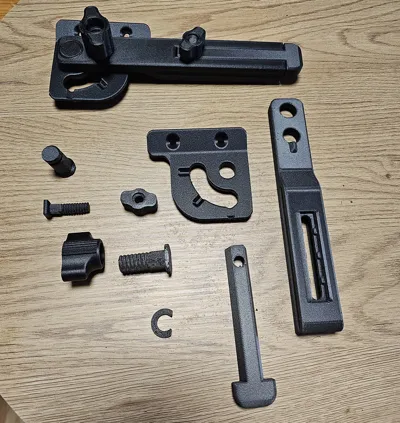
1. Print all parts from the Picatinny rail adapter print profile (legs, screws, etc. are from version 2.1).
2. Screw in the two screws until they sit flush with the inside of the mount.


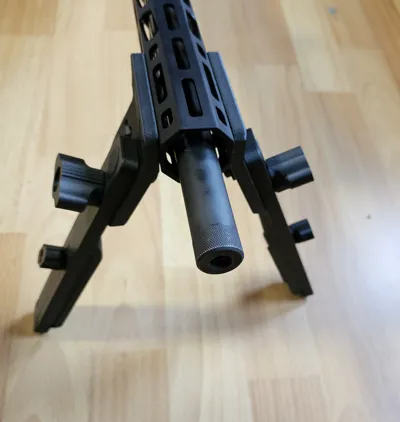
3. Insert the Picatinny locking board and install the bipod legs.


4. Slide the adapter onto your Picatinny rail. Tighten the screws and align them as shown in the photo. You can use the included locking bracket to assist with tightening. Do not over-tighten – just make sure the Picatinny board locks securely onto the rail.


5. Snap the locking bracket into place – this will prevent the screws from loosening.

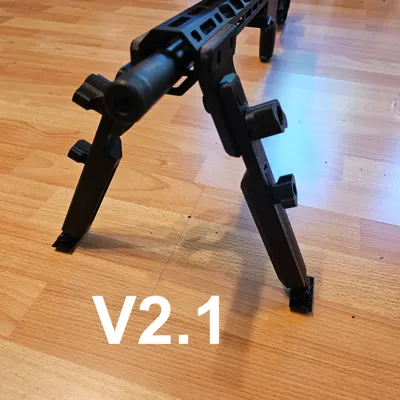
Update 15.06.2025: Uploaded version 2.1 with a redesigned leg extension (I suggest using TPU/TPU in the AMS for the foot). I've also added a separate print profile with only the legs in case you want to upgrade your already printed 2.0 version. :)
Version 2.1 features a movable foot for better ground adaptation.


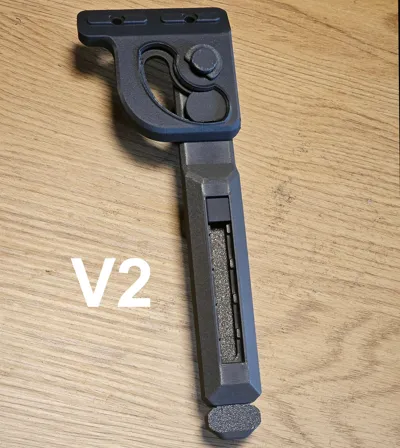
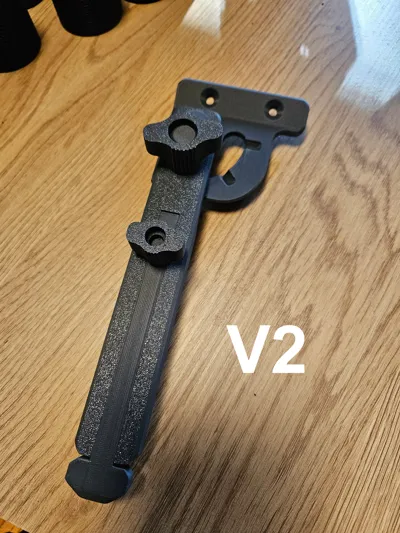
Update 29.05.2025: Uploaded a slightly modified version with a slightly different design. The new version is also more height-adjustable (21–28 cm).


Some time ago, I came up with the idea of making a bipod for a rifle, and now I'm presenting the first version.
I designed the bipod specifically for .22LR or .17HMR calibers, which I used for testing — and it performs great (it's more stable than many store-bought bipods).
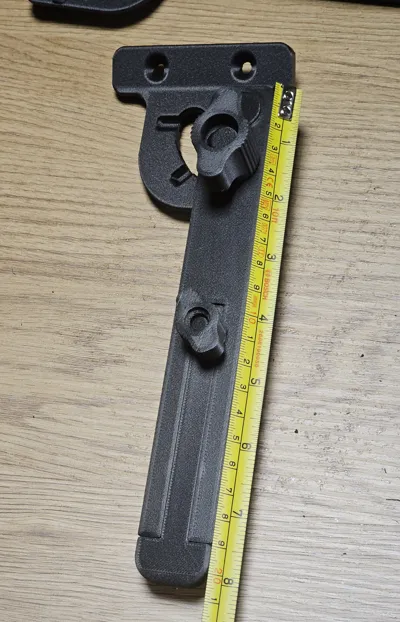
The bipod is foldable — just loosen the main knob and fold it flat.
To set the bipod at the correct angle, it has a notch that allows for positioning at 0–45–90 degrees. Once set, it should be locked with the main knob.
The bipod is also height adjustable in the range of 20–26 cm.
I suggest printing it in ABS or ASA. Personally, I printed it in PA12-CF because I also want to test it with a .223 caliber rifle (and it looks cool :) ).
I recommend printing the main mounting components with 100% infill, and the rest as you see fit.
The only additional parts you'll need are 4 standard M-LOK screws with nuts for mounting.
See assembly guide for help how to put it together.
Looking forward to your suggestions!
If you want to support my work:
Boost Me (for free)
If you like my work and want to see more, please consider boosting me. It would be greatly appreciated!
If you want to sell my models:
Membership
If you want to sell my projects, check out my commercial license !
Thank you so much for all your support!
Documentation (1)
License
You shall not share, sub-license, sell, rent, host, transfer, or distribute in any way the digital or 3D printed versions of this object, nor any other derivative work of this object in its digital or physical format (including - but not limited to - remixes of this object, and hosting on other digital platforms). The objects may not be used without permission in any way whatsoever in which you charge money, or collect fees.
Comment & Rating (58)