
P1S fan cover quick disconnect magnetic pogo pins
Print Profile(4)


Description
THIS IS A MOD THAT REQUIRES SOLDERING, YOU DO IT AT YOUR OWN RISK.
Another thing that bothered me about hotend swaps is the fancover :)

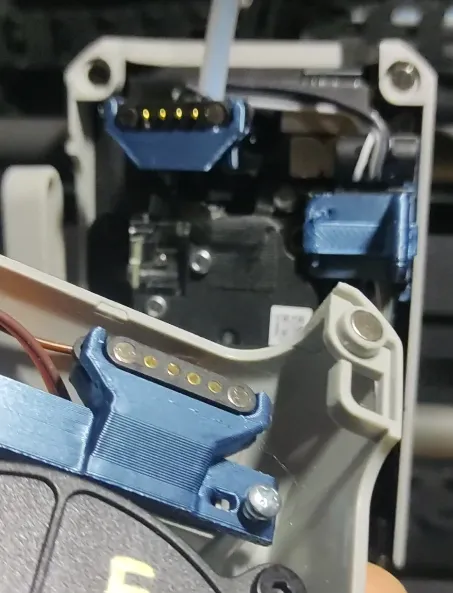
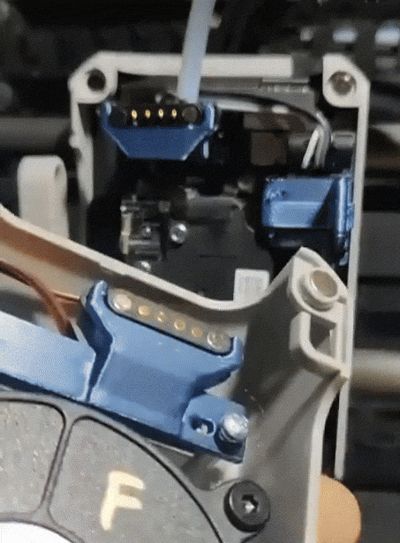
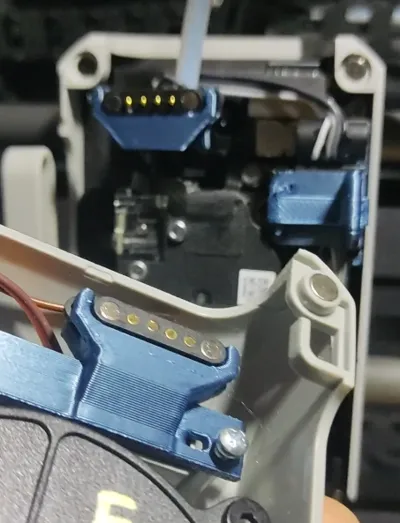
This mod is a way of adding magnetic pogo pins to the fan-cover of the P1S so that you can take it off a lot easier and don't have to wear out the fanpin everytime you do.
You’ll need a 4-pin magnetic pogo pin (the version with “ears”).
I recommend the type that comes with pre-soldered cables, like these:
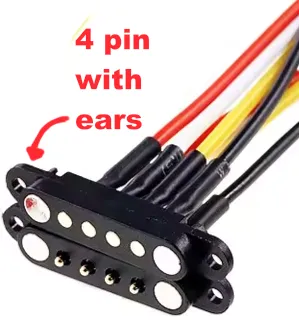
I bought mine on AliExpress: https://www.aliexpress.com/item/1005006531774076.html (First print profile 17.98mm)
(There is also a bit more expensive variant that you have to solder wires yourself on Amazon: https://www.amazon.com/Magnetic-Connector-Pogopin-Through-Connectors/dp/B0CSX5Z37W
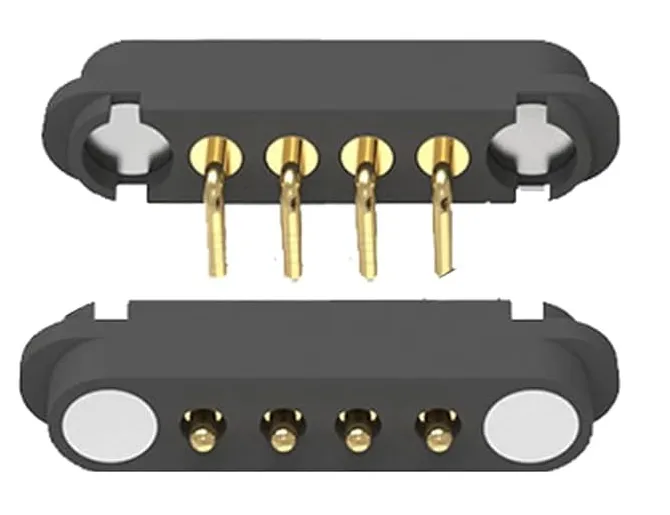
These are a tiny bit smaller at 17.54mm (third print-profile))
First before doing the installation you have to make sure that your POGO pins fit into the 3D model, after you confirmed that you can continue :)
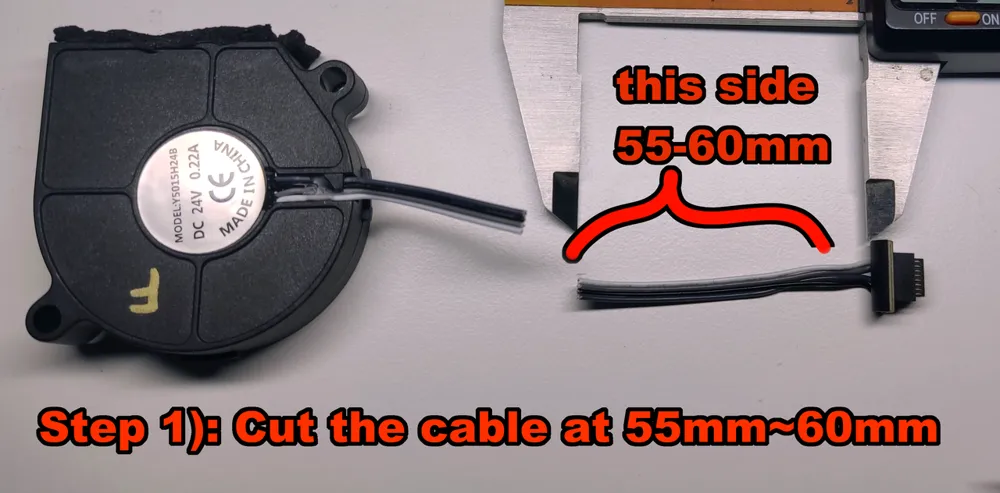
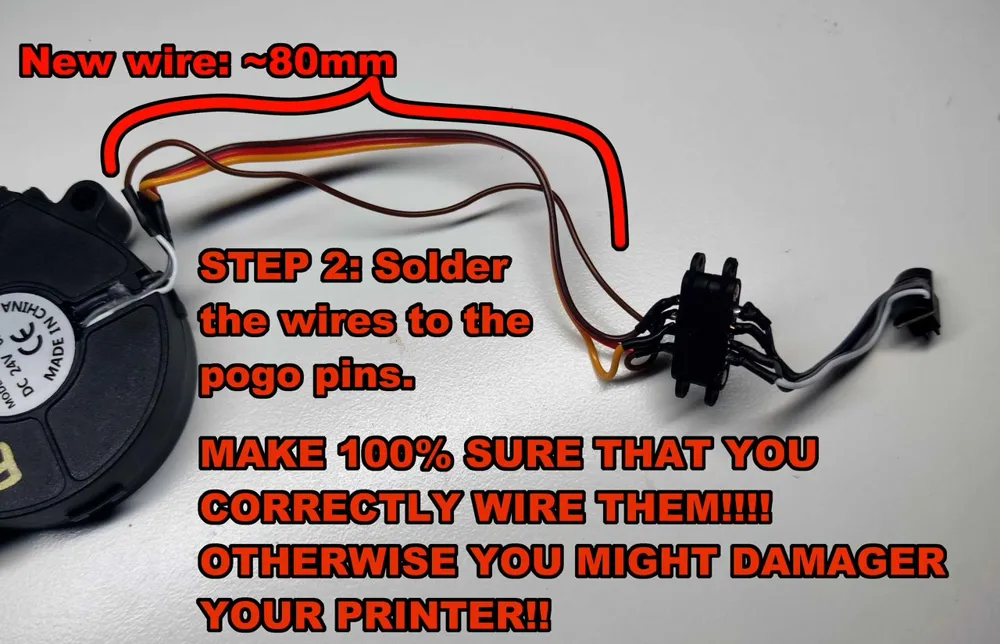
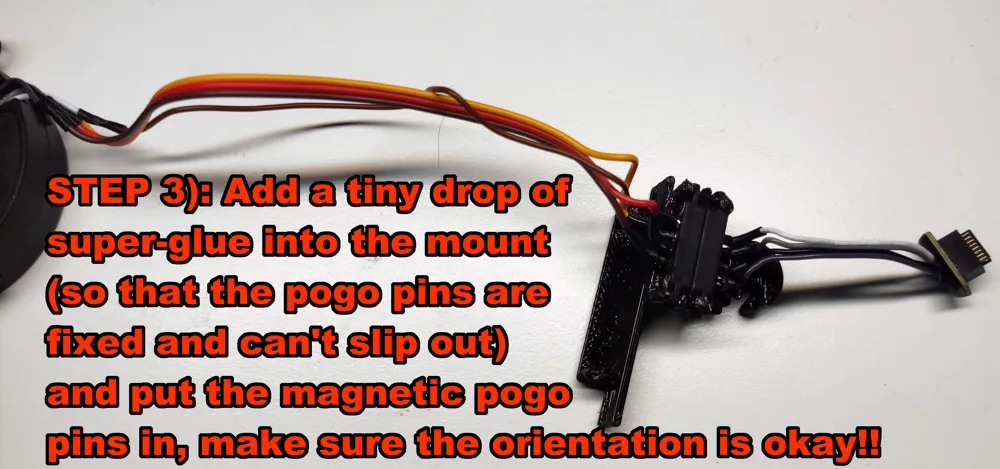
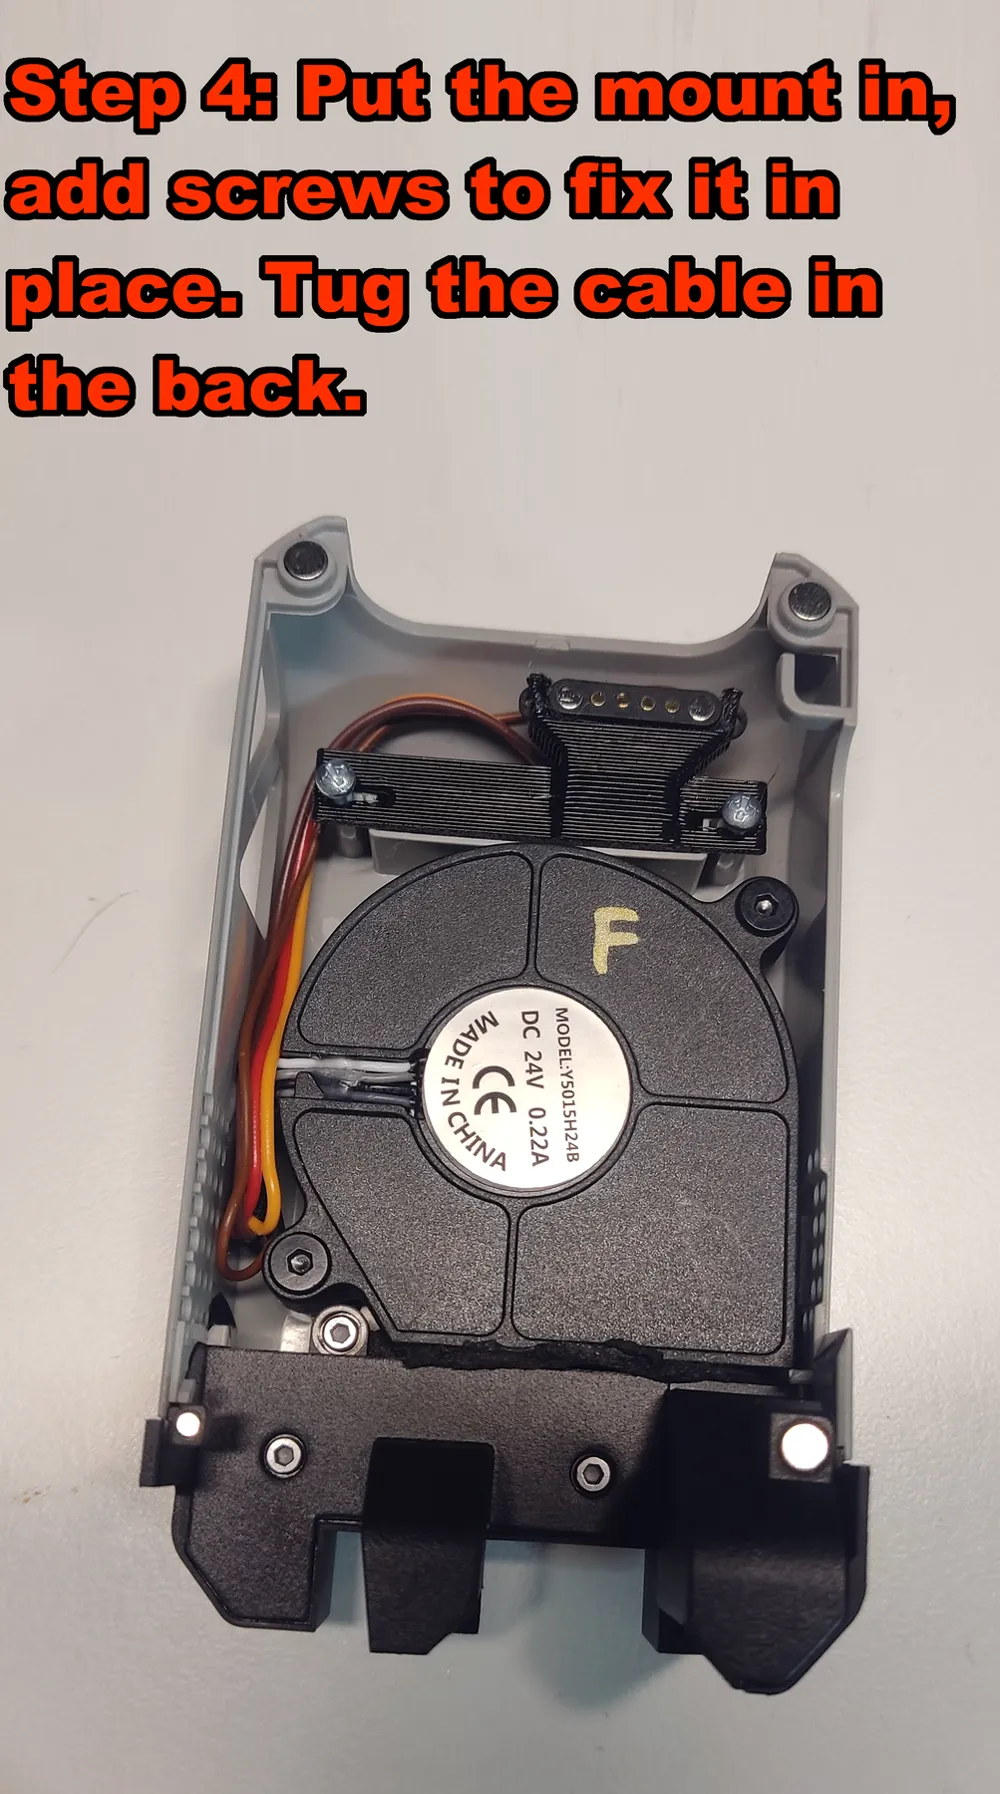
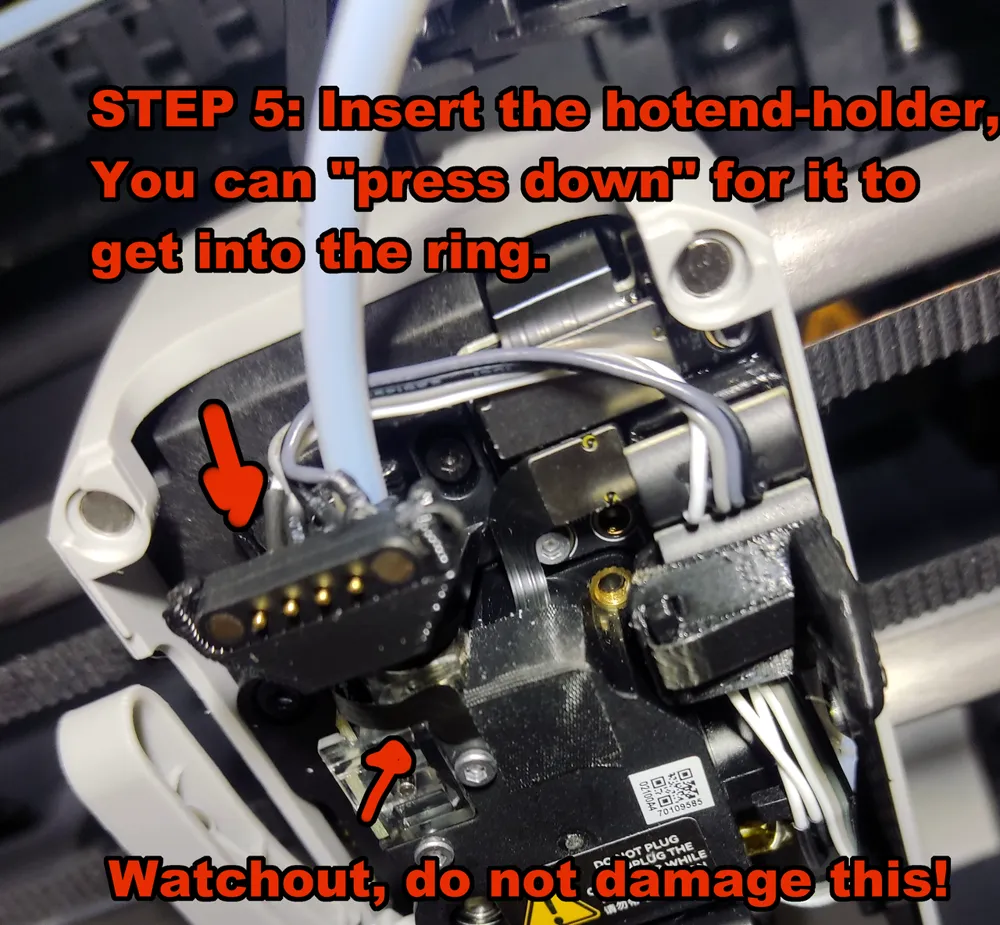
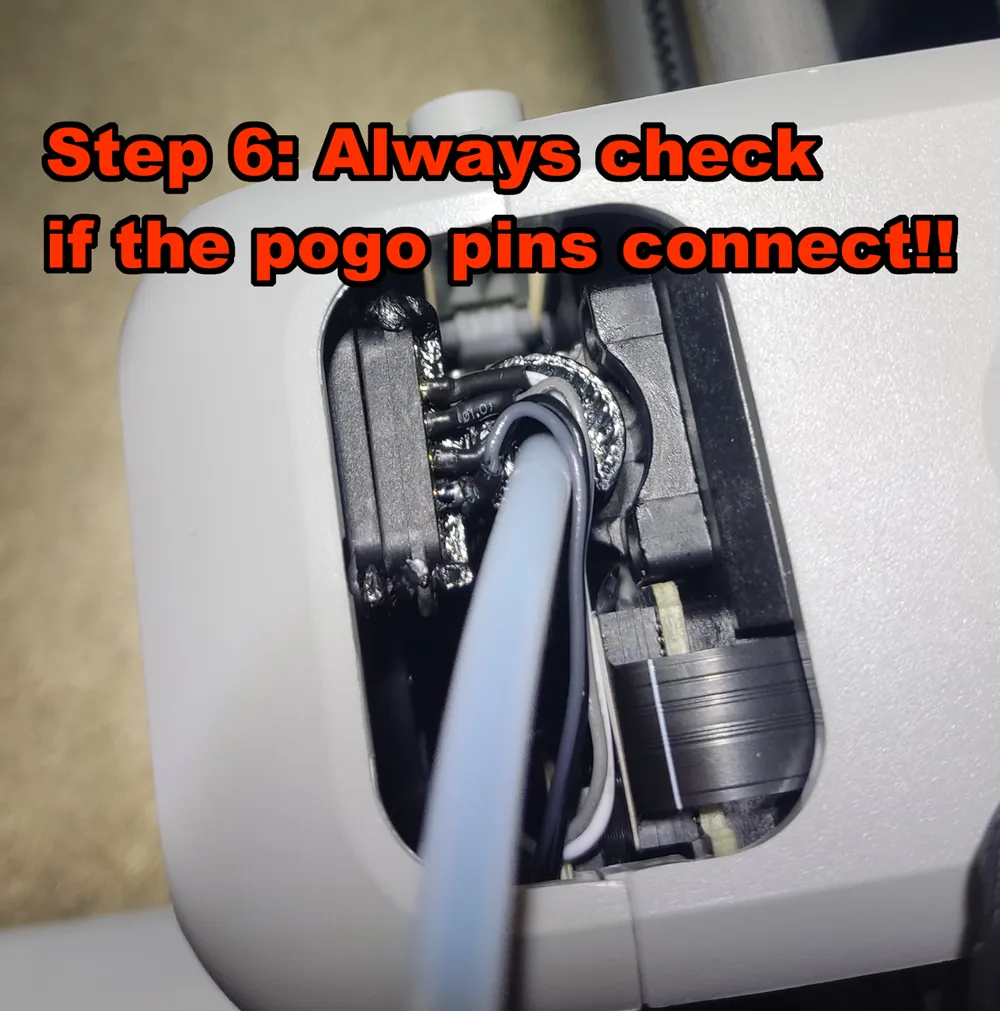
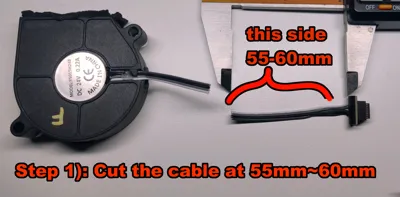
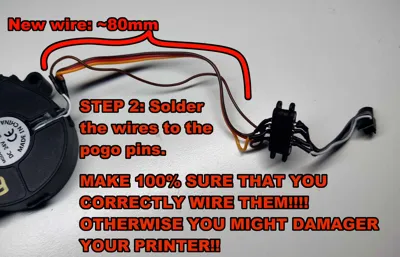
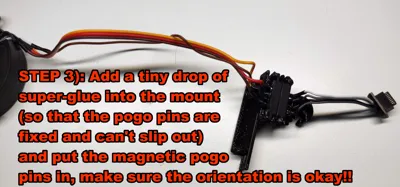
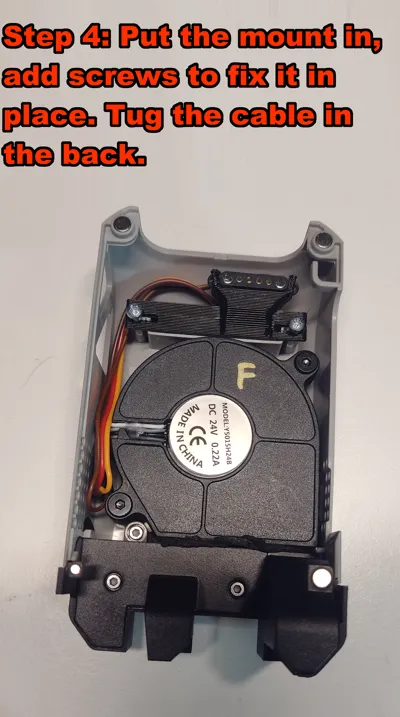
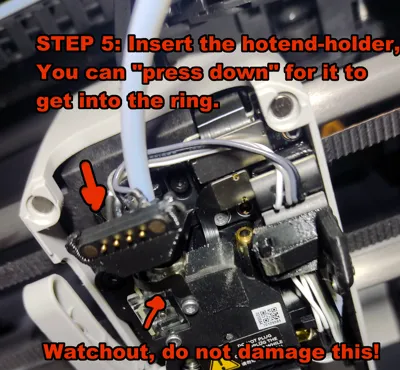
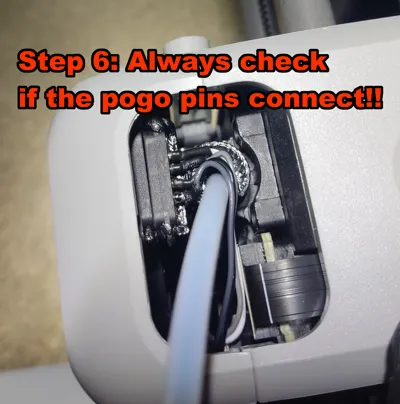
You first cut the fan connector (this is the “only” irreversible step of this MOD), then solder them to the POGO pins, and after that put those into the 3D model I made. After attaching the 3D mounts to your printer, you are ready to go!
If you don't want to modify the original part cooling fan of the P1S then another option would be to buy a cheap fan of AliExpress (I did that), they look like this and are cheap (https://www.aliexpress.com/item/1005008987356758.html or this one which has those soft edges: https://www.aliexpress.com/item/1005009787949319.html ):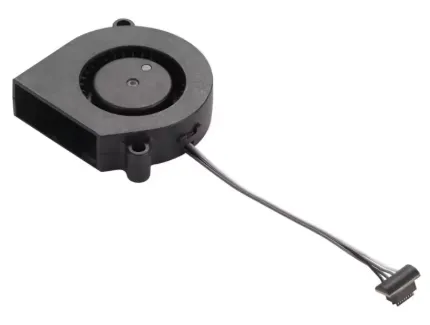
A few more steps by step images on how long to cut the cables are provided in the image gallery/assembly guide.
I recommend using this in conjunction with my Quickswap V2 Plug Mod
I've been using this for a few days now, without any issues, and swapped out my nozzles quite a bit.
Updates:
- 13.07.2025: hotend-side can't fully swivel around anymore, improved holding strength and part strength
Again: Because this is a modification, you apply it at your own risk, I’m not responsible for any issues that may occur. Please make sure that the connection of the plug is very well, because a lot of power is going through those connectors and if you don't properly plug it in it might melt (this is always the case even without this mod)!
Documentation (1)
License

You shall not share, sub-license, sell, rent, host, transfer, or distribute in any way the digital or 3D printed versions of this object, nor any other derivative work of this object in its digital or physical format (including - but not limited to - remixes of this object, and hosting on other digital platforms). The objects may not be used without permission in any way whatsoever in which you charge money, or collect fees.


Comment & Rating (72)