Mini Flat Pack Chess Board (easy 2-piece glue-up)


Print Profile(2)
Bill of Materials


- Wood glue x 1:
Description
If you like my models, don't forget to boost, download, like, rate, share and all that good stuff!
Boost Me (for free)
Boosts enable me to keep going while still sharing all my models free 😎 So thanks for considering! 🎉🥳
If you like my models, please like, share, download, boost, rate and all the amazing good stuff!
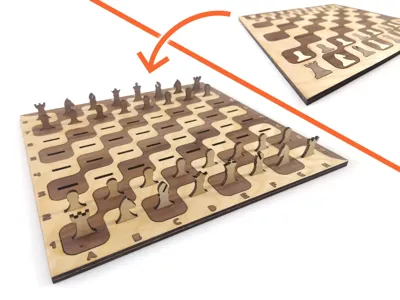
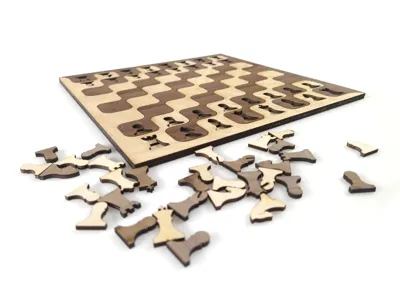
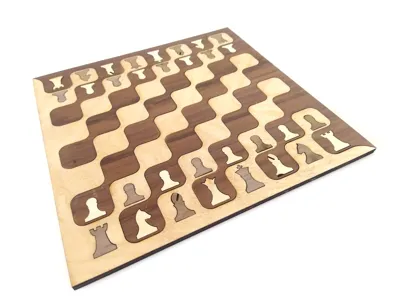
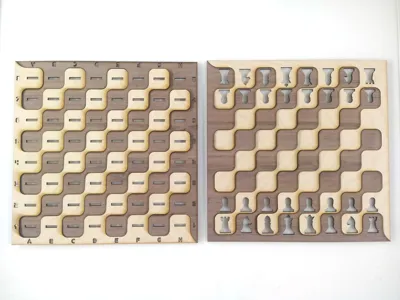
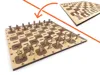
A chess board consists of 64 squares. I really wanted to laser cut one but that would mean a very hefty glue up!
So I designed this board where all squares are connected on the diagonal. This way you only have two main pieces that just interlock.
Furthermore, the ‘cutoff’ of one color is used to cut out the play pieces and combined with the other cutoff forms the bottom of the chess board. This also means that you can conveniently store the pieces into the bottom of the board, creating a nifty flatpack travel board!
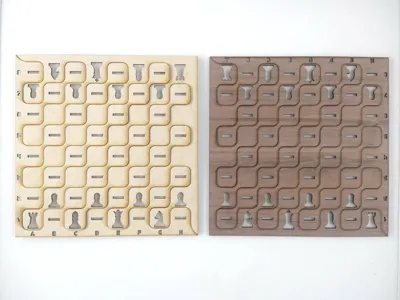
!! Important !! It is important that the outline of the board gets cut before the pieces and slots. Therefore I have given the outline the “Laser Line” property to force Studio to do that first. It is thus Essential that you adjust your Laser Line settings to be the same as your Laser Cut settings, otherwise you will waste a piece of stock material.
Have fun with my models! And don't forget to follow if you want to see more of my upcoming designs.
Happy laser cutting!
- Rossero
Don't forget to check out my latest models (clickable images):


Harry Potter Labyrinth Game ~ TriFlex - Super Flexible Fabric ~ Melting Drip Clock
Membership
It is Essential that you adjust your Laser Line settings to be the same as your Laser Cut settings (see description and photo below)

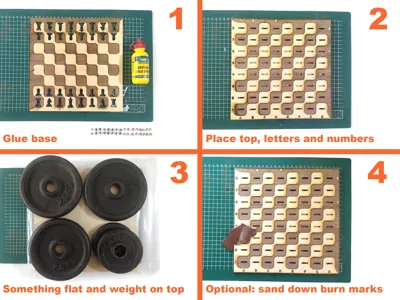
Place the bottom pieces as in the image and carefully (but quickly) apply glue to the whole surface. It helps if you sort the letters and numbers beforehand.

Line up the top surface in the orientation as shown in the image on top of the bottom layer. Don't forget to drop the letters and numbers into their correct cutout.
Place something flat on top of the board (I used Bambu stock material in its zip lock bag) and weigh it down properly and wait the recommended time (read the manual of your glue)
Depending on the material and laser used there might be some burn marks visible. I gave my board a quick sand down and a touch of oil to bring out the best of the wood
License
You shall not share, sub-license, sell, rent, host, transfer, or distribute in any way the digital or 3D printed versions of this object, nor any other derivative work of this object in its digital or physical format (including - but not limited to - remixes of this object, and hosting on other digital platforms). The objects may not be used without permission in any way whatsoever in which you charge money, or collect fees.
Comment & Rating (1)