Polaris Northstar Starlink Mini Mount


Print Profile(4)


Description
Explanation:
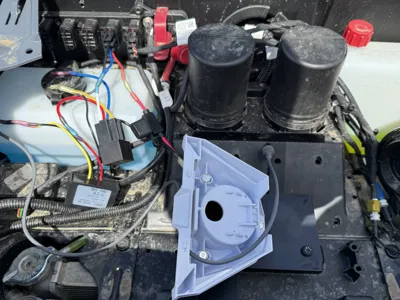
I couldn't find a mount that would fit in the under the hood of the Northstar Polaris XP's, so I made my own.
The build is in two separate STL's, to improve prototyping speed, as well as building with absolute minimal supports.
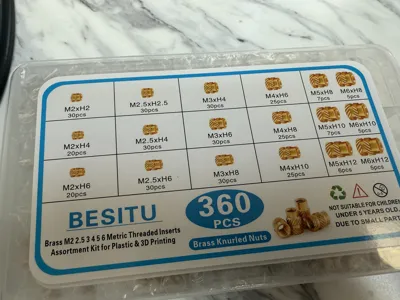
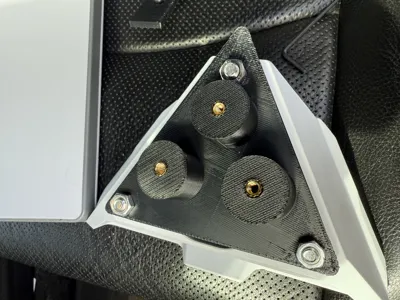
I chose to join the base and the stand with brass threaded inserts, super easy to insert into the pilot holes just watch a youtube video, 2 seconds with a soldering iron.
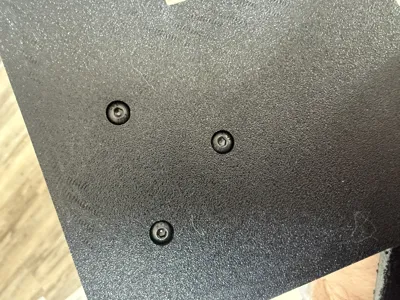
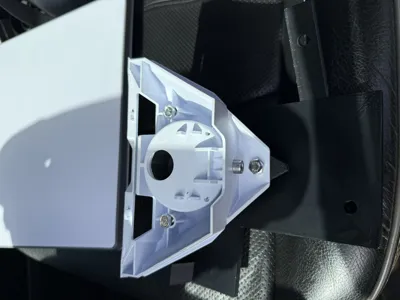
use M4xH8 threaded inserts for the stand pilot holes, and M4x8 (i prefer non socket caps so the heads go into the counterbore'd holes and sit flush)
All holes are already pre-drilled in the machine so you do not need to drill new holes.
I printed my final version with Bambu ASA Black Filament. Roughly about a 6 hour print using the 0.12mm High Quality profile.
Install Steps:
- Relocate the ride command antenna over to the side, mount it however you want, there are very convenient locations already available.

- Insert Brass Threaded Inserts M4xH8 into Stand pilot holes (click the link to see which ones I used) Here's also a VIDEO of how to insert them, couldn't be easier.
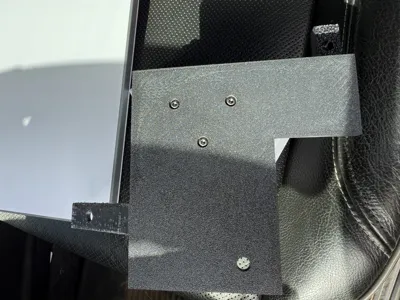
Secure the Starlink Pole Mount to the Stand portion, I used M4x12 for the front, and M4x20ish for the two rear holes (look at pictures for reference)

Mount the stand to the base using the threaded inserts and M4x8 bolts.


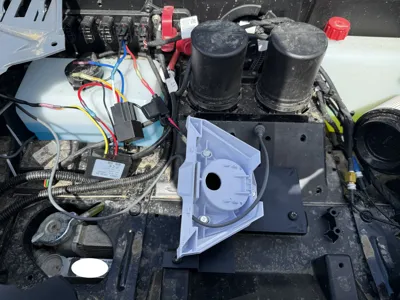
Mount into the machine as shown ( I just re-used the two screws from moving the antenna)

- Simply wire in a power cord for the Starlink Mini (For now I chose to use an automotive relay, a 12→24VDC step up converter and a 10A inline fuse. (The starlink can run between 12→48VDC, since the machine obviously produces 12VDC, I wanted to bump it up a little bit, I'm sure it'll work fine straight off the 12VDC)
- 12→24VDC Stepup Converter
- Automotive Relay
- 10A Inline Fuse
- USB-C Starlink Power Cable cut and spliced to the power output of the step up converter
- Pulse Bar Plug with dead ends
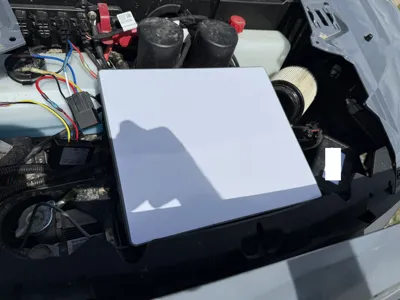
Ta-da!

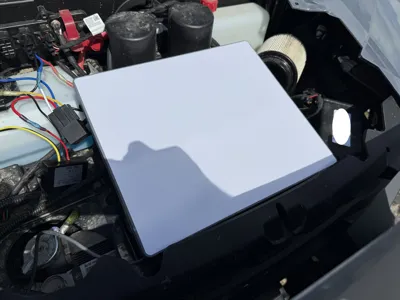
That should be it! Slide your Starlink mini onto the pole mount, throw your hood on and off you go! Now you have internet, and your starlink is safe from growing legs and running away, and from any crazy weather!
If you wonder how much it affects the signal, it barely does. Just remember that the Starlink Antenna is sitting under the same plastic roof.
License
You shall not share, sub-license, sell, rent, host, transfer, or distribute in any way the digital or 3D printed versions of this object, nor any other derivative work of this object in its digital or physical format (including - but not limited to - remixes of this object, and hosting on other digital platforms). The objects may not be used without permission in any way whatsoever in which you charge money, or collect fees.
Comment & Rating (9)