AMS Lite 2.1 for IKEA ENCLOSURE


Print Profile(1)

Bill of Materials


Description
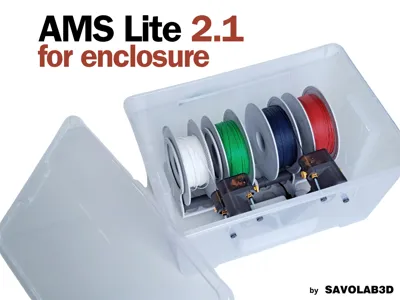
AMS Lite 2.1 – Upgrade for Ikea Enclosure
The new AMS Lite 2.1 introduces some modifications compared to version 2.0, allowing it to fit perfectly inside an Ikea box for optimal filament humidity control.
This version includes the following updated parts:
- C.1 (formerly C)
- C1.1 (formerly C1)
- C2.1 (formerly C2)
The assembly remains the same as in version 2.0 but requires the use of these updated components.
Useful Links:
🔗 AMS Lite 2.0 (missing parts and assembly instructions)
📝 Important Notes:
Some small PTFE tubes are required to connect the motor blocks to part D.
- The installation of part D is very simple:
- Insert the small washer inside the female part of part D.
- Drill 8 mm holes in the box for the PTFE tubes to pass through (a PDF template for precise drilling is included).
- When using the template, make sure to align the top edge of the template with the top edge of the box: this way, the holes will perfectly match those of the AMS.
- Before drilling, place the AMS inside the box and check that the markings correspond with the motor block holes.
If you find small misalignments, you can use a simpler method: look closely at the holes from the front, manually mark the points on the plastic, and proceed with the drilling.
- ⚠️ Caution during the assembly of part D:
- When screwing the female part to the male part through the hole in the box, make sure the washer is perfectly straight.
If it bends or shifts during screwing, it could obstruct the hole and compromise the flow.
- ⚠️ Caution with the connection holes of block C.1 to the C1.1 and C2.1 arms:
- These holes are delicate; over-tightening the screws could strip the plastic.
During testing, I verified that moderate tightening is enough to keep everything stable and functional.
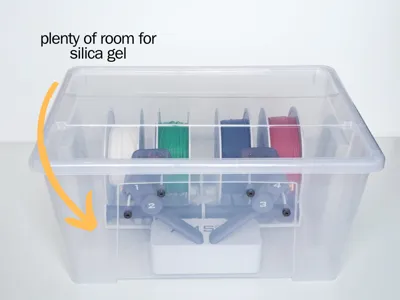
- Silica gel:
- I have not provided dedicated containers for silica gel, as there are already many models available online.
I recommend choosing one that best fits your needs.
- Correct positioning of the AMS inside the box:
- To ensure optimal filament movement, it is crucial that the front part of the AMS, where the C block and the motors are located, is completely against the front wall of the box.
- This allows the spools to rotate freely at the back without hitting the wall.
To keep the AMS perfectly in place, you can adjust the length of the PTFE tubes: if cut to the right size and anchored to part D, they will hold the AMS stable and equidistant from the rear wall.
- Thread and PTFE hole tolerances:
- The threads on block D and the holes for the PTFE tubes have been tested using Bambu Lab filaments.
- If you use filaments from other brands or different materials, there may be slight tolerance variations.
In that case, it may be necessary to slightly scale the model before printing to ensure a perfect fit.
- Installation above the printer:
- I have not designed a model to install the enclosure directly on top of the printer, as the purpose of AMS Lite 2.1 is to prioritize user convenience over compactness.
- Mounting the enclosure on top of the printer would increase its overall height, making filament loading much less practical and defeating the purpose of its ergonomic design.
However, if you need to save as much space as possible, you can consider installing a shelf above the printer, allowing you to store the enclosure neatly and accessibly without sacrificing usability.
- Power Cord Management:
- You will need to drill a hole in the back wall of the box to run the power cord through.
- If you do not want to buy an extension cord, be careful to position the hole correctly.
- I personally drilled the hole in line with the fourth coil (motor 4 on the AMS) and had no problems.
- If possible, I recommend doing some tests first: if the hole is too far from the AMS, the cable may not be long enough.


Boost Me (for free)
🚀 Thank you for downloading my model! If you enjoyed it and would like to support me even more, you can use the Boost.me feature: every contribution helps me keep creating new projects.
Documentation (1)
License
You shall not share, sub-license, sell, rent, host, transfer, or distribute in any way the digital or 3D printed versions of this object, nor any other derivative work of this object in its digital or physical format (including - but not limited to - remixes of this object, and hosting on other digital platforms). The objects may not be used without permission in any way whatsoever in which you charge money, or collect fees.
Comment & Rating (39)