Acrylic Enclosure for A1/ A1 mini and Many Others


Print Profile(1)

Description
🛡️ Simple Enclosure for A1 mini
Minimal build. Maximum practicality.
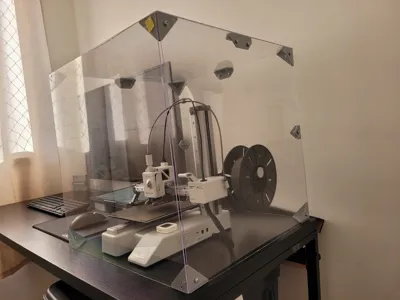
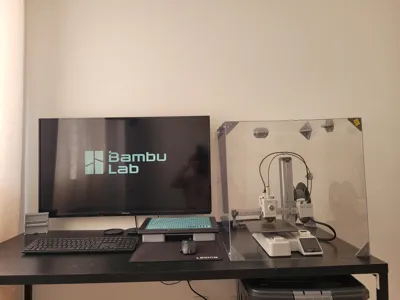
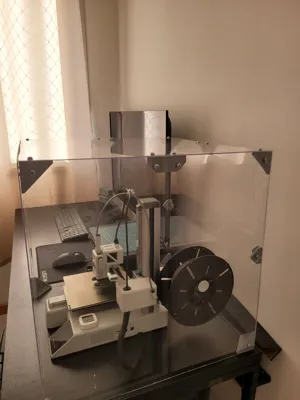
This is a clean, no-frills enclosure for the Bambu Lab A1 mini, made using standard acrylic sheets and 3D printed brackets. It’s designed to keep your printer protected from dust, pets, drafts, or curious fingers — while keeping the build process super simple.
The front lid is magnetically attached, so you can remove it completely whenever you need full access.
🔧 Why this design?
I wanted an enclosure that didn’t require hinges, complex tools, or bulky hardware. Just basic acrylic panels, a handful of printed parts, some screws and magnets — and that’s it.
It’s ideal for small spaces, beginner-friendly, and budget-conscious, without sacrificing aesthetics or function.
🧩 Features
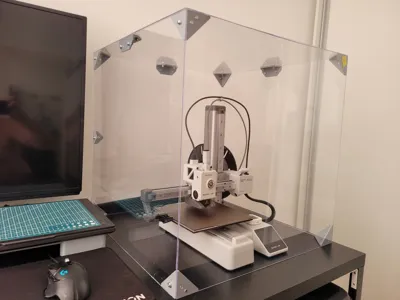
• ✅ Clean, minimal look — fits the A1 mini perfectly
• ✅ Magnetic front lid — easy to remove when needed
• ✅ Lightweight — uses 2mm acrylic sheets
• ✅ Minimal parts — all STL files included
• ✅ Keeps dust out and heat in — ideal for consistent printing conditions
• ✅ Budget build — efficient use of materials
• ✅ Quick assembly — glue or screw the brackets and you’re done
🛠️ What You’ll Need
• Acrylic sheets — I used 5x 500mm x 500mm, 2mm thick stock, cut to size
• 3D printed brackets — all STL files included:
- 4× Corner Bracket with Holes
- 4× Corner Bracket with Magnets
- 2× Side Brackets
- 2× Top Brackets
• Hardware:
- 36× M4 bolts with washers and nuts (12mm length)
- 8× 5mm x 2mm neodymium magnets
💬 Notes
This is a great starter enclosure for anyone using the A1 mini without AMS. It keeps your space tidy and helps with print consistency, especially in dusty or shared environments.
If you want something sturdier, consider using thicker acrylic sheets — while 2mm works well and holds itself together just fine, I wouldn’t recommend putting weight on top of it.
Let me know if you remix or improve it — I’d love to see what you come up with!
🖼️ Assembly Pictures & Tips
Here are a few tips that helped during my build — and might help you too:
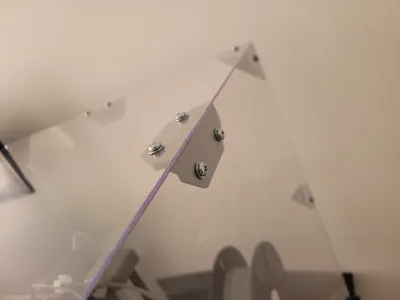
• To drill holes in the acrylic, I first positioned the bracket exactly where it needed to go, then temporarily held it in place using double-sided tape. After that, I carefully drilled through the holes using a rotary tool (like a Dremel), going slowly to avoid cracks.

• Important: Only remove the protective film from the acrylic after the full assembly is complete. This helps avoid scratches during the build process.
• The magnets were glued in place using super glue. Make sure to double-check the polarity before gluing!

A good trick: stack your magnets, mark one side with a sharpie, and always glue the marked side inward or outward consistently depending on the bracket type. This ensures the front panel snaps in securely instead of repelling.

License
You shall not share, sub-license, sell, rent, host, transfer, or distribute in any way the digital or 3D printed versions of this object, nor any other derivative work of this object in its digital or physical format (including - but not limited to - remixes of this object, and hosting on other digital platforms). The objects may not be used without permission in any way whatsoever in which you charge money, or collect fees.
Comment & Rating (11)