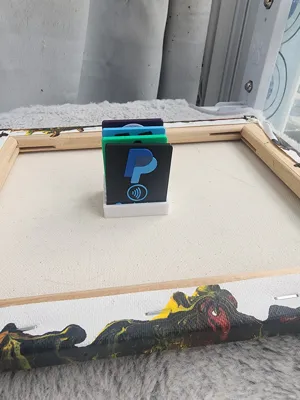
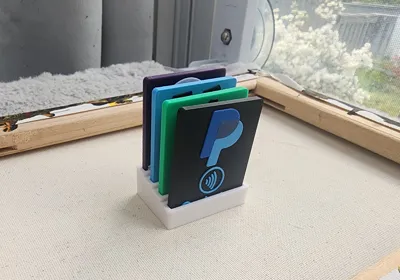
NFC Tag Cards - Payment & Social Media


Print Profile(6)


![TRIP ADVISOR [REQUEST]](https://makerworld.bblmw.com/makerworld/model/US1f3050ca6e89b5/456761868/instance/2025-10-29_72c2eee9f81b7.jpg?x-oss-process=image%2Fresize%2Cw_100%2Fformat%2Cwebp)
Description
Fully customizable NFC tags for various payment methods and social media.
If you'd like a card that isn't there, please let me know and I'd be happy to add it!
Due to the required customization of the text, this profile is not Handy compatible, I apologize.
Note: Zelle & Apple Pay do not come with an NFC slot because there is no direct link to those profiles.
The Spotify Wave Code is actually the Wave Code for Rick Astley's Never Gonna Give You Up, but I have not been able to get it to read after printing, so at this point, it's just there for aesthetic.
TikTok and PayPal come in 2 variants to allow 2 color manual swapping for those without an AMS.
Stands for the cards come in variants from 1 slot all the way to 7 slots. There are also face plates included on the plate which can be glued to the front of the stands. The text on them can be manipulated in Studio. Instructions for editing text is below if you need help. Be sure to disable any pauses in the slicer when printing the stands or faceplates.
AliExpress link to the NFC tags used in this model: 13.56MHz Ntag215 NFC Coins Adhesive Cards Badge Backing 504 Bytes ISO/IEC 14443 A 25mm Waterproof PVC 215 Tag
The NFC tags measure 25mm diameter and 1mm thick and have an adhesive backing.
You will also need to download an NFC writing app
 I recommend NFC Tools: Apple | Android
These cards are designed very small, so longer handle names will be difficult to print. If you want a larger card for more room, instructions are provided for proper resizing at the very bottom.
It's not a bad idea to do a test print of at least one card before including an NFC chip to ensure the text is legible.
I have successfully printed all of the cards in this profile other than Apple Pay and the 2-color TikTok / PayPal cards. NFC is readable on my Android device.
Boost Me (for free)
I spent a lot of time designing these and getting the print profile and instructions ready. I am really excited about sharing it with you all!
HOW TO SET UP & PRINT
Instructions for printing without an AMS are in the next section.
Do not change the layer height from 0.2!!!
- Add a new plate and drag the card you want to print to it
- Make sure the cards are in a good access position to add in the NFC card (for enclosed printers, close to the front)
- On the lefthand tool bar, under Process, click “Objects”

Find the text layer “ABC_Handle” for the card you want to edit, and make sure only that line is selected, not the entire assembly.

In the top toolbar, select the Text Editor. It will be grayed out if you did not select the text layer properly.

Edit the text as necessary for your information. DO NOT CHANGE THE THICKNESS OF 0.6!
The text is already centered on the card, so it should stay centered as you change the text.
- Set your filament as normal and slice the plate.
Confirm there is a pause at layer 12, 2.40mm height. It will show up in the layer slider on the right side of the screen.

- Send the job to the printer. It will pause right before the hole for the NFC tag is bridged closed.
- Peel the sticker off the NFC tag and place it into the slot. Be sure to press down firmly. It will sit flush with the current printed surface.
Resume the print to complete.
- The NFC tag can be coded before or after the print, but follow the Writing App's instructions to do so.
Setting up the cards without an AMS
Do not change the layer height from 0.2!!!
- Add an empty plate and drag the card you want to print to it
- Make sure the cards are in a good access position to add in the NFC card (for enclosed printers, close to the front)
- Click on the card so the entire assembly is selected, and Right Click → Change Filament
- Set the assembly to the filament you want as the card/first to print. It will overwrite the part colors and set the entire assembly to one color.
- On the lefthand tool bar, under Process, click “Objects”
Find the text layer “ABC_Handle” for the card you want to edit, and make sure only that line is selected, not the entire assembly.
In the top toolbar, select the Text Editor. It will be grayed out if you did not select the text layer properly.
Edit the text as necessary for your information. DO NOT CHANGE THE THICKNESS OF 0.6!
The text is already centered on the card, so it should stay centered as you change the text.
- Set your filament as normal and slice the plate.
Confirm there is a pause at layer 12, 2.40mm height. It will show up in the layer slider on the right side of the screen.
Set a second layer pause at layer 16, 3.2mm height to allow for a filament swap for the text and logos.
- Send the job to the printer. It will pause right before the hole for the NFC is bridged closed.
- Peel the sticker off the NFC tag and place it into the slot. Be sure to press down firmly. It will sit flush with the current printed surface.
Resume the print until the filament swap, and then resume once more to complete.
- The NFC tag can be coded before or after the print, but follow the Writing App's instructions to do so.
HOW TO RESIZE THE CARDS AND STANDS
- Move the card you want to edit to a blank plate
On the left-hand toolbar, under Process, click “Objects” and click on the object “ABC_Rectangle”
Make sure only the rectangle object is selected!

- In the top toolbar, select the “Scale” tool

Edit only the X and Y sizes. DO NOT edit the Z height!
The card will scale from the center, keeping everything in place
If you are manually entering new dimensions, make sure “uniform scale” is not checked.
- The logos can also be resized in the same manner, but make sure only that object is selected before scaling.
To move them, I recommend using the Move tool (two left of the Scale tool). Click and drag the arrowheads of the X or Y axis (red or green) that appear so the Z height (blue) or centering is not affected.

When you are done resizing and adjusting, select the ABC_Rectangle object again and open the Scale tool again. Take note of the new width of the card. In this example, the card is set to 65mm.

Select the correct stand you want to resize, and choose the Measure tool. Click on one of the long edges of the slot to check it's length.

Select the Scale tool and only edit the stand's width until that measurement is the width of the card + 0.6mm. You'll have to switch between the Scale and Measure tool until complete. Make sure you are measuring the width of the slot and not the entire stand.
For the example, it would need to be 65.6mm. It doesn't need to be exact, but width + 0.6mm gives a nice fit, just don't make it any smaller than that.
If using a faceplate, resize the width to 0.6mm less than the width of the resized stand. To not change the height or Z dimension of the plate.
This is necessary because of the small rounded fillet corners of the stand.
For example, the stand is 44.6mm wide, and the faceplate is 44.0mm wide.
- If you are resizing these cards by an exceptional amount and the 8mm depth of the slots is not enough, the Z dimension of the stands can be adjusted.
License
You shall not share, sub-license, sell, rent, host, transfer, or distribute in any way the digital or 3D printed versions of this object, nor any other derivative work of this object in its digital or physical format (including - but not limited to - remixes of this object, and hosting on other digital platforms). The objects may not be used without permission in any way whatsoever in which you charge money, or collect fees.
Comment & Rating (41)