Tanq 2 TPU


Print Profile(1)

Description
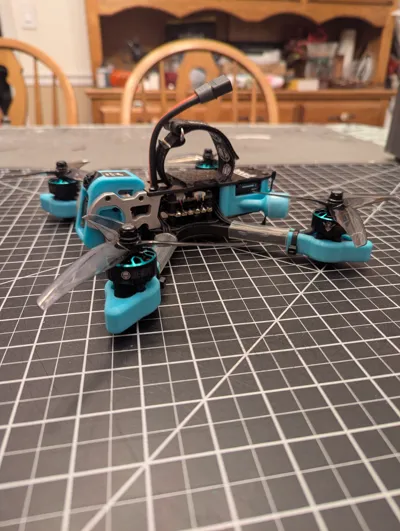
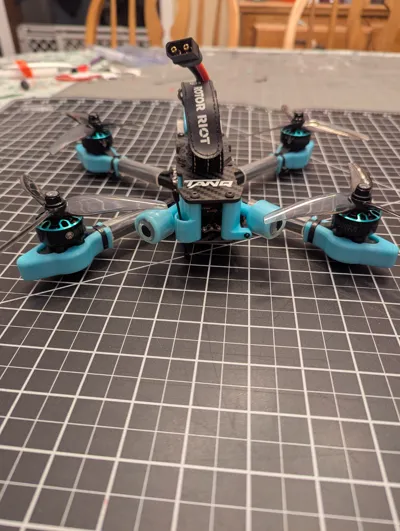
Tanq2 TPU Parts
This is a full set of TPU parts for the Tanq 2 from Rotor Riot. These models are designed for the Dji 04 pro camera which you can tilt the camera from 10 to 30 degrees. It also holds the HGLRC M100 GPS unit. The rear holds the DJI 04 pro unit, both its antennas as well as places to put two transmitter antennas along the horizontal and vertical planes. the Arm TPU parts will fit the skids that come with the kit, I have included replacemets skids you can use if you wish. You will need 2mm motor spacers which I have included and recommend they be printed in ABS or similar.
I printed the Rotor Riot Skull for the Camera/GPS parts on a resin printer with Tough Resin, you can print the part out of any material you wish, I recommend ABS/ASA/PETG.
I recommend printing the TPU parts one at a time or print them by object instead of by layer this will produce a better looking TPU part. If you are not familar with printing by object, go to the “Others tab”, then scroll down to “Special Mode” then “Print Sequence” change from “By layer” to “By Object”.
The rear TPU parts will require supports, set the supports to Normal, Auto, Default, then check “On Build Plate Only”. the supports should easily pull off.
The TPU for the Arms can be printed a couple ways, you can use supports, but the part will not look very good or you can use the spacers I have included and pause the print twice to put in the spacers and let the TPU be printed over them and then you can peel them off when done. I recommend the second way and will explain how to do it.
Print one part at a time and you will insert two paues during the print to add the spacers.
I printed the parts at .16 layer height, which will require a pause at layer 6 to insert the first spacer and at layer 77 for the second. Note, this will change if you print the part at .2 layers. See the two photos below showing where and how to put in the pauses for .16 layer height.


When the print gets to the pause point, the printer will pause and wait for you to hit resume, see the next two photos showing the spacers inserted at each pause point.


After the print is finished, you can peel off the spacers and have a really nice looking part!


License
You shall not share, sub-license, sell, rent, host, transfer, or distribute in any way the digital or 3D printed versions of this object, nor any other derivative work of this object in its digital or physical format (including - but not limited to - remixes of this object, and hosting on other digital platforms). The objects may not be used without permission in any way whatsoever in which you charge money, or collect fees.
Comment & Rating (4)