


Print Profile(2)


Description
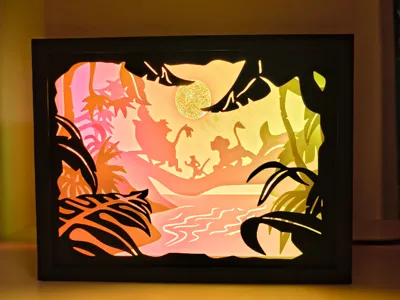
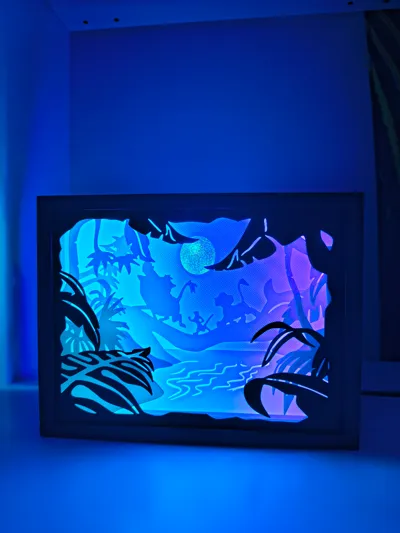
Lion King lightbox adapted for 3D printing and A1 mini
!!Please use the print profile, either open directly in Bambu Studio or download as 3mf, not as STL! There seem to be problems because I adapted all parts in Bambu Studio for 3D printing and they are incorrectly converted to STL, so I recommend using my print profile!!
Boost Me (for free)
If you like the model, please remember to leave a like, comment, photo, or boost
This model is based on the following model: https://www.thingiverse.com/thing:6241207 which I discovered on Thingiverse. License: CC BY-SA
By the way, I highly recommend his profile, there are many beautiful lightboxes and other models there! (unfortunately mostly models for wood CNC)
I found it very beautiful, but unfortunately not suitable for 3D printing, so I made many modifications and adjusted the size so that the lightbox can also be printed on the A1 mini. It was a model for wood CNC
0.4mm nozzle
0.20mm layer height
first layer slowed down for a smoother surface
brim on the two large parts to prevent warping
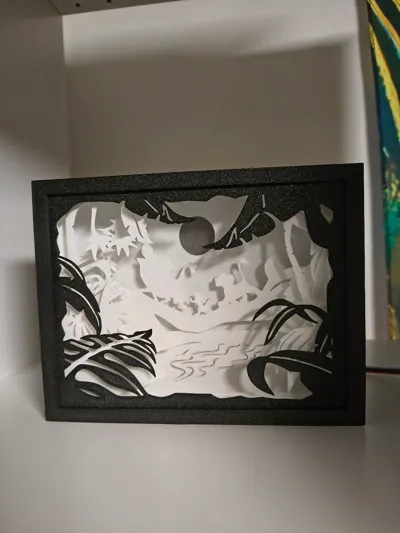
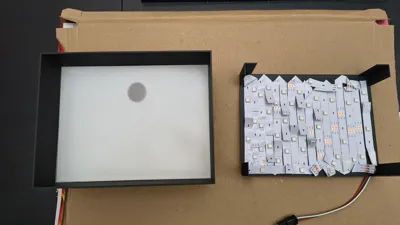
The box alone consisted of 5 parts and was generally not well suited for 3D printing. I reduced the box to 1 outer part and a lid, and made sure that the plates can simply be inserted one after another
I added a border to the back of all plates, so that the necessary 5mm between the individual plates are directly printed, eliminating the need for awkward gluing or adjustment later. They are simply pushed into the box and then held in place by the backplate
Assembly (see photos)
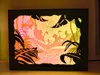
The plates are inserted into the box in numerical order
After the 6th plate, insert a transparent diffuser plate to prevent seeing the individual LED points later
If you do not have transparent filament, you can also print plate “replace 6 if no diffuser” in white instead of plate 6, as there is a thin layer that still allows the sun's details to be recognized
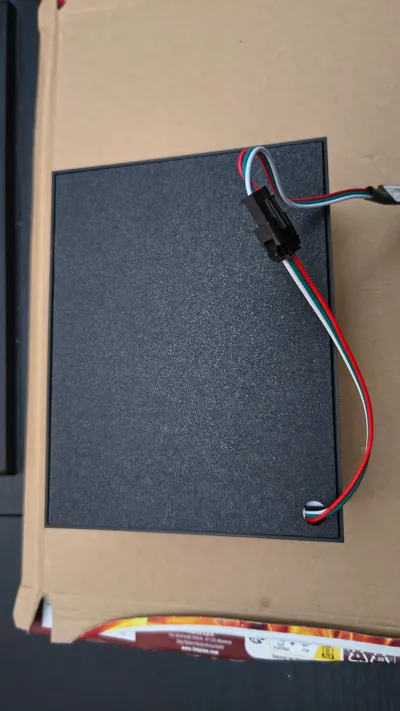
I glued the LEDs to the backplate from the inside and routed the cable through the 10mm hole. (a 2m LED strip should be sufficient), then the backplate is inserted and preferably glued so it does not come loose again
I printed the first plate in black because I found it more aesthetically pleasing than white
Optionally, you could also print all plates in different colors and use a white LED, such as:
- black, 2. light green plants, 3. dark green plants, 4. 3 brown figures, 5. turquoise water, 6. orange
I am a beginner and spent many hours in Bambu Studio assembling and adapting all the files for 3D printing. If you have suggestions for changes, please let me know

Comment & Rating (36)