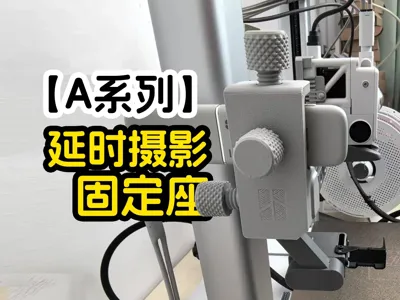
A1/A1 mini Shutter Cable X-Axis Mount


Print Profile(1)
Description
Boost Me (for free)
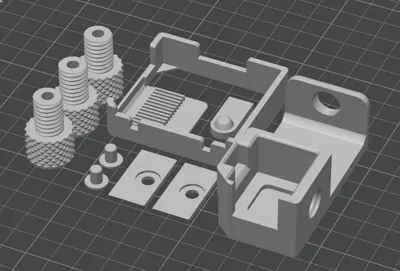
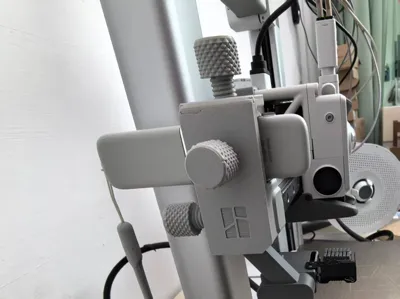
I. This accessory kit comprises four components:
1. Remote control mounting base x 1;
2. Fixing nuts x 3;
3. Push-block mount x 1;;
4. Push-block x 1;

【PS: We recommend purchasing the black anti-slip silicone pads shown below to prevent the remote from slipping】

Reference link: 0.5mm thick anti-slip pad
【Alternatively, consider using nano glue, which is softer!】
II. Maximum dimensions for installation, as shown below:
Maximum remote width: within 32mm, maximum thickness: approximately 16mm
|

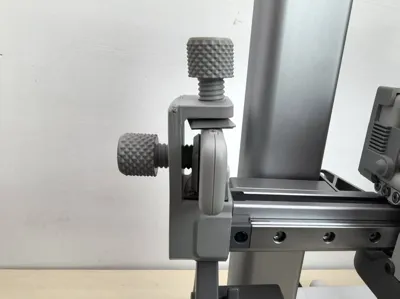
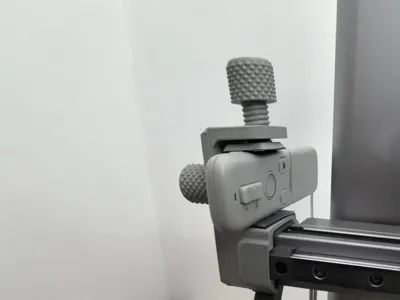
III. Installation steps, as shown below:
1. Step one: Fit and tighten the nut
| 2. Apply a layer of anti-slip silicone as a soft base for securing
|

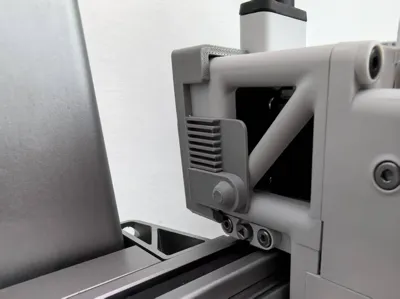
3. Inwardly bend the grille plate
| Form a 90-degree bend |

4. Fit onto the print head
| 5. Install the push-block; the position can be adjusted vertically as needed
|


Finally, adjust the remote control to the appropriate position to activate
| Improved version, added a planar push-block
|


Update: Added one part (Z add 10mm)

Boost Me (for free)
If you find this helpful, please boost this model!
Time-lapse code modifications:
step1
| step2 |
step3 |

step4: Modify as shown, add X-axis homing trigger for photo capture, comment out redundant actions
|

step5: Save as a new preset named “XXX - Time-Lapse”.
|

License
You shall not share, sub-license, sell, rent, host, transfer, or distribute in any way the digital or 3D printed versions of this object, nor any other derivative work of this object in its digital or physical format (including - but not limited to - remixes of this object, and hosting on other digital platforms). The objects may not be used without permission in any way whatsoever in which you charge money, or collect fees.
Comment & Rating (21)