Search models, users, collections, and posts

Spool lamp

IP Report
GIF

Print Profile(2)

All
X1 Carbon
X1E
H2C
P1S
H2D
H2S
P2S
H2D Pro
P1P
A1
X1
X2D
A2L

Full Spool Lamp
Full Spool Lamp
Designer
6.4 h
3 plates
4.9(41)

Wavy Lampshade
Wavy Lampshade
Designer
3.1 h
1 plate
5.0(8)

Open in Bambu Studio
Boost
3746
8214
132
246
1.7 k
317
Released 

Bill of Materials

Maker's Supply Kits and Parts
Select all
300x1mm (1PCS) - KA009
Maker's Supply Electronics Bundle - ZH038
List other parts
  • Bambu_Spool x 1: Bambu Reusable Spool

Description

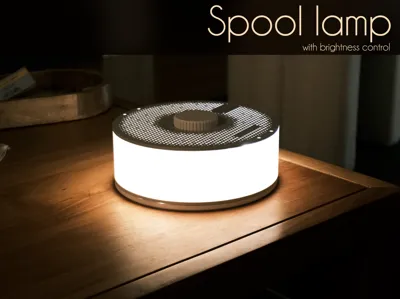
Spool Lamp – A Creative Upcycle Project

The moment I got my hands on a 300mm LED strip and noticed the holes in a Bambu reusable spool, inspiration struck—I had to turn it into a lamp!

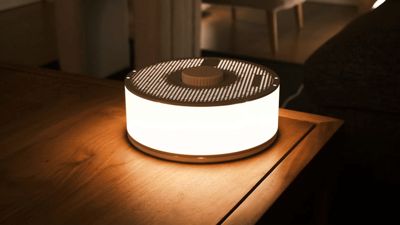
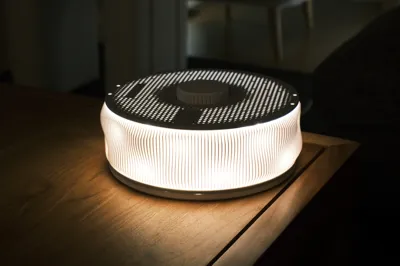
The concept was simple: use the spool as the core structure to hold everything together. The result? A sleek, modern lamp with a warm, cozy ambiance, enhanced by the subtle glow escaping through the tiny holes on top.

If you have an empty Bambu reusable spool lying around, why not give it a try? It’s a fun and rewarding DIY project!


Printing Instructions

Material:

I used white PETG, but PLA and other materials should work just as well.

Print Settings:

  • Layer Height: 0.2mm (standard)
  • Infill: 10% gyroid for all parts except the lampshade
  • Lampshade: Printed in vase mode with 3 bottom layers


Required Extra Hardware

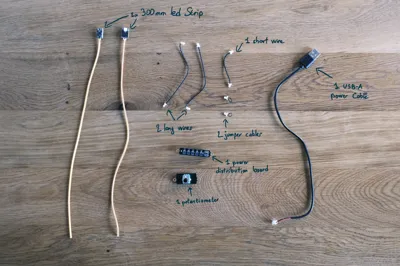
The only additional components you’ll need are the electronics, all available from the Bambu Maker Supply Market. Here’s what to get:


ItemPrice (€)QuantityTotal (€)
COB LED Strip Light - KA0097.24€214.48€
Maker's Supply Electronics Bundle - ZH03810.33€110.33€

Total price

24.81€


What you need to start this project :

Electronics :

Printed parts :

Bambu reusable Spool :

Assembly instructions :

  • Connect each long wire to the 300mm LED strip.
  • Use the short wire to connect the potentiometer to the "SW0" port on the distribution board.
  • Insert one jumper cable into "SW1" and the other into "SW4" on the distribution board
  • Place each LED into its dedicated groove in the Base.
  • Secure them with tape to make assembly easier.
  • Place the bottom part of the Bambu reusable spool on top of the Base, making sure each LED passes through the holes.
  • Ensure that no LED strip or wires get pinched between the Base and the Spool—they should sit flush.
  • Carefully pass the two wires through the two holes in the Spool Core.
  • Tip: Guide the wires with one finger while placing the Spool Core with the other hand.
  • Ensure the wires align with the LED strips.
  • When in place, it should look like this
  • Flip the Assembly:
    • Hold the Spool Core with one finger to keep it in place.
    • Firmly grip the Base and Spool and flip the entire assembly.
  • Insert the Base Screw by hand.
  • Tighten it using the printed tool (avoid over-tightening to prevent breakage).
  • Pass the USB power cable through the Base Screw and Spool Core.
  • Plug the USB power cable into the "IN" port on the distribution board (opposite the potentiometer).
  • Insert the Distribution board into its groove until it clicks into place.
  • Connect the LED Wires:
    • Attach both LED wires to the "CH1" and "CH4" ports (opposite the jumper cables).
    • Tip: Use pliers to insert them carefully, ensuring the correct orientation before pushing them in.
  • When installed, it should look like this :
  • Then install the potentiometer, making sure the wire is not pinched
  • Screw in the Potentiometer Screw to hold it in place.
  • Ensure it sits flush and straight.
  • Place the Lampshade on top of the Spool, aligning the LEDs through the holes.
  • Install the LED Track:
    • Position the LED Track and start pressing the LED strip into the groove.
    • Tip: Begin at the tip (LED facing up) for an even light distribution.
  • When assembled it should look like this :
  • Leave a gentle curve at the base of the LED strip to prevent damage.
  • Lock the top part of the Spool in place securely.
  • Push the Knob onto the potentiometer until it is fully seated.
  • Plug the USB cable into a phone charger and light it up !
  • I made an alternate Lampshade if you prefer the wavy pattern
  • Use the Knob to adjust the brightness and enjoy :)

Let me know if it worked for you in the comments :)


Comment & Rating (132)

(0/1000)

Print Profile
Full Spool Lamp
Super well designed! Everything fits together so well and it looks wonderful! Thank you!
profile
33
Reply
Wow this is cool where did you get the cabinets from or did you make it yourself?
0
Reply
I came here to ask the same question! I’d love to have this setup, if you can enlighten us.
0
Reply
ok so now it's 3ppl asking about your desk setup.. looks very nice
0
Reply
Print Profile
Full Spool Lamp
Great model. Exaclty what I was looking for.
30
Reply
wow thats an incredible 3d printer art piece few will understand. i love the big nozzle but seems to niche, but i understsand it. 2wow haha thats amazing @BambuLab should check this Printer spool wall LED art ! they should feature this, have you sent more filamnent and gift cards to create more works liek thios for a bambu sponsored local 3d printer worjkshiop museum ine very city to help p[[romote bambuy printer sto masses
(Edited)
4
Reply
the extruder makes it so much better lol
0
Reply
Replying to @mrbanana39633 :
lol, thanks! I kinda thought the filament looked kinda boring with out it.
0
Reply
Print Profile
Full Spool Lamp
Cool idea! I built a stand for it that houses the cable and integrated COB LEDs
Show original
9
Reply
Boosted
Print Profile
Full Spool Lamp
There's a story behind my print.. A spool fell off the holder and cracked the lock, leaving me with a spool I can't use for filament. I can however use it for a lamp! I ordered the hardware from BL, printed the parts and assembled it tonight. It came out fantastic! Points to note: •Kapton tape is good for holding the wires down. •When laying the LED in the track make sure to have the orange side upward. •The USB lead is very short. You will likely need a USB A extension cable. Thank you Hugo!
The profile uploader has replied
profile
4
Reply
Boosted
I forgot to say that the base and shade are BL PETG HF white, the inside parts are BL PLA basic white and the top dial is BL PLA basic light grey.
(Edited)
profile
1
Reply
It turned out looking amazing ! thank you for trying my project ! I agree that the usb is very small.. I added an extension cord to have it where I wanted it
(Edited)
1
Reply
cool story! 👏
0
Reply
brilliant print. However I modded it to not need the LEDs recommended here and just wrapped my LED around the spool!
4
Reply
where did you find that hot end model? looks great
0
Reply
Replying to @bar_down26 :
https://makerworld.com/models/839714?appSharePlatform=copy here mate. I printed it at 750% size! I also made two sets of rails that go behind it to run the light through the back. someone didn’t like my comment about their print being AI though and falsely reported it so it got taken down. if you needed the two rods though I can send you the stl files!
1
Reply
nice
1
Reply
wow im envious
0
Reply
Complete own and easier design without regulation of brightness but inspired from your design i say thank you !
1
Reply
Boosted
How did you fix it on the wall?
0
Reply
Boosted
Great idea. Awesome and simple project for beginners.
1
Reply
Print Profile
Full Spool Lamp
nice
profile
1
Reply
Boosted
Print Profile
Full Spool Lamp
Top ideal for our caravan holiday
Show original
profile
1
Reply

License

This user content is licensed under a Standard Digital File License.

You shall not share, sub-license, sell, rent, host, transfer, or distribute in any way the digital or 3D printed versions of this object, nor any other derivative work of this object in its digital or physical format (including - but not limited to - remixes of this object, and hosting on other digital platforms). The objects may not be used without permission in any way whatsoever in which you charge money, or collect fees.