Multi Tool Scanner inspired by No Man's Sky


Print Profile(0)
Description
Update (Feb. 3, 2026): Improved heat insert holes for lid screws and improved vertical servo mount. Added screwing picture. Uploaded new versions of Housing_base and Housing_lid. Updated step file.
Inspired by the Game No Man's Sky, I decided to recreate this moving Multi Tool Scanner to mount it on my post-apocalyptic costume.
Here is a short clip in action: https://www.youtube.com/shorts/2m960GLwLwA
List of Materials:
- 2x 180° Servo (https://amzn.to/4pQ1An7) (I use exactly these servos. I don't know if others will fit.)
- 2x Arduino Nano with USB-C (https://amzn.to/4r0aDCT)
- 5V 5mm LEDs (https://amzn.to/45ki2EM)
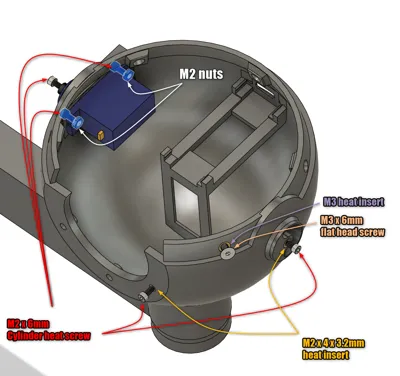
- M2 and M3 flat head screws (https://amzn.to/3MimRrK)
- M2 cylinder heat screws (https://amzn.to/4c5Rfju)
- M2 and M3 heat inserts (https://amzn.to/4bukyw7)
I printed everything in white PETG and painted it with acrylic paints. Mostly darkgray and gray and a little orange for the rust effect. Not perfect, but good enough for me.
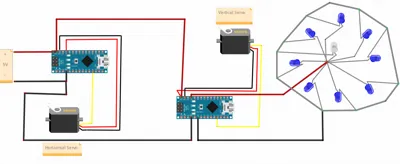
Programming: I attached 2 arduino sketches. One is for the horizontal servo and the other one for the vertical servo and the LEDs.
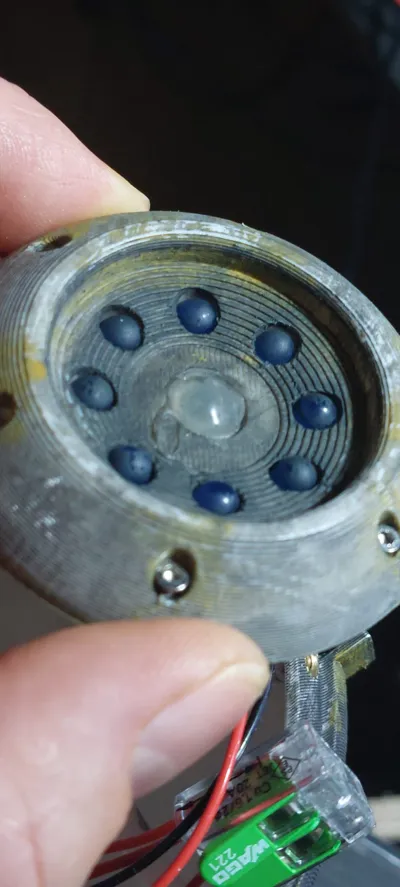
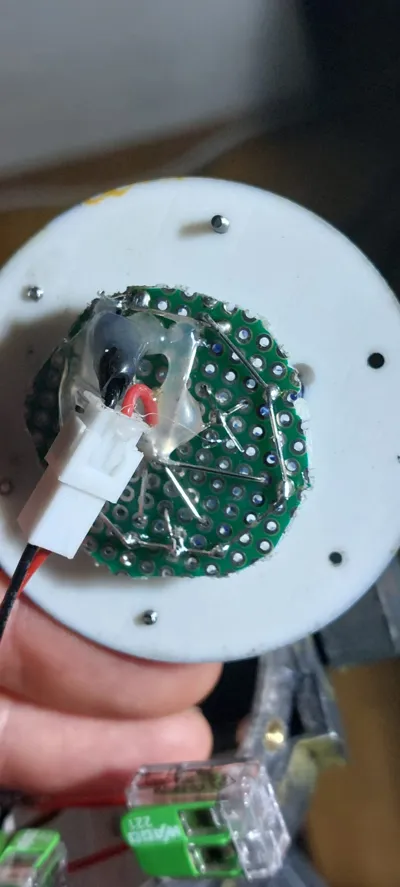
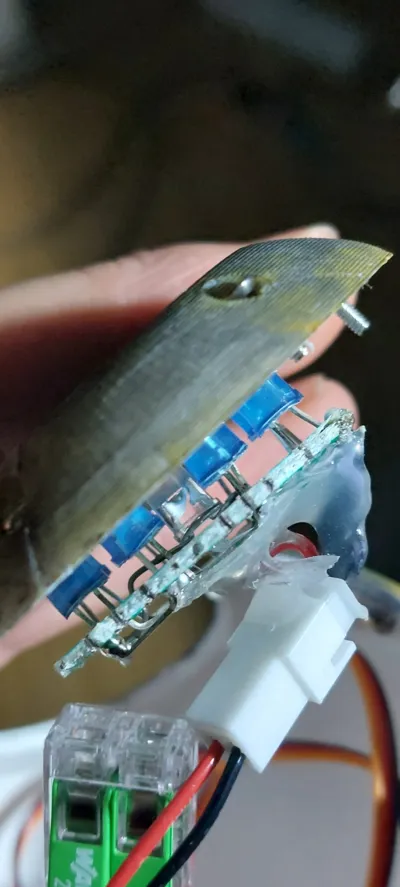
Soldering: There are 8 blue LEDs in a circular pattern and 1 white LED in the middle. Solder all positive LED-Terminals and all negative LED-Terminals together. Before soldering, make sure the white LED is slightly lower than the blue LEDs. Fill the hole around the white LED with hot glue. See pictures for details and wiring.
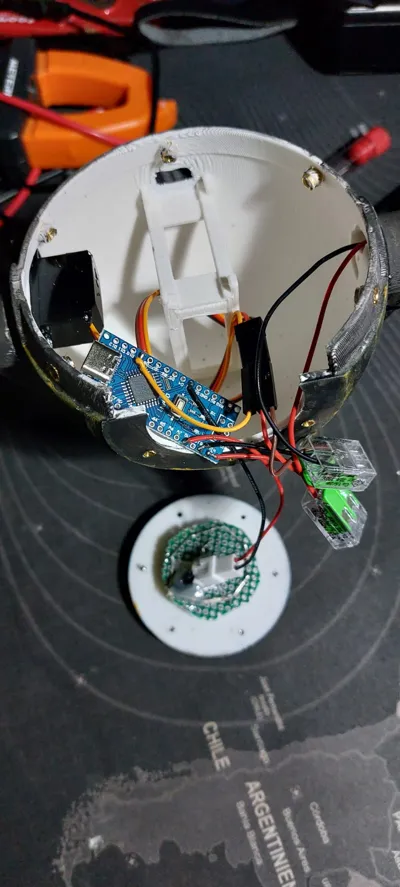
Note: Before you put all the things together, programm the arduinos, connected them with the respective servo and power them. The servos will always go into 90° position first and stay there for 5s. Power off the arduino within these 5s. Since the servos are now in a 90° position, you can align and assemble the rest.
Hint: You can take an old USB cable, cut off one end and use it with a regular power bank to power everything.
Comment & Rating (4)