【Lao Teng】Seamless NFC Integration. AMS lite integration with drying box, automatic filament retrieval + full-function NFC card reader integrated bracket


Print Profile(1)

Description
Finally perfect!
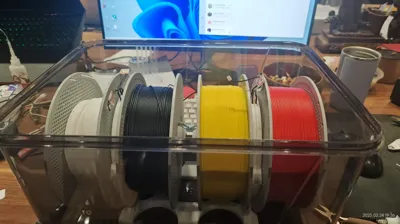
AMS lite filament spool into the box, various online solutions are to solve the material feeding problem, NFC almost no one considers transplanting, maybe the great gods prefer third-party materials, NFC is optional.
But as a novice, I usually don't print much, and I don't know how to adjust various parameters, I only know the brainless fool-style original factory machine and original factory materials, so NFC is much more convenient.
So this bracket came into being.
The modification scheme is inspired by Xiaofan's great god.
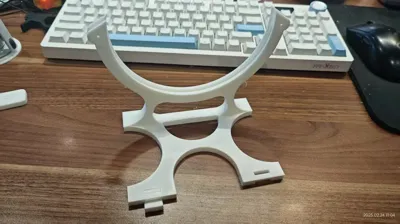
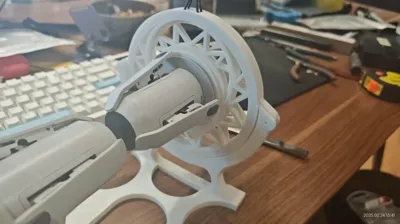
1, bracket, NFC disc, filament spool bracket three-piece design, easy to assemble. Especially the base, the size is too large, A1MINI can not print, so it is separated into two models assembled, the assembly point is not the stress point, for the strength has no impact.
2, two NFC slots between the specially added isolation gasket, to prevent crosstalk.
3, the entire model does not affect the strength of the place are hollowed out, saving materials and time roughly estimated 70%, the entire model is printed only needs 12.5 hours, using more than 300 grams, this is the original factory PLA material 6 layers of walls 40% filling high-strength printing data.
4, installation steps:
①. Disassemble the original AMS spool, remove the four coils. Note: The four NFC ports on the circuit board are best marked with the number of the spool, otherwise, if they are installed incorrectly, the serial number will be disordered. AMS is not difficult to disassemble, note that there are screws on both sides. At the beginning, I only removed the screws on one side, the buckle could not be opened, and it almost broke. The NFC coil is also thick, 1mm thick copper wire, with soft glue points, a small knife bar soft glue cut open with a screwdriver gently pry off. Be careful not to damage the copper enamel of the coil when cutting the glue.
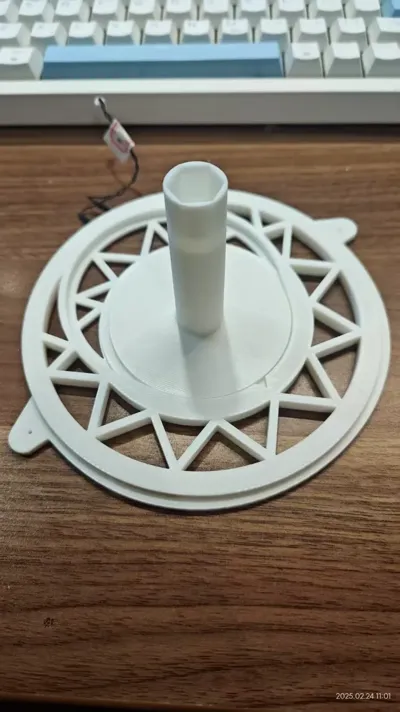
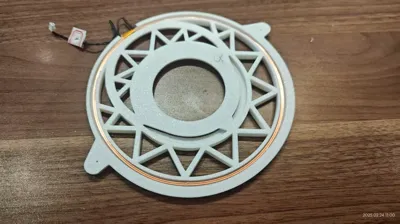
②. Install the removed NFC coil into the groove on the back of the printed circular disc.
③. Install the NFC baffle, which is the ring, then the two circular discs are installed back to back.
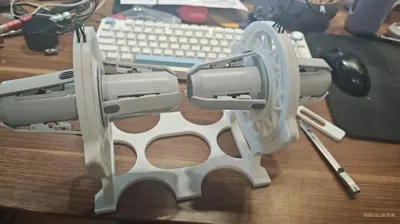
④. Assemble the base bracket.
⑤. Insert the installed NFC disc into the bracket, it is a bit tight, you can use a rubber hammer or other tools to gently tap it in.
⑥. Install the original rotary shaft to the printed wheel column, note the green corresponding square hole, yellow corresponding hexagonal hole. Note the order, if I remember correctly, No. 1, 3 and No. 2, 4 correspond to two colors.
⑦. Insert the rotary shaft and the wheel column into the NFC disc, no direction, just quick plug. It will also be convenient to change the filament spool in the future.
⑧. Buy some 0.3 square electrical wires, the NFC port out. The port has no opposite, just cut off the black wire, and then add the plug wire longer. Those with a soldering iron are best to solder, those without use tape.
⑨. Plug the extended NFC plug into the material feeding port circuit board, finished! (Automatic material feeding top scheme online many, I will have the opportunity to share my improved scheme)
License
You shall not share, sub-license, sell, rent, host, transfer, or distribute in any way the digital or 3D printed versions of this object, nor any other derivative work of this object in its digital or physical format (including - but not limited to - remixes of this object, and hosting on other digital platforms). The objects may not be used without permission in any way whatsoever in which you charge money, or collect fees.
Comment & Rating (5)