uConsole back cover w/prop & antenna mounts


Print Profile(0)
Description
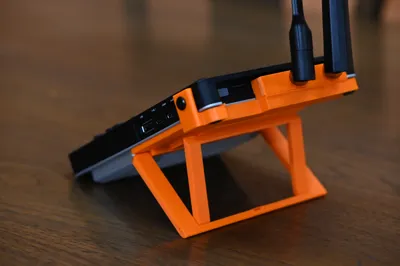
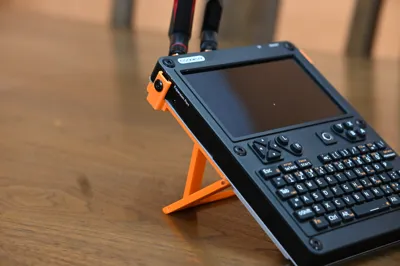
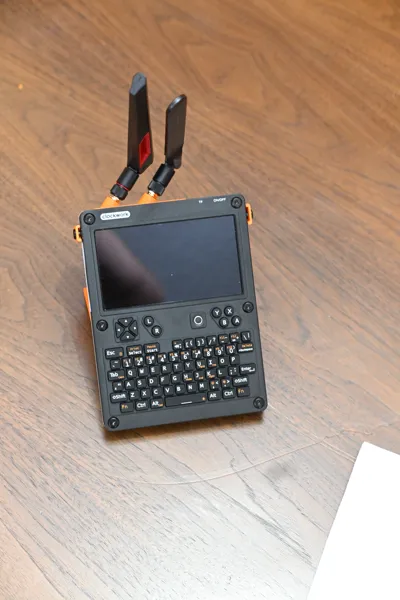
First things first, the entire backplate and kickstand are my design and my original model.
The antenna mounting parts are from paragonv (License: https://creativecommons.org/licenses/by-nc-sa/4.0/ Link to his/her model: https://makerworld.com/en/models/1103666?from=search#profileId-1122681 )
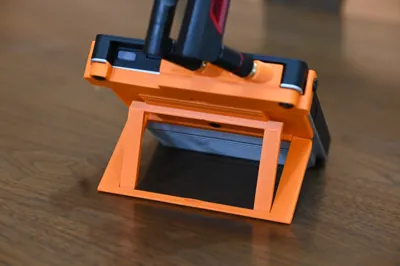
I designed this relatively complex backplate due to an issue I was having with every antenna mount. Every mount I could find used the screw holes in the back of the case which made the factory metal wire kickstand not function. In order to solve this I realized it would make the most sense to design a backplate with a built in kickstand and the antenna mounts as well.
Antenna mounts you can select which one you want. They are meant to be superglued to the top of the backplate.
For the backplate itself, I have included a Fusion 360 file since that would be the easiest way to make any necessary adjustments if you find you need to.
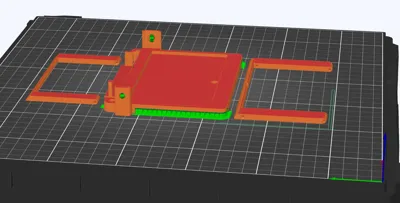
There are obvious areas where supports are required for the main backplate body.
The pivot holes (one through the main body, and the others through the two folding parts of the kickstand) should be printed with support blockers so that they don't get filled with support as you'd obviously never get it out.
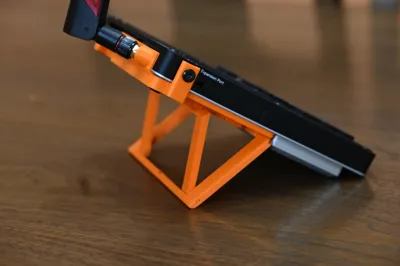
This stand is assembled using 1.75mm filament as the pivot pins. I would recommend melting the ends after running it through the assembly so that it doesn't move out. The pivot holes are a tight fit for the filament with my printer settings and material (Qidi X-Max 3 using ASA). These case be adjusted in the Fusion file if you feel you need to.
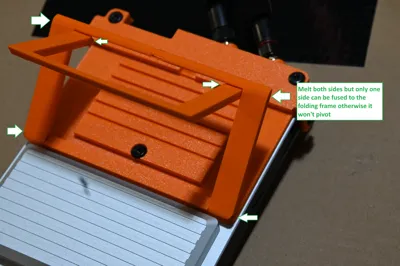
for the pivot that goes directly through the main body feed the filament though, melt both ends using a soldering iron and they can melt directly to the folding part.
For the second folding part that pivots off of the first, you have to have one side free so that it can pivot and they aren't just welded together. There are multiple ways to do this:
- Melt one end of the filament flat, feed it through both folding pivot holes, then melt the other end to the other side
- Coat the hole where the filament would be melted on just one of the folding portions with some silicone grease, then feed the filament through and melt both ends (the silicone grease will stop it from melting to the folding portion).
- or skip all that entirely and use M2 screws and bore one pivot hole open to allow it to rotate while the screw threads into the other side.
Okay, I'll try to take as many pertinent pictures as possible, so please reference those. I HIGHLY recommend a test fit before melting anything together!
You will also need some slightly longer screws to mount to the case (they are M4 and this style, I would recommend just getting a pack of 6mm, 8mm, and 10mm to be safe): https://a.co/d/byWPa0m
If you have any questions, please feel free to ask.
Comment & Rating (0)