FF7 Buster Sword MTG Commander Deck Box (Updated)


Print Profile(6)


Description
Please Read!
If you want a newer version of this that can hold a 100 card double-sleeved deck, some dice, and a play mat all in one, click here!
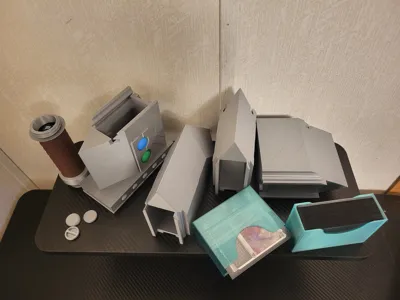
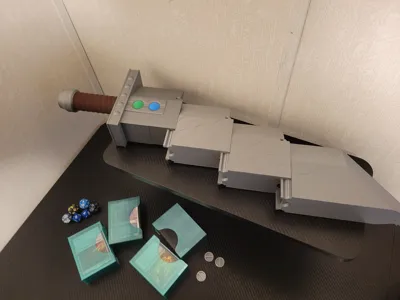
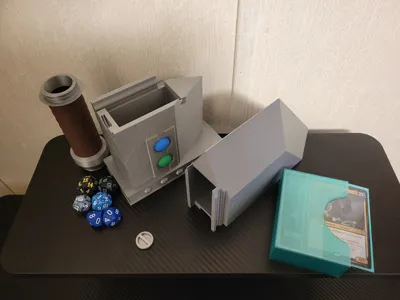
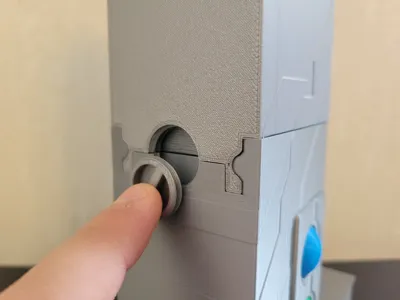
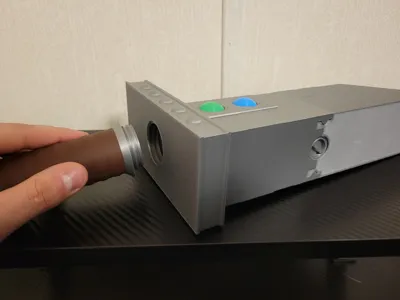
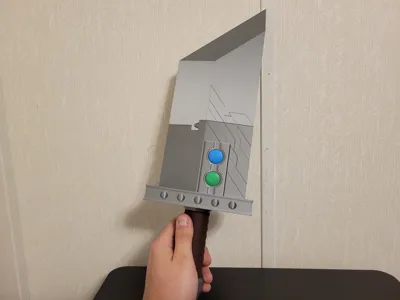
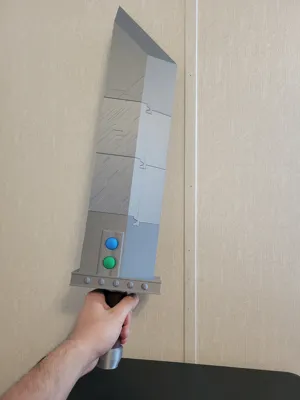
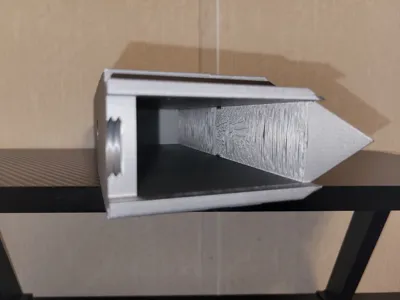
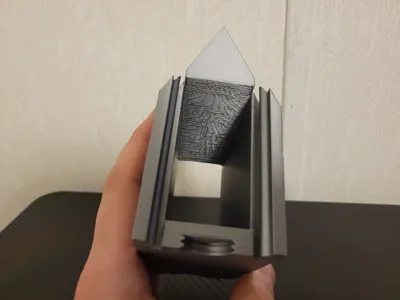
This is a MTG Commander Deck Box that is in the style of Cloud's Buster Sword. This Deck Box (just barely) fits a 100 card Dragon Shield single sleeved Commander Deck (or 2 if you print the Extra MidSections). (If you want a version that holds a full double-sleeved Commander deck, use the 60 Card Version!) The main body of the Deck Box is split into 2 parts, and slides together down the middle. Because this model is thin, the Commander Deck needs to be split into half, then put into the little trays to stay aligned in the halves. Each half of the deck fits about 50 cards, so both of them combined fits the whole deck. While friction will keep the two halves roughly together, the 2 pieces of the blade stay tightly together using the small locking screw, which screws into the back when both halves are aligned. The cards are stored in little trays, which slide out from the inside.
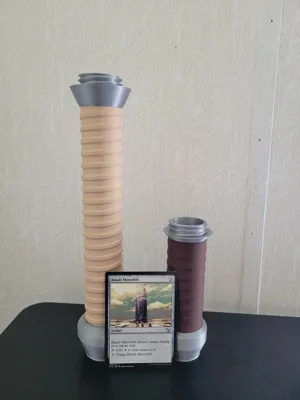
The handle screws on to the bottom part of the sword, and is hollowed out to allow for storage of some dice. It will not fit the oversized dice found in the bundle boxes, it only fits normal size spindowns. The small Materia pieces need to be glued on separately to the side of the blade, so there are no major multi-color aspects to this.
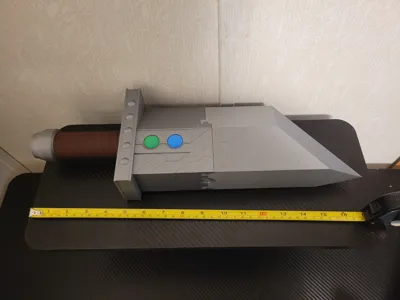
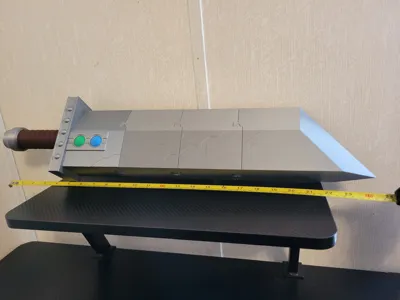
The entire standard model takes about 400g grams of filament when using 3 wall loops, which I recommend. I used 2 wall loops to save on filament, and while it seems sturdy, 3 seems better if you were to carry this around a lot. There are no supports needed in the normal version of the model, with how I have all the parts oriented. (UPDATE) Okay, so in the first version of the model, I thought that the Top Part of the sword was too long for an A1 MINI build plate, so I made a version that was cut in half in order for people with an A1 MINI to print it. For some reason, I didn't realize that you could just rotate the Top Part of the sword diagonally, so it could fit onto the plate and be able to be printed in one piece. I have changed the A1 MINI print profile of the sword and removed the version of the blade that is split. My apologies to anyone that didn't like the A1 MINI version of the Top blade, I should have noticed this.
Version 2 Update Log
I did not think I would make this many changes to the Buster Sword, so I have tried to organize all the additions and changes to the model in this Update Log.
Midsection UPDATE
Someone in the comments asked if there could be a middle part of the sword that would be used to store another deck, and that got me thinking. I ended up with a design that uses 2 MidSections that also hold the card trays and slide on the same way as the Top and Bottom Parts. One MidSection will hold one tray, so using 2 Midsections allows you to store another 100 card Commander Deck. I made 2 different style MidSections which are functionally the same, but just have different external designs that are repeating and mesh with the Top and Bottom Parts. These MidSections are also interchangeable, and since they have the same connecting mechanism, you could theoretically expand the blade infinitely long, though I doubt the handle would hold that much weight. These MidSections should also be perfectly compatible with the previous sword Top and Bottom Parts, so if you want the extra long sword, you do not have to reprint the Standard Parts, just print the Extra MidSections and parts.
If you are printing the Standard version of the sword with no MidSections, it is about 400 grams of filament. If you are also making the Extra MidSections and Card Trays and Caps to go with, it will be about 700 grams total. You only need to print the Extra Parts if you want the long sword and storage for another deck. I do not recommend using the long version of the sword and then only putting one deck in it, as the tray may slide around on the inside and prevent you from opening it. If you want the long sword but only have one deck, I recommend printing all the trays and then using them for things like dice or tokens. The Extra MidSections do need supports for a small portion, and I have added them to the print profile as well.
Tray UPDATE
I have changed the design of the trays, because while the current design worked, I found that the cards would still move out of place and fall out of the trays, especially when using the MidSections for more storage. When I designed the old trays, I was thinking about how something could work with just the Top and Bottom parts, and didn't account for the MidSections that I would later make. This new version of the tray will be in the print profile, along with all the other new additions. Users who have printed this model previously may want to use the new trays.
Long Handle UPDATE
Someone asked if there could be a longer handle, so I made a version that is about 2x as long as the normal one. This new handle can ONLY be printed on a printer that goes up to 250mm, so this will not print on an A1 MINI. It should be functionally the same as the old handle, and it will fit onto the standard base of the sword. I set it to print a brim for the handle, but if you have good adhesion, you may not need it. I also set the color to be a specific range in the slicer, so it may not look colored in the preview, but when you slice it, there is color. I printed this handle in Bambu PLA Matte Desert Tan and PLA Basic Silver. I am also thinking about designing a version of the sword that can hold one deck and a play mat, but that would require a different base, handle, and midsections.
Tolerance UPDATE
One problem that some users mentioned is the tolerances for the Top and Bottom Parts of the blade were too tight and needed post-processing in order to slide on and off smoothly. I have changed all of parts that slide together and increased the margins, so the new models should feel smoother and not need post-processing. My first sword was tight at first, but eventually smoothed out. Everyone's filament and printers are not the same, so I am trying to accommodate for that. If the sliding feels too loose or still too tight, let me know in the comments. Also, I don't think anyone has mentioned this, but while this does have short overhangs, they do need to print nice in order for the trays to slide in nice. I haven't really experimented with the “thicker bridges” option in the Bambu Studio, but it may give better results for the overhangs.
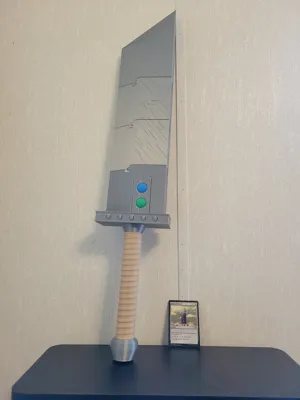
Sword Stand UPDATE
A few people have asked for a stand, so I made a quick stand that is able to hold the sword, both short and long. This stand is in the style of the game's roman numerals, and I thought of it from the MTG showcase(?) cards that they made for some of the characters. They are pretty big, and take up about 250 grams of material, so I tried to reduce it by setting the wall loops to 2 and reducing the infill. Because I have hit the limit on main pictures uploaded for this model, and because I do not currently have my own Buster Sword (I sold it, need to make another), I will upload some pics of them here. The sword in one of the pics was a test model, but it still has the same measurements as the current one.


60 Card Version UPDATE
Some people have asked for a wider version that can hold 60 cards in each slot, and I was able to edit the original model to be wider. This version can hold a Standard 60 card deck in each tray, allowing for 2 decks to be stored. I also made the changes to the Midsections, so you could hold 3 or 4 decks in one sword if desired. This version of the sword is compatible with the old Handles and the Locking Cap, but NOT with the other main parts, like the Top and Base. The trays can actually fit about 70 cards, as shown in the blue sleeves in the pics below. The stand that I made previously will work with this model, but it will not sit flush in it. If desired, I can make a stand for this version too.
Recently, I double-sleeved one of my Commander decks, and it turns out that the deck is much thicker and does not fit in any of my previous boxes. Then I realized the 60 card trays in this deck box work perfectly for the 50 double-sleeved cards, so I can still use this box to hold my Commander deck. To reiterate: if you have a double-sleeved Commander deck, use the 60 card version to store your deck. The black sleeves in the pic below is the ~50 double-sleeved cards. I also turned on supports for the Top part, and increased the amount of supports for the Midsections, as I felt it was too long of a distance for bridging to work well. The supports worked much better than I thought, and they barely left a mark.


Version 2 Update Log End
The print profiles have all settings and orientations for the best printing. I used Bambu PLA Basic Silver, Light Blue, Green, and I printed the handle with Bambu PLA Rosewood, which feels very nice. I used Bambu PETG Translucent Teal and Light Blue for the new card trays that I printed, which work much better than the old design. All normal filament types should work good for this model. In hindsight, this design is very goofy and definitely a show piece, but it's still very cool looking to me. I based this model mostly off of the FF7 Remake version of the blade, as that one has much more detail compared to the original game. This model was made because of the upcoming Final Fantasy collaboration that WotC is doing, which seems to be getting much more attention than the actual sets. As always, if you have any suggestions or questions on the model, leave a comment or message me and I will respond. If I think of anything else or made changes, I will add them here.
For the people that made all the suggestions for the model or criticisms on the tolerances, thank you.
Thank you for reading this long description!
Boost Me (for free)
Boost if you like my model!
License
You shall not share, sub-license, sell, rent, host, transfer, or distribute in any way the digital or 3D printed versions of this object, nor any other derivative work of this object in its digital or physical format (including - but not limited to - remixes of this object, and hosting on other digital platforms). The objects may not be used without permission in any way whatsoever in which you charge money, or collect fees.
Comment & Rating (197)