
SKADIS Pegboard VESA Monitor Adapter/Mount v2 IKEA
Print Profile(3)


Bill of Materials


Description
Boost Me (for free)
I’m working on more IKEA Skådis utilities and would love your support! If you have any suggestions for improvements or ideas for new Skådis accessories, feel free to reach out. Happy printing! 🚀
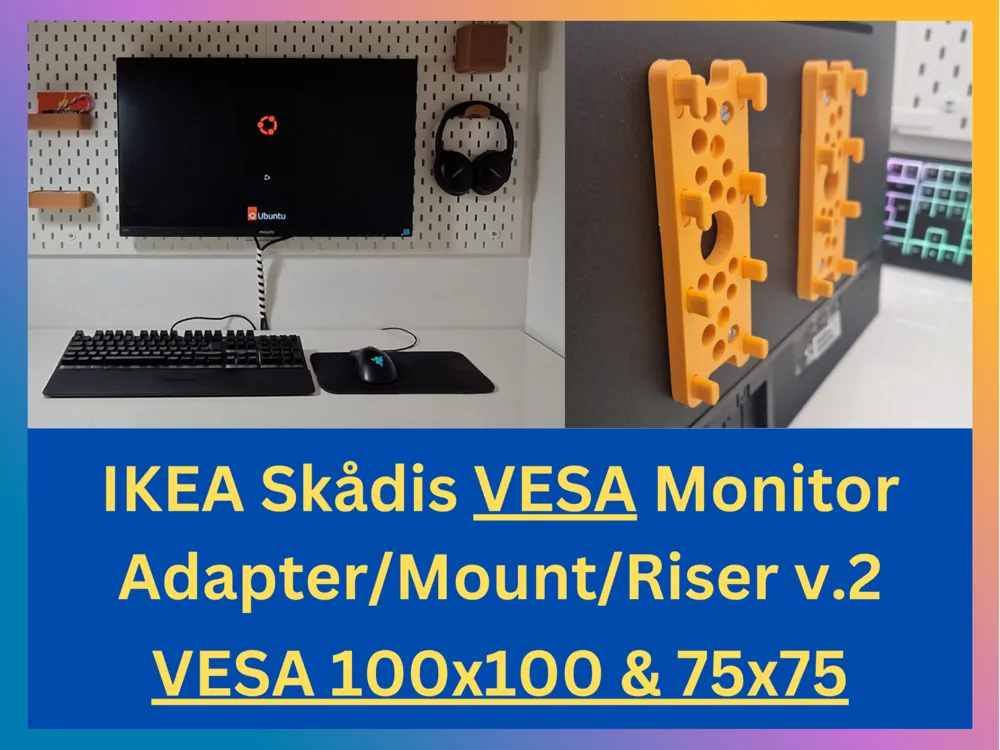
Upgraded VESA Monitor Adapter for IKEA Skådis Pegboard
This is an improved version of the VESA monitor adapter designed for the IKEA Skådis (Skadis) pegboard system. It allows you to mount monitors with VESA 100x100 and 75x75 on a pegboard, helping to free up desk space while offering adjustable height options.
Requirements
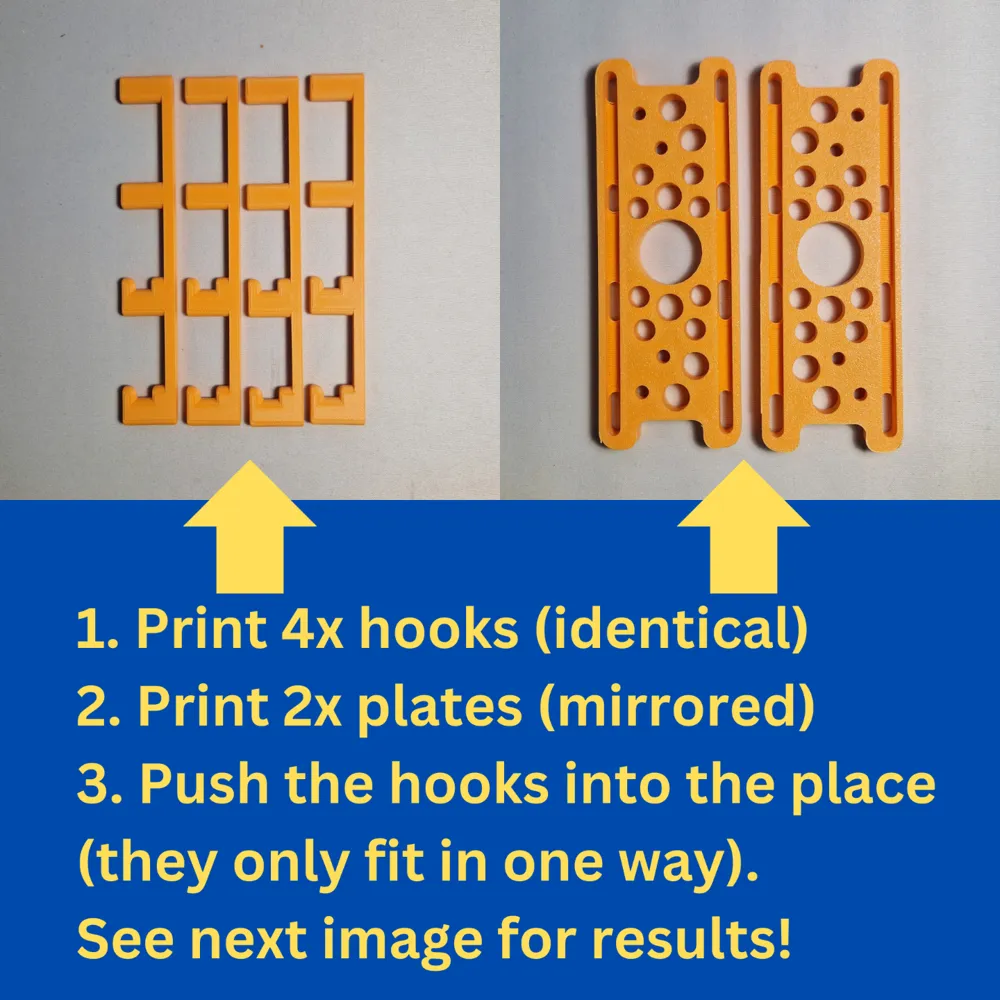
- 2 print plates
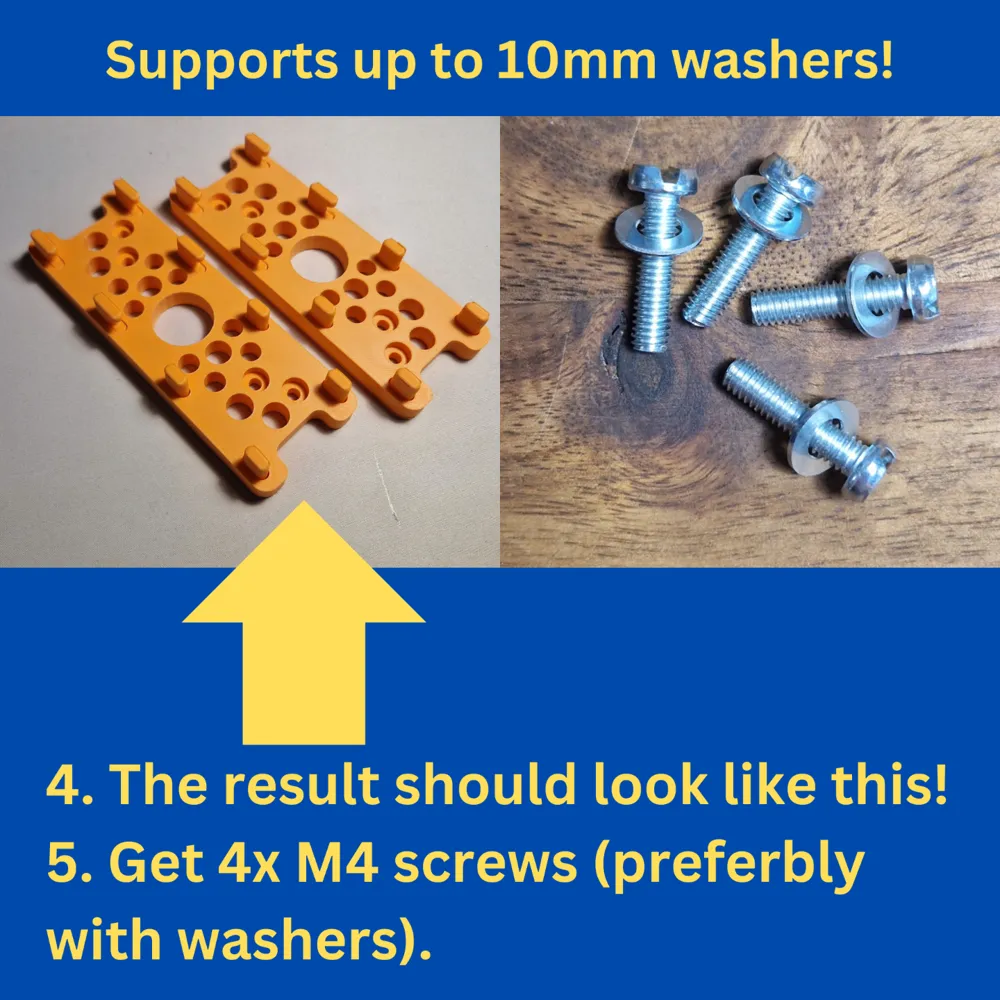
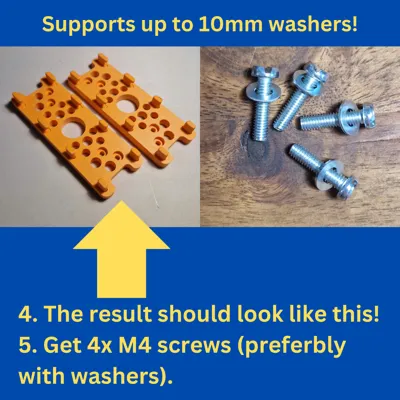
- 4x M4 screws (preferably with washers)
- IKEA Skådis pegboard system (either purchased or 3D printed)
Features
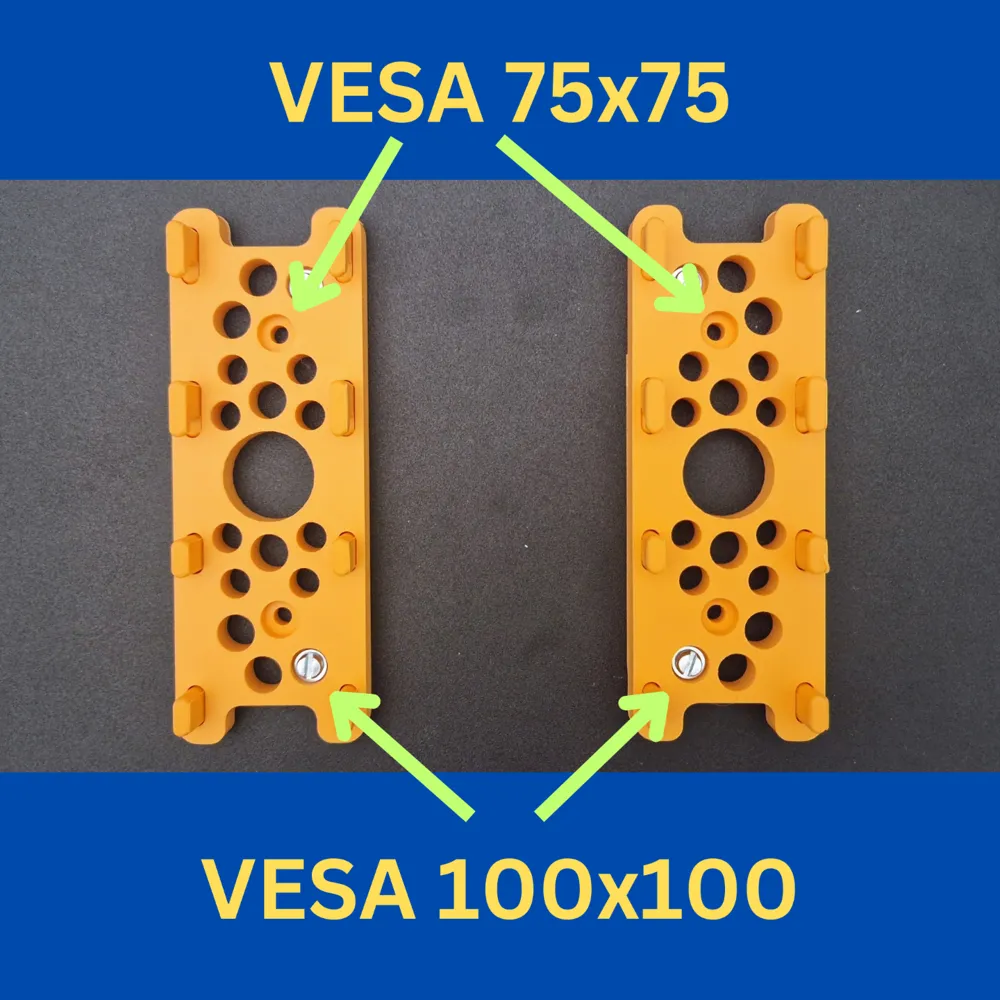
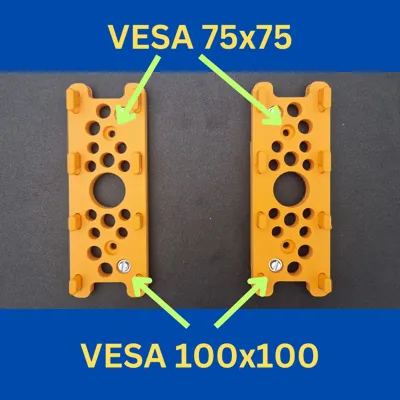
✅ Supports both 100x100 and 75x75 VESA mounts
✅ Supports up to 10mm washers
✅ 16 mounting points for better flexibility
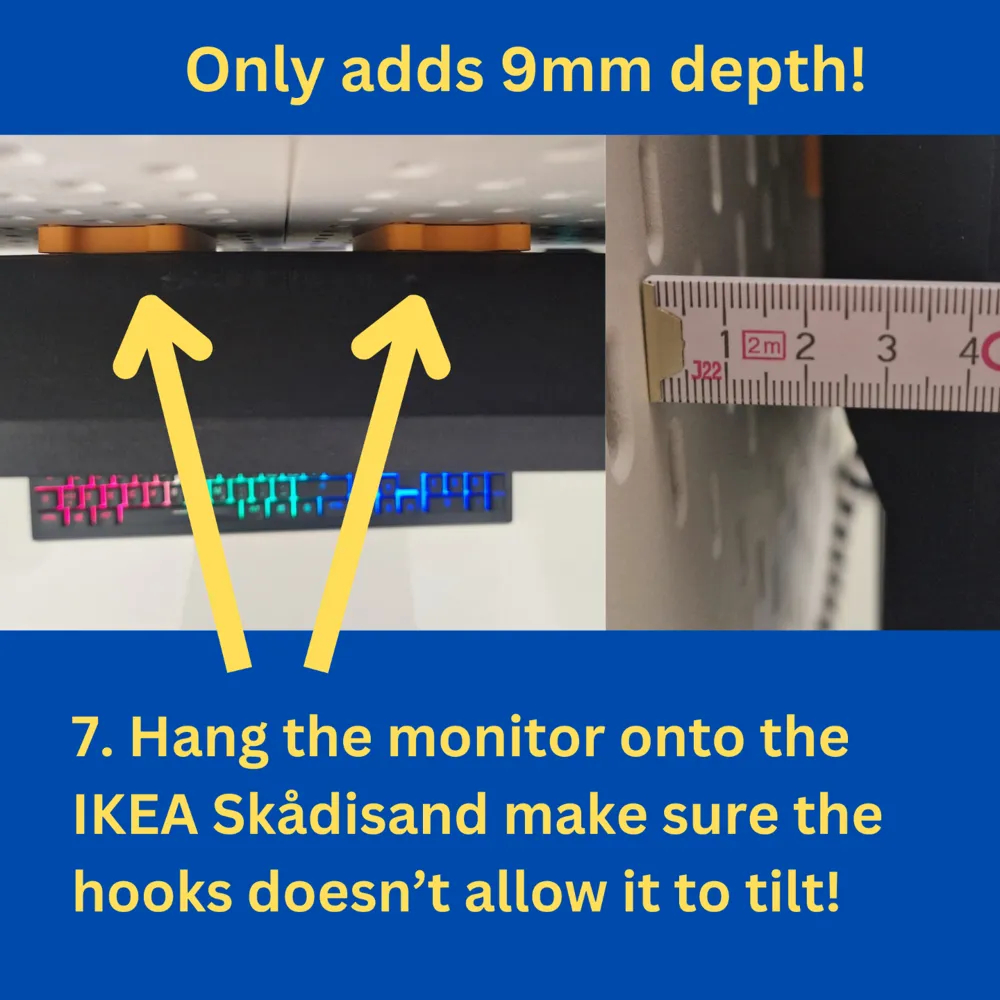
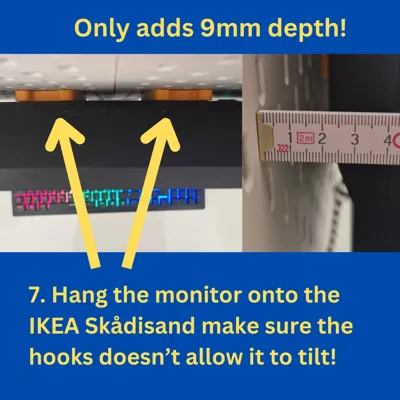
✅ Minimal space impact – adds only 9 mm between the monitor and the pegboard
✅ Easy mounting with improved hooks
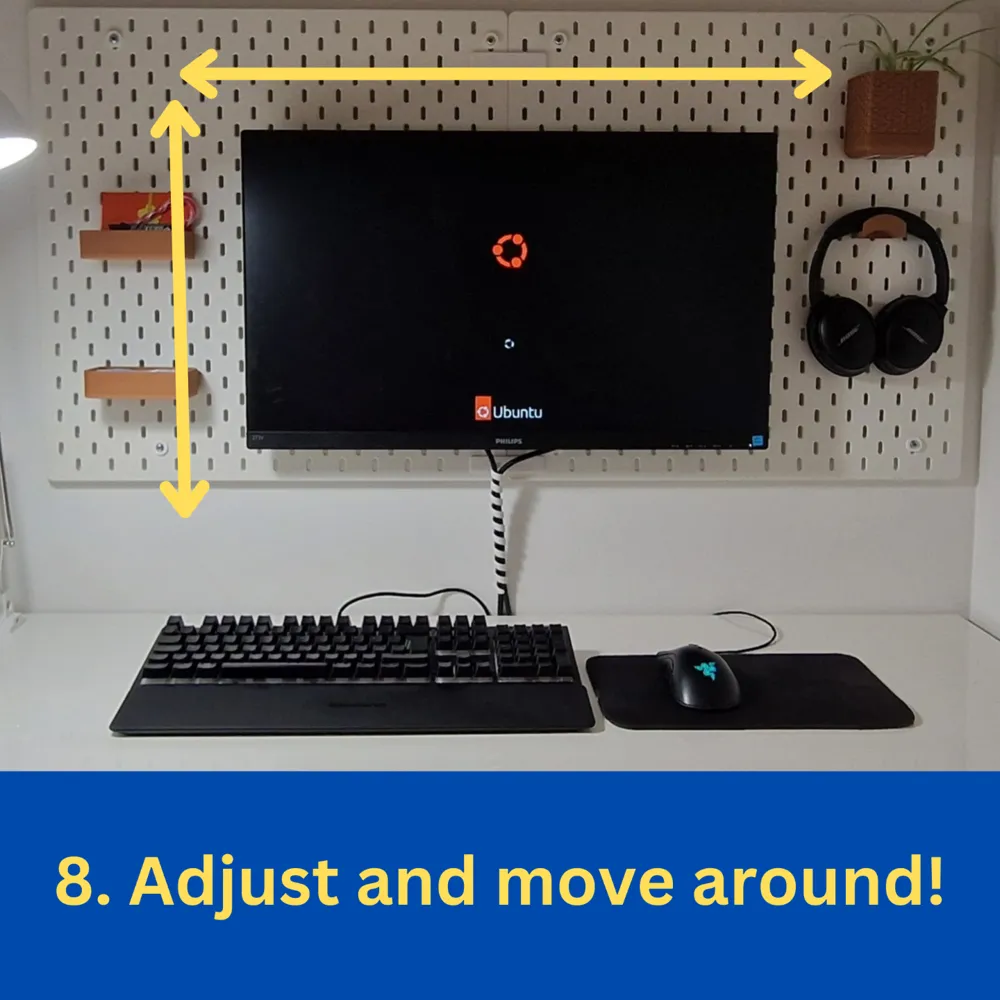
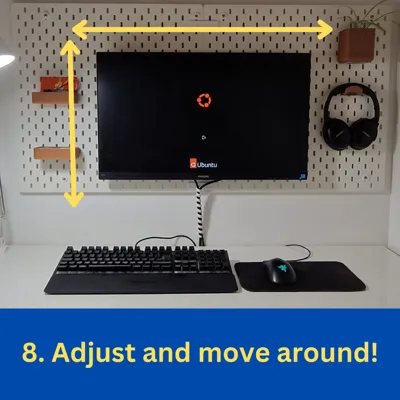
✅ Adjustable height – move the monitor 40 mm up/down when keeping it on the same horizontal level, or 20 mm per step otherwise (limited by IKEA Skådis design)
What’s New in v.2?
- Added 75x75 VESA support
- 4 additional mounting points for more positioning options
- Improved hook design for easier installation
Instructions
- Print the parts with a high number of walls and infill (5 walls, 40% infill recommended).
- Tip: The plate should be printed in PLA instead of PETG for better fitting.
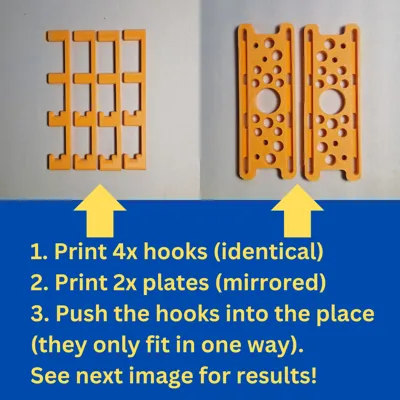
- Note: The two plates are different—ensure you print both correctly.
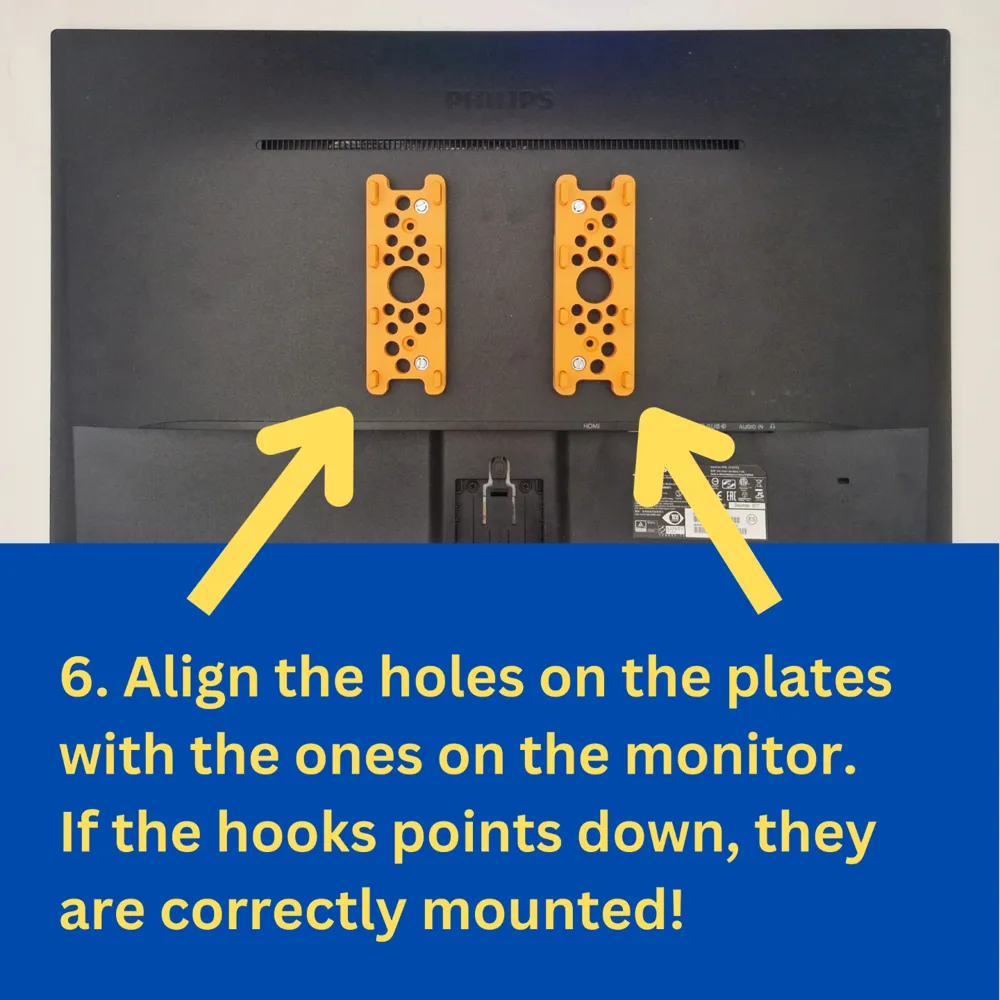
- Assemble the hooks by snapping the 4 identical hook parts into the plates, aligning them with the correct holes (see images).
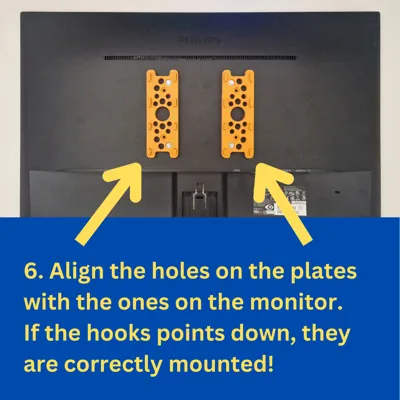
- Attach the plate to your monitor using the VESA 100x100 or 75x75 mount.
- Connect the cables to the monitor before hanging it on the pegboard.
- Mount the monitor onto the Skådis pegboard and adjust as needed.
⚠ Important Warning
Ensure that your IKEA Skådis pegboard is securely mounted to the wall. If the pegboard bends when you hang the monitor, consider reinforcing it with additional mounting points, ideally near the monitor.
The Story Behind This Design
This project began as a budget-friendly solution to optimize a small desk space. Traditional monitor arms, while effective, take up space and can look bulky. I wanted something sleek, minimal, and practical, so I designed my own mount.
The first version had some dimensional issues and was tricky to mount, but after several iterations, I developed a solid, easy-to-print, and easy-to-install monitor mount fully compatible with IKEA Skådis.
Now, with version 2, I’ve refined the design based on real-world use, making it more streamlined and flexible with improvements such as rounded corners, a smaller print size, and fewer parts.
License

You shall not share, sub-license, sell, rent, host, transfer, or distribute in any way the digital or 3D printed versions of this object, nor any other derivative work of this object in its digital or physical format (including - but not limited to - remixes of this object, and hosting on other digital platforms). The objects may not be used without permission in any way whatsoever in which you charge money, or collect fees.


Comment & Rating (110)