Search models, users, collections, and posts

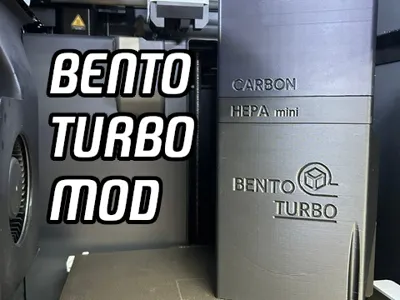
Bento Box TURBO Mod: 24v Blower Fan Filters Fumes!

Remixed by

Print Profile(3)

All
P1S
P1P
X1
X1 Carbon
X1E
A1
H2D
H2D Pro
H2S
P2S
H2C
X2D
A2L

ASA - All files included - 2 Filter Housings - No supports
Designer
9.9 h
5 plates
5.0(26)

0.2mm layer, 2 walls, 15% infill, ASA
Designer
4.7 h
2 plates
5.0(26)

Full Print - 2 Plates - PLA - No Supports
Designer
9.4 h
2 plates
5.0(12)

Open in Bambu Studio
Boost
252
796
190
91
549
301
Released 

Description

This mod to the original “Bento Box v2.0” takes the filtering process and TURBOCHARGES it!!!

Why I designed this:
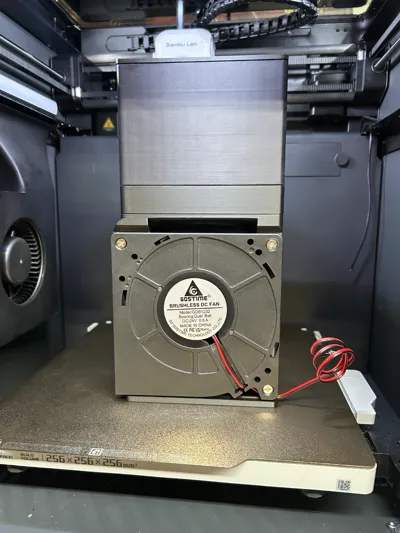
The 40x20mm fans that I was using weren't moving any air through the assembly. I looked at other fans online, but I could never be sure if the CFM ratings were accurate. Axial fans do not produce much static pressure, and I didn't want to use small radial fans. My solution? One 120mm radial fan. This generates enough suction to pull the hotter air full of VOC's through the carbon and HEPA filter, and exhaust it at the bottom. The other benefit to this is circulating air throughout the print chamber without cooling the air or the part. After testing with a 3 hour print, my enclosure temp floated around 47.5* C.

Requires:
- The Carbon Box, C-Mag, and dividers from the Original Bento Box v2.0
- This Radial Blower Fan from Amazon (other 120mm blower fans might work)
- 4mm x 2mm magnets
- Superglue
- 22AWG wire and a way to solder them to the fan wires
- Red Terminal Crimps to attach to the PSU of the P1S or X1C
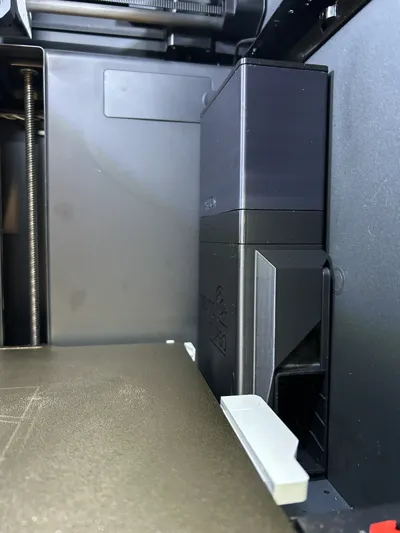
- OPTIONAL BUT RECOMMENDED FOR P1S USERS: The Bento Box External Switch and Housing

An inline switch is HIGHLY recommended to keep the filter fan from running constantly when your printer is on.

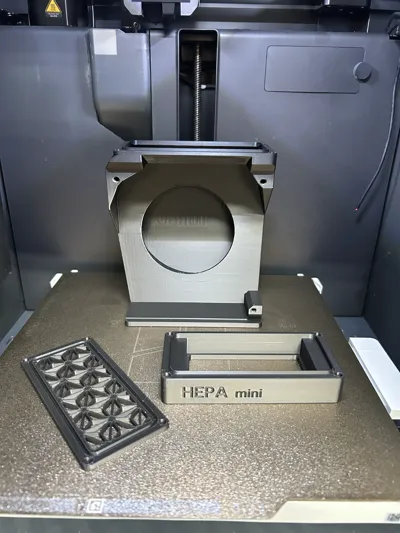
This mod puts the HEPA filter on top of the fan housing, and the carbon filter on top of that. It also uses a custom top screen. This is to ensure no carbon dust gets blown into the printer.

Yes, the fan is loud, but it isn't THAT loud and makes printing ASA a lot safer! Enjoy!

Comment & Rating (190)

(0/1000)

Boosted
Really impressed with how effective this is! I built an enclosure with two HEPA filters and used an LM2596S buck converter to step the 24V fan down to 12V. The result? It's quieter than the printer itself! Even at 12V, the ABS smell is barely noticeable. For control, I'm using a Tuya smart relay. It's rated for 100V but works perfectly at 24V. Highly recommend this setup! Big thanks for sharing this project – it's a super effective solution!
(Edited)
The designer has replied
10
Reply
WOW! Awesome photos and good to hear it works well at 12v!
1
Reply
Print Profile
Full Print - 2 Plates - PLA - No Supports
I modified the Fan mount and I was able to fit it on the left with no problem.
The profile uploader has replied
profile
4
Reply
That is awesome! The P1S has a fan there already, but that's perfect for the P1P!
0
Reply
Replying to @FlipNik_Pinball :
yea but the fan in the p1s is pretty much exactly the same as p1p, ive got a fan coming so i can have filter on left and right.
(Edited)
profile
1
Reply
Replying to @lloyd1337 :
Awesome! Enjoy!
0
Reply
Boosted
Print Profile
ASA - All files included - 2 Filter Housings - No supports
I finished a long-delayed project—Bento Turbo (putting it off for two months, but the growing number of ASA prints, forced me to finally finish it). Printed yesterday - ASA Devil Design and ASA Bambu. Today I assembled it, glued all those damn little magnets :-) and installed it. The power supply is solved externally via a 220V/3.5-24V source, so the fan power can be regulated. I originally wanted to run cables to the hole in the back, but in the end I used a conveniently located hole in the printer's bottom - just a few centimeters from the Bento base (too bad I didn't notice it earlier - I could have modified the base model so that the cables were completely covered). The power supply is temporarily placed next to the printer ... a more elegant solution will have to wait. To be honest, I am very curious about the experience of real-world operation - elimination of odors, more even heating of the chamber space, etc. Thanks for the great model... everything went smoothly
The profile uploader has replied
profile
5
Reply
The external power supply is a great way to regulate the speed of that fan; it is a beast! The print looks great, and now you can print even more ASA!
(Edited)
1
Reply
can you tell me where you found that hydrometer mount?
0
Reply
Boosted
Replying to @user_2918649475 :
2
Reply
Boosted
An excellent functional print that can move a LOT of air. Running at 12 volts seems to be the sweet spot but I can up that if it works out insufficient. I added the Safety Wedge For BentoTurbo and that corrected the issue with the floor. I didn't want this hitting the bed! If you are trying to work out how to route the wires, look no further! There are holes in the floor and the fan wires can pass straight through. For the time being I will just plug it in when I need its services.
The designer has replied
designer
3
Reply
Glad it worked out for you! A lot of people seem to be running it at 12v and that’s great! Easy to find a power supply!
1
Reply
Boosted
Replying to @FlipNik_Pinball :
At the moment I will leave it at a variable rate, I can just plug it in when it needs to be used. When I have settled on a voltage that works perfectly, I will change to a fixed voltage rate. Just need to dig through my pile of old AC/DC converters. You need to be selling these through a seller, these are much better than the standard BentoBox. The fan you chose makes all the difference.
1
Reply
Replying to @Beagly :
people buy things they can just print? I guess I could sell it as a kit…
0
Reply
Just finished it, I ended up using heat set inserts (M3x5mm) because I don't trust the way the layers in the screw holes were looking at me. Upgrade on my original bento, I'm reusing the HEPA for pre carbon and adding the HEPA just below as well. It's quite loud! I will have to work on the speed control soon.
designer
3
Reply
@snazzer Do you have a photo of the screw mount? What screws did you use? 😊
Show original
designer
1
Reply
Replying to @Andreas10 :
I used the same fasteners that are part of the original bento box instructions. See https://www.printables.com/model/272525-bentobox-v20-carbon-filter-for-bambu-lab-x1c-enclo/files and look at the user guide.
designer
2
Reply
Replying to @snazzer :
Oh sorry you mean in the main fan....I used M3 inserts, I don't remember the length, but I think 2 or 3mm.
designer
3
Reply
Boosted
A little helper for those who are experiencing a similar problem to the one I had. After installing Turbo Bento, I noticed one inconvenience - after screwing it to the bottom, it did not stand straight but was tilted toward the build plate. Not much, but given the height of TBento, its top came very close to the plate (in my case, it was barely 2 mm). It's only a matter of time before it may tilt even more (like due to vibrations during printing) and collide with the moving plate. Tightening the screw does not solve the problem – it actually makes it worse (as the plastic bottom of the chamber is thin and warps, and the screw is on the "wrong side"). The solution is a simple model - a wedge pad that slides under the front of the Bento base and deflects it in the right and safe direction - away from the printing plate. More information at ... https://makerworld.com/en/models/1845219-safety-wedge-for-bentoturbo#profileId-1971829
designer
5
Reply
Boosted
This solved the solution of this getting a little too close for comfort. Fantastic solution!!!
1
Reply
Print Profile
ASA - All files included - 2 Filter Housings - No supports
Printed on X1C with white PolyMaker HT-PLA-GF. Instead of crimping/soldering the fan wires, I bought some pairs of the XH2.54mm 2pin connectors with wires for the fan. And then I did solder those wires, but with a 35c default open bimetal thermostat spliced in that I Kapton taped to the bottom of the shelf. Still needs a little cleanup for the wire and probably more Kapton tape, but working great. Connectors: https://www.amazon.com/dp/B0BDR2QXKN Thermostat: Make sure to select the 35C, Normal Open https://www.aliexpress.us/item/3256805916846247.html The 30c would stay on too long after printing, even when leaving it in the bottom of the printer. The 35c in turn wouldn't actually come on unless taped to the shelf.
The profile uploader has replied
profile
3
Reply
Smart implementation! I’d actually recommend putting the hepa mini filter under the carbon to keep from throwing carbon dust all around the printer, or printing a 2nd hepa mini and having one on top and bottom of the carbon.
(Edited)
0
Reply
Replying to @FlipNik_Pinball :
Ahhh.. right. Thanks for the reminder, yes one above to protect the activated carbon from fiterable plastic fume/dust, and below to protect the printer from carbon dust. Printing it right now.
(Edited)
profile
2
Reply
Print Profile
Full Print - 2 Plates - PLA - No Supports
MORE POWER!!! Okay... too much power! This thing is a beast. Sucks air through two filters and a fully loaded carbon container like they aren't even there. After some finageling and a long set of needlenose pliers, I ran the wiring through the crack in the back right wall. I drilled a few holes in my back plate and hooked up a 5.5x2.5 power power jack and a couple PWM speed controllers to my lights and this fan. It's quiet at 12V but still blows a good amount of air. It's entirely tolerable at 17V and completely removes any VOC vapor when printing ABS. I guess I'm saving 24V for whatever filament gives off Sarin Nerve Gas, because it sounds like a freight train! I saw a couple gasket models that fit, but none seemed to be molded to fit the grooves between boxes. That'd be the only thing I could think of to improve this model. This thing is suckin so much air it wouldn't surprise me if it pulls air through the grooves. Some liquid gasket maker did the trick to ensure a perfect seal.
The profile uploader has replied
profile
4
Reply
looks awesome in that clear filament!
(Edited)
1
Reply
Boosted
Print Profile
ASA - All files included - 2 Filter Housings - No supports
I printed this with PETG and it turned out great. The fan can move way more air than the smaller fans and between the charcoal and double HEPA filters, eliminates smells from the printer. Perfect fit and a great design. Rather than power this from the printer, I designed a Power Distribution Unit that screws to the back of the printer. It utilizes 3 PWM Motor Controls which allow you to adjust fan speeds and if you have LED lights, it can dim and brighten them. I call it The Power Block. Linked below. https://makerworld.com/en/models/1630580-the-power-block-x1c-p1s-power-distribution-unit#profileId-1722160
The profile uploader has replied
3
Reply
that is awesome! Glad it fits an X1C as well!
0
Reply
Boosted
Print Profile
ASA - All files included - 2 Filter Housings - No supports
best bentobox. i tried the OG Version and the 120mm Fan Version, but this is the best. i bought the 12V and 24V. the 12V is enough und brings my chamber temperature higher(from 41Celsius to 48 now!)
profile
4
Reply