


Print Profile(10)


Bill of Materials




Description
The jewelry box with a classy-cutesy heart pattern
This jewelry box is designed to keep your cherished accessories organized and tangle-free.
This model is compatible with all 256mm+ plates, for some reason the A1 is not listed as compatible for some profiles, but it is, just make sure to remove your A1 filter.
Boost Me (for free)
Well, if you want !? It means a lot to me :D
Boosts also help me justify my protopyping to my wife... 😅
The lid / top
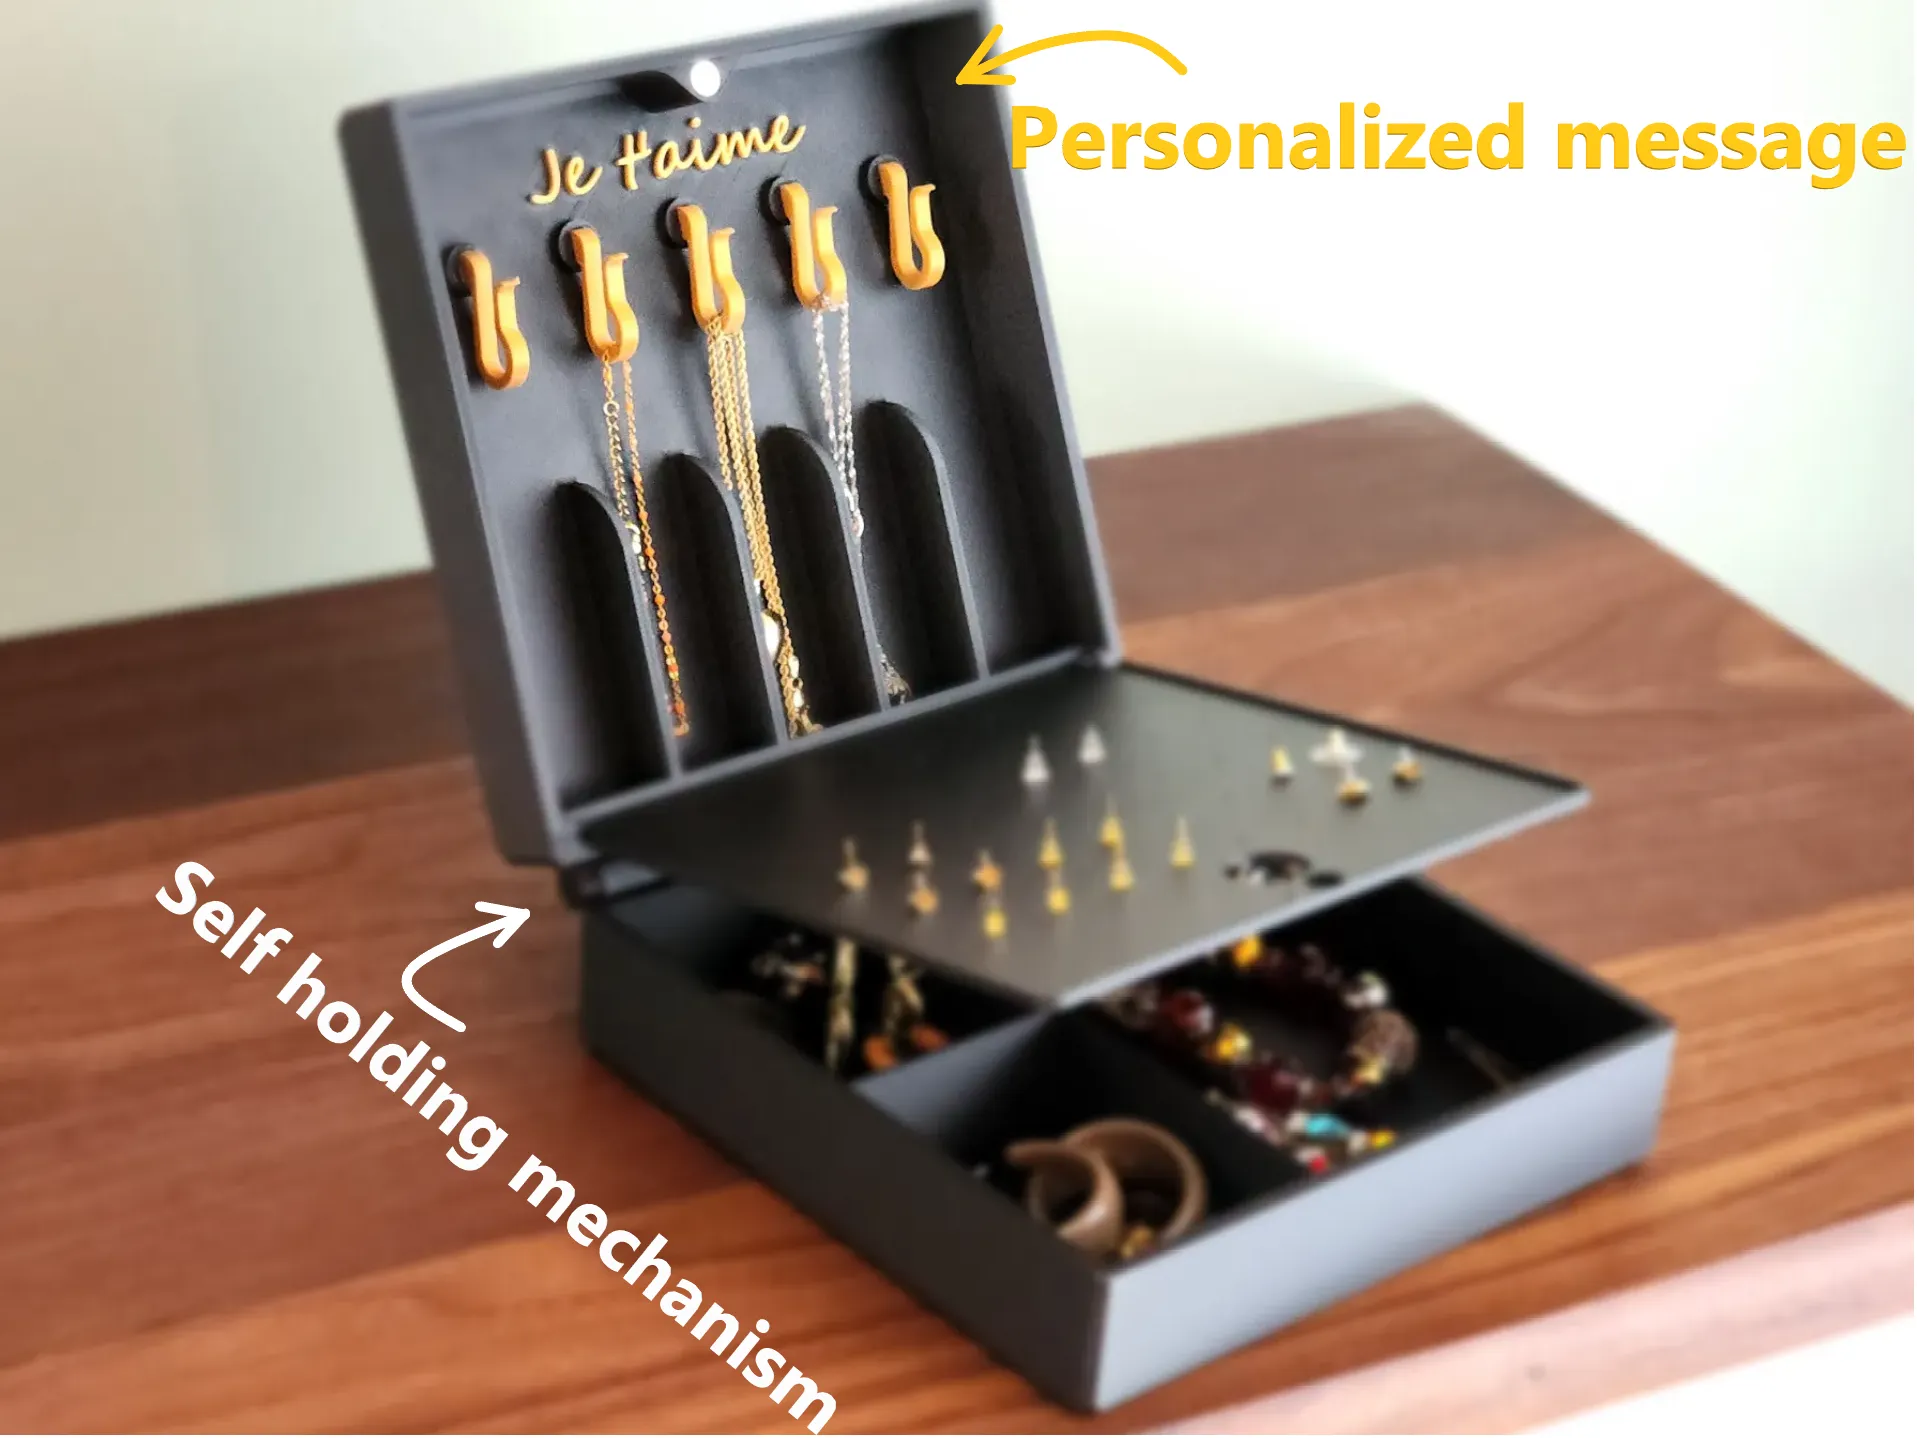
The lid features a debossed heart pattern embracing the line effect of printing mid air, inside you'll find the following features:
- Hooks for your tangle prone jewelery (necklaces, bracelets…). Printed horizontally for sturdiness and flexibility, super-glue them in !
- Vertical separators to make sure everything remains tangle free.
- A small incline lip, to make sure nothing gets caught in the hinge and goes on the middle separator instead.
- A customizable text, perhaps to make a loved one remember you love them, or make them laugh.
The lid separator
There's a middle separator between the lid and the base, as a way to maintain necklaces in the top of the box. Marying function and beauty, I placed holes in the separator as a way to store and display stud/stab type earrings.
The base
- Separators : The separators allows for future (and current! See print profiles!) inserts. Also, maybe you want to segment where you put what.
- There are different bases options, with separators by default, but there's also a profile with alternative options : without separators for a more “throw it in” use case and deeper bases for those of you with more treasure to organize !
The hinges
Features on hinges? What do you mean? Yup! I'm sure you've seen those little strings, on the commercial options found online, tucked and glued behind some felt, they inevitably end up breaking. Well, with the joys of 3d printing, we have POWER: manufacturing a better solution. I added a simple tab on the outer eyelet, the base rests against the lid and vice versa, at the perfect angle (Well I hope you like it anyway…).
… As a gift ?
Who doesnt like a personalized gift ? Find the person's favorite colors (atleast for the inside accents?) and print away! HINT: the closed box fits perfectly inside a bambu refill box!
Colors ?
Pictured, an elegant matte charcoal and gold for a loved one, you still have time before valentine's day! A little jewelry dangling hidden in there with cute text sure would make for the perfect gift!
Go crazy for your daughters! Pink and purple? White and red ? A bit of paint-in and color swap by layer? RAINBOW! … Sorry I'm getting carried away here…
Happy printing !
How do i personalise text ?
Right click on the pre-existing text added in-sliced and click edit-text. You can also add your own text pretty much on any flat surface easily, use the text tool at the top of the screen!

Printing:
All the plates are compatibles with the A1, I need to re-upload a profile showing that.
The lid has an intricate pattern on the first layers, make sure that your plate is clean (scrub with dish soap and rinse with a lot of hot water). I recommend watching the first layer.
In my profiles, I added a height range modifier, the section of the print including the hinges is printed with more walls to make sure nothing breaks, both in the bases and the lid.
Assembly:
- Put a dab of glue inside the 5 hook receptacles and push the hooks in. They are not a 90 degree angle, the bottom end of the hook will rest against the inside of the box.
- Place a dab of glue inside the separator's hole, and push a magnet in.
- Place a dab of glue inside the lid's hole and push a magnet in, when closed, both magnets should be able to touch each others (watch out for polarity)
- Deburr the lid's internal holes with a small pointy object, simply make sure they are “round”.
- Lightly bend the middle separator and align the pins into the lid's holes.
- One at a time, put a dab of glue inside of the dowel's caps, push the dowel in it. if the fit is too hard, you can scrape it a little bit, the cap serves no mechanical purpose other than making sure it remains in the hole. You should have two open ended dowels.
- Put the lid on the base.
Push the dowels in the holes while lightly wiggling the top up and down (there is about 0.5mm clearance) and glue the other end on.
Notes:
Comment below if you'd like something more, have ideas, want another magnet hole size, no magnet , etc.
There is a tiny weeny gap between the two faces when closed, it is not noticeable, but it allows for a little bit of felt to be glued on around the outer rim for a satisfying closing sound. The square is 162mmx162mm with 4mm walls
Updates
- 02-09 Added a profile with about double the height for the base.
- 02-09 Added a profile for 6x2mm magnets.
- 02-10 Added a profile for 5x3 magnets.
- 02-10 Added a profile for a ring organizer that fits in the little compartments.
- 02-12 Removed an extrusion in the lid on the sides by the internal hinges
- 08-28 Added message concerning A1 print profile compatibility
- 11-05 Added a print profile for the A1 mini! Thanks to @Katastrofie for testing it out!
Seak peek

First little base insert idea for fishhook earrings modeled, sent to print and I'll see the result tommorrow morning! I should be able to sneak in modiifcations during my breaks and lunch !
Here are a few of my models you might enjoy :


License

You shall not share, sub-license, sell, rent, host, transfer, or distribute in any way the digital or 3D printed versions of this object, nor any other derivative work of this object in its digital or physical format (including - but not limited to - remixes of this object, and hosting on other digital platforms). The objects may not be used without permission in any way whatsoever in which you charge money, or collect fees.


Comment & Rating (283)