


Print Profile(1)

Bill of Materials


Description
Boost Me (for free)
Designing models like these involves hours of dedication and numerous test prints to ensure everything is perfect. If you appreciate the effort I put into my designs, please leave a like and give a boost. Your support keeps me motivated and enables me to continue sharing with this amazing community. Thank you for being a part of it!
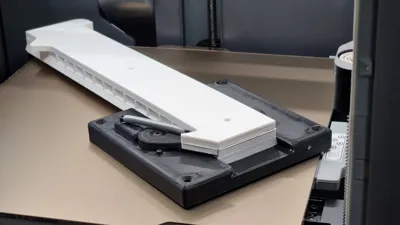
My newest and most robust monitor wall mount utilizing bi-stable ratchet mechanism.
I currently use this version with my heavy gaming ultrawide monitor with great success.
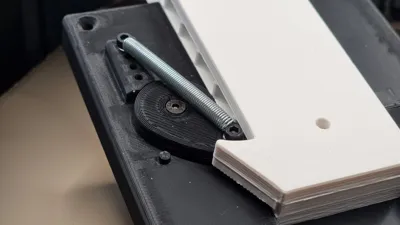
Operation:
The mechanism ratchets on the way up, until it reaches maximum top position.
At the top end stop the mechanism opens and allows for downward movement.
After reaching bottom end stop, it locks again to enable the ratchet again.
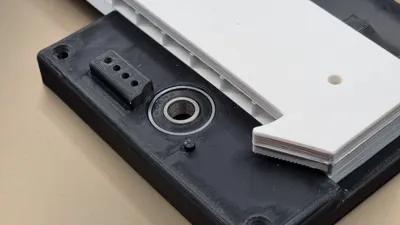
Thanks to the bearing it ensures smooth operation and satisfying clicks when adjusting height.
For even smoother movement I advise using pure parafin wax as a lubricant for sliding parts.
Make sure it's parafin wax and not beeswax or some kind of plant based wax as those are sticky and actually make movement worse.
Hardware needed:
608RS bearing or similar (could be also 3D printed)
4x M4 countersunk screws for VESA plate (sometimes comes with monitor)
2-3x 4.2mm flat head screw (or similar) for attaching the mount on the wall.
2x M3x6 (or similar lenght) screw for attaching spring
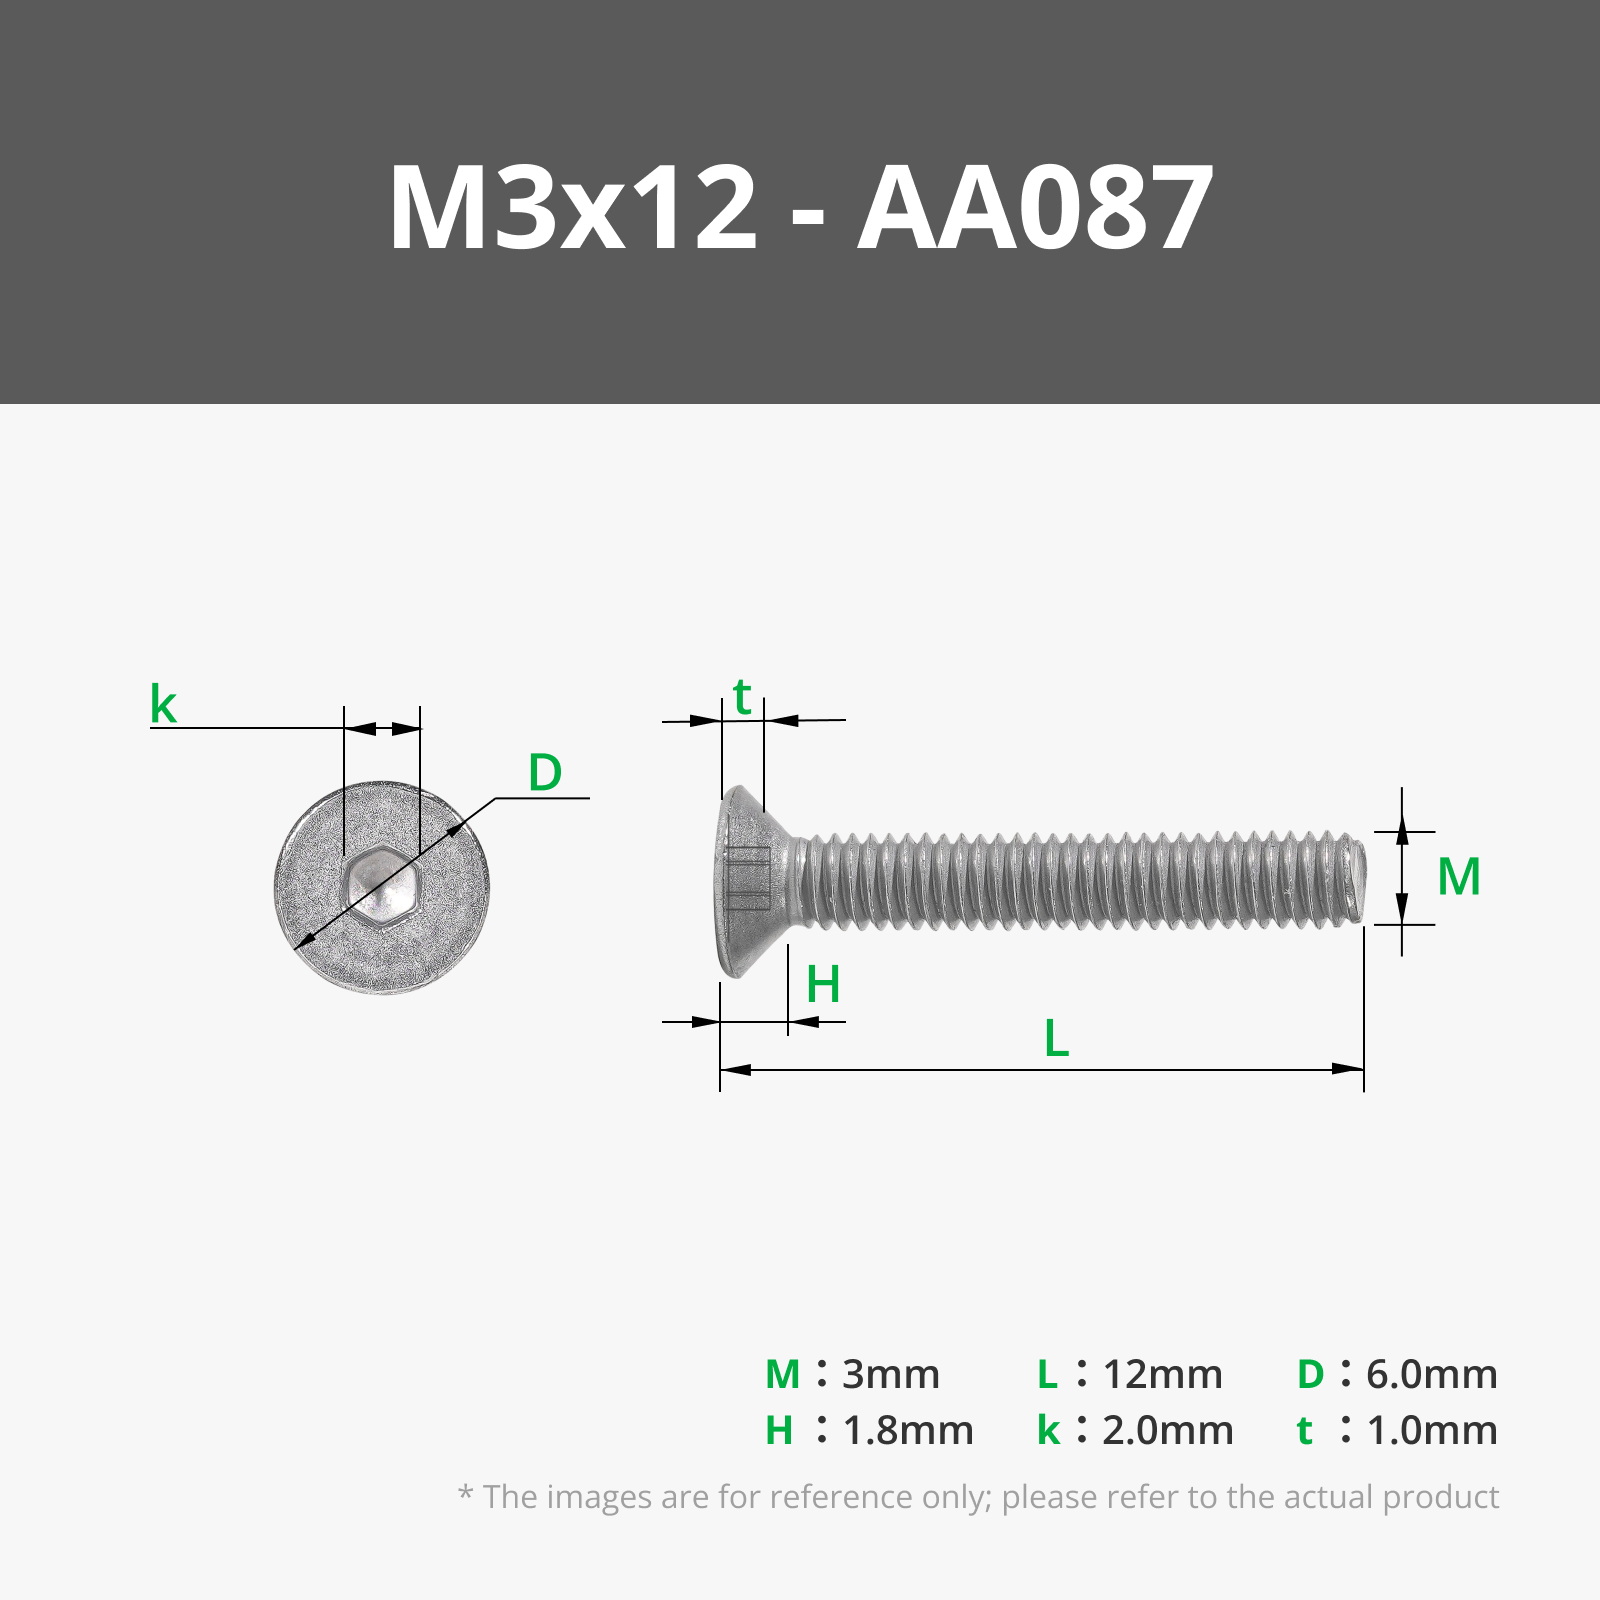
2x M3x12 (or similar lenght) for attaching top end-stop
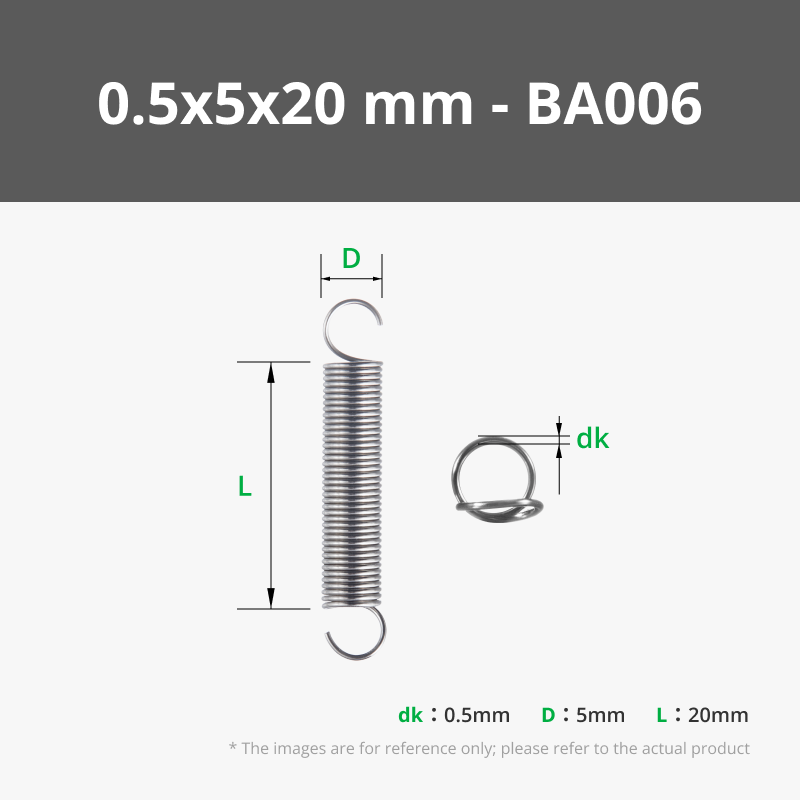
1x pull spring - diameter up to 5mm, lenght can be adapted using different attachement points on the model.
Please note that mechanical 3D prints demand precise tolerances and are highly dependent on a well-tuned printer and filament profile. When leaving a rating, remember that it is not the designer's fault if your printer or filament settings do not achieve the required tolerances.
I recommend using Orca Slicer as it has much better options for making functional prints with super tight tolerances. Also take the print profile as a base guide line and feel free to adapt it to your printer's optimal settings.
License
You shall not share, sub-license, sell, rent, host, transfer, or distribute in any way the digital or 3D printed versions of this object, nor any other derivative work of this object in its digital or physical format (including - but not limited to - remixes of this object, and hosting on other digital platforms). The objects may not be used without permission in any way whatsoever in which you charge money, or collect fees.
Comment & Rating (8)