T8 Lead Screw Cleaning Tool V1


Print Profile(1)

Description
Please see version 2: I increased the clapping force by 2.5 times and adjusted the thread profile to better fit the contour of the trapezoidal thread profile of a T8 lead screw
Press Ctrl + click to follow the link
https://makerworld.com/en/models/2028460-t8-lead-screw-cleaning-tool-v2#profileId-2218064
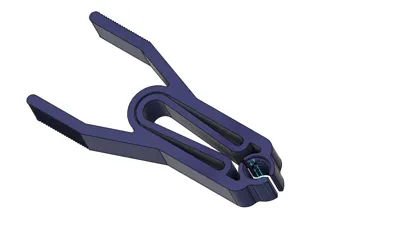
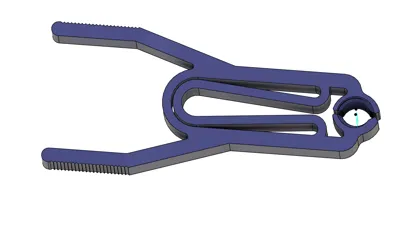
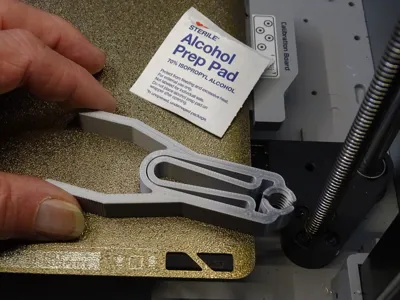
I designed this version of a tool to clean the T8 lead screws of a Bambu Lab printer to use an “Alcohol Prep Pad” that can be found at a local pharmacy or food market. I designed the threads on the tool to have an offset so that pressure is always applied to the lead screw. The threads are also made with a larger 8.5 mm diameter to allow for the thickness of an alcohol prep pad or something similar. If you clamp the tool on the threads without any kind of cleaning pad, you will see that the tool threads are slightly larger than the lead screw thus allowing space for the pad The wall thicknesses of all the sections of the part are designed to create complete unbroken loops. When you set “Wall loops” to 8 or more you can see what I mean when you slice the part. Although I do not have a way to accurately measure the force, it seems that having uninterrupted loops removes any infill and gives the tool the best tension on the lead screw. I have printed the part in both Bambu PETG and PLA. Because PETG is a little more flexible than PLA, I believe the force applied to the lead screw using PETG is ever so slightly less than the PLA. I have not tried any other materials so that will be up to the audience to experiment with. I printed the part at the .16mm layer thickness just to give the threads a better match to the lead screw. I left all the other settings to the default valves designed by Bambu for each of the two materials. The .16mm thickness took 48m on the “standard” speed setting and the .20 thickness took 30m.
Tips for use:
I found it easier to take the IPA pad out of its package and place it around the threads of the lead screw and THEN use the tool to clamp it in place. I always tried to get the pad centered on the lead screw so that it was in contact with both jaws of the tool to get the maximum surface area of the pad to be in contact with the lead screw. When the build plate is near the top of its movement, just grab one ear of the tool and pull it out of the way. I put a taper on the inner edge of the jaws so that you do not need to squeeze the ears of the tool to remove it from the lead screw.
There is a version 2 that is now available: https://makerworld.com/en/models/2028460-t8-lead-screw-cleaning-tool-v2#profileId-2218064
Comment & Rating (349)