


Print Profile(3)


Description
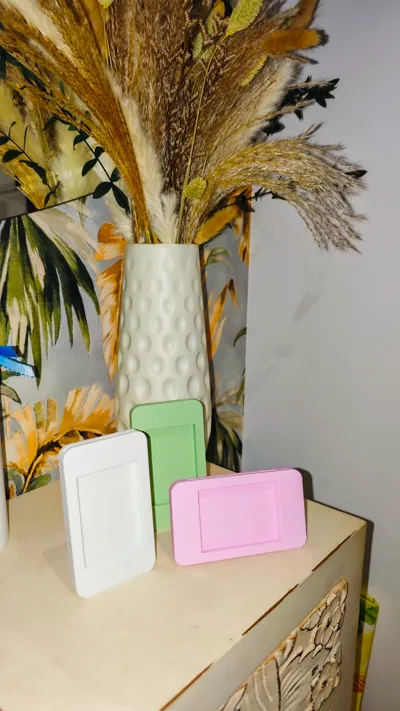
Want to personalize your Instax mini photos? With our free 3D design, you can print your own frame and showcase your cherished memories with style! Follow our straightforward tutorial and discover how effortlessly you can create a unique and decorative item.
What will you need?
- A 3D printer
- Our free 3D design (download link)
- Filament in your preferred color
- Allen wrench (optional, if the design incorporates screws)
- Adhesive (optional)
- Instax mini photos
Tutorial:
- Download the design: Click the link to download our STL file at no cost.
- Prepare your 3D printer: Ensure your printer is calibrated and ready to print.
- Select the filament: Choose your favorite filament color for your frame.
- Print the components: Upload the STL file to your slicing software and commence printing. Printing time may vary based on frame size and printer.
- Clean the components: Once printing is complete, gently clean the components with a brush to remove any filament residue.
- Assemble the frame: Follow the assembly instructions provided within the design file. Most frames assemble easily by snapping together or using screws and an Allen wrench. If needed, use adhesive to secure joints.
- Insert your photo: Slide your Instax mini photo into the designated area of the frame.
- Enjoy your creation! Display your frame prominently and admire your handiwork.

Want to add a personal touch to your Instax mini photos? With our free 3D design, you can print your own frame and display your memories in style! Follow our simple tutorial and discover how easy it is to create a unique and decorative piece.
What will you need?
A 3D printer
Our free 3D design (link to download)
Filament of your favorite color
Allen key (optional, if the design includes screws)
Glue (optional)
Instax mini photos
Tutorial:
Download the design: Click on the link to download our STL file for free.
Prepare your 3D printer: Make sure your printer is calibrated and ready to print.
Select the filament: Choose the filament color you like best for your frame.
Print the pieces: Load the STL file into your slicing software and start printing. Printing time may vary depending on the size of the frame and your printer.
Clean the parts: Once the parts are printed, gently clean them with a brush to remove any filament residue.
Assemble the frame: Follow the assembly instructions included in the design file. Most frames are easily assembled by snapping the parts together or using screws and an Allen key. If necessary, use glue to reinforce the joints.
Insert your photo: Slide your Instax mini photo into the designated space on the frame.
Enjoy your creation! Place your frame in a visible location and admire your work of art.
License
You shall not share, sub-license, sell, rent, host, transfer, or distribute in any way the digital or 3D printed versions of this object, nor any other derivative work of this object in its digital or physical format (including - but not limited to - remixes of this object, and hosting on other digital platforms). The objects may not be used without permission in any way whatsoever in which you charge money, or collect fees.
Comment & Rating (24)