Filament Organiser - Book & Benchy


Print Profile(7)


Description
Filament Organiser - Book & Benchy
What is this thing?
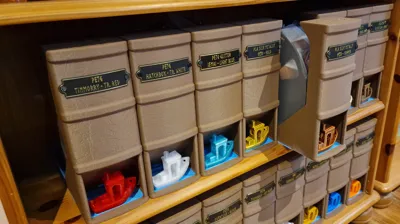
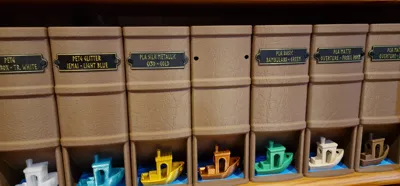
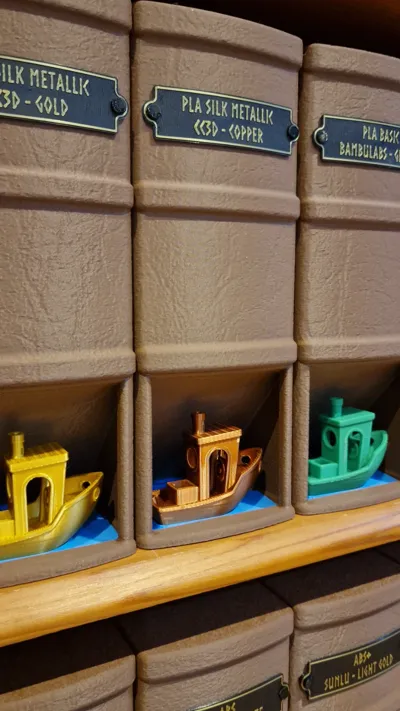
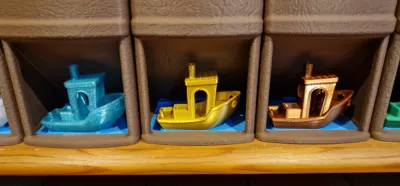
A storage solution styled as large book spines for your filament spools; it aims to be affordable while being functional. It incorporates a holder for the common Benchy as an easy method to identify and select your filaments, with printed labels that can be swapped as needed.
Hello there:
Boost Me (for free)
Boosts are always nice if you feel I've earned them <3
What are boosts? They are free tokens that you can gift to creators you feel did a good job. Each boost gives that creator a few points that can eventually be used for certain items in the Bambulab shop. A free way for you to support us.
I don't ask or require any payment, but if you wish to help me out you can tip me via KoFi https://ko-fi.com/drsquirrel.
Or enjoy it for free! Your call :)
--------------
Update - Labels:
I designed a MakerLab label system for those who aren't able to change the label models themselves.
Feel free to use the original labels supplied, or this generator.
https://makerworld.com/en/models/1053805#profileId-1040977
--------------
Brief:
A filament storage design that would be relatively cheap to print while looking good in an open bookshelf.
My filament was stored in my living space on an open bookshelf in vacuum bags and was becoming an eyesore. I didn't want to have plastic containers on the shelf, nor did I want the filament on a rail or in boxes. There were nice existing 3d models for filament containers, however they used a lot of filament. I decided to design a system that would hide the filament reels behind a book front, while displaying what was there with an example Benchy and label, giving easy access to any I wanted.
I use vacuum bags for the filament spools, they are fairly cheap and work fine for me with the little pump they come with. The ones in the pictures are from Elegoo.
The Print:
In the print profile you'll find
- 4 plates with different version of the front. Each design A through D have a different leather texture. This should prevent repeating patterns on your bookshelf from being obvious. Print whichever combination you prefer. The parts are setup with variable layer height and support blocking to reduce material wastage at the top overhang.
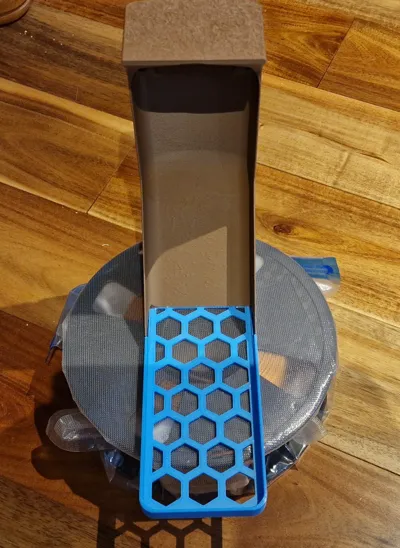
- 2 plates with the base. A plate with a single base, and a plate with 3 bases. These are setup with modifiers to improve the print quality.
- 2 plates with label pins. One plate is set to print by layer if you're confident all pins will print successfully. The other plate is set to print per object so a failed pin can be skipped easily.
- 2 plates with labels. One plate has additional slicer added text that can be edited. The other plate is blank to allow you to add your own text via slicer, hand written, or label maker.
Constructing:
- Print one Front, one Base, two Pins and one Label.
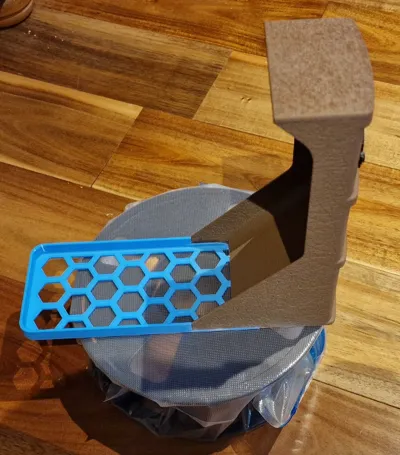
- Remove the supports from the Front, ensure all the supports are removed underneath and test fit the Base into it.
- Once happy the two fit together well, add a line of Cyanoacrylate glue (Super glue) to the recessed element of the Front and along the bottom edges that will contact the Base.
- Slot the Base into the Front and apply pressure until the glue is set. I stand the Front upside down and leave a weight on the Base to hold it in place while the glue cures. Make sure you don't add too much glue, and keep an eye out for glue runs if you do have it upside down.
- Clean up two Pins and insert one in each hole of the Label.
- Insert the Label with Pins into the Front. It should lightly snap into place but be easily removeable to change the designation of the storage.
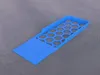
The Label:
The label is supplied in 4 formats.
- A plate with a blank label.
- Can be used for hand written, or label printing identification.
- A plate with a label with slicer text added to it.
- The text can be edited in slicer. However, note that you will have to manually re-centre the text any time you edit it, I couldn't see a way around this within BambuStudio.
- A .obj model.
- Can be used in any mesh editing program you prefer.
- A Fusion360 file.
- Can be used to add text or modify the label within Fusion360. I have added a supressed sketch and extrusion for the text as an example, you may need to alter the font to make it work with whatver font library you have personally available.
If you wish to design your own label, the holes are spaced 65mm apart with a diameter of 5mm, the label is 0.96mm thick where the pins locate. The label relies on being thin enough to flex around the Front when pinned in place.
Label Printing:
Without AMS:
The labels are set up in slicer to print without AMS. They have a pause point set to allow manual filament changing. They also have a dummy filament colour change set at the end to allow enabling of the prime tower. Simply print the label, when the printer pauses, unload the filament, load a new filament, resume the print. It seems there is a slight bug with Bambustudio where it will return the print head to the last location in the previous layer before resuming, this may lead to an unwanted dot, this can usually be removed fairly easily. You can add a dummy primitive onto the build plate and make sure it's the last thing printed each layer if it's causing issues.
With AMS:
Use one of the NoAMS label plates. Go to the preview screen and remove the pause point on the right hand side, then move the colour change to the required layer instead.
Thanks!
Hopefully that's enough information to get this all working for you. Originally I designed this just for me, and didn't expect it to gain so much interest from the functional 3D printing community. I'd really love to see your prints of the design, people always have such cool filaments and colour combinations.
Note 1 (2025-01-27):
My version was printed with
Overture Matte PLA in Chocolate - Fronts
I'd say going for a matte finish filament might give a better book look. I've never printed with wood effect or CF, perhaps they would work well too?
For the rest I used what I had laying around, hence the PETG PLA mix, so it's not worth copying what I used. Yes the PLA printed onto the PETG, but it's not the easiest to get right, I'd advise sticking to one material.
Tinmorry PETG in Sky Blue - Base
Overture PETG in Black - Labels and pins
CC3D PLA Metallic Silk in Gold - Label text
Note 2 (2025-01-29):
I've added the plain STL files for the parts, note that the pins should be printed on their side for strength, the labels are blank, and you'll need supports for the fronts. I'd advise looking into variable layer height to get better results. The fronts have quite a detailed (35Mb) mesh as I wanted it for the leather effect.
Settings I used:
These are just what I found worked, use your own judgement and skill, it's probably better than mine!
Front:
Top surface pattern concentric
Infill 10% Gyroid
Support - Tree(Auto) - On build plate only
Support blocker added to top of model to prevent giant tree support for upper overhang
Variable layer height tuned as appropriate
Base:
Top shell layers 3
Top shell thickness 0.5mm
Sparse infill 12%
Infill pattern Gyroid
Add single layer thick modifier added at hexagon top surface for ironing settings.
- Set ironing to Top surface in this modifier, I use 40mm/s, 30% flow, but use whatever works for you.
Add modifier around the entire front water/benchy
- Set top shell layers to 25, sparse infill rectilinear
Set variable layer height to max quality on waves layers.
Pins:
Enable support
support type normal
Initial layer density 100%
Brim enabled outer
print by object if you are getting failures and need to skip them
Label:
Infill direction 90
Add thin modifier across the label surface only
- Set modifier ironing to all solid layer, rectilinear, 40mm/s, 30% (or whatever your fav ironing settings are.
- The idea of this modifier is to fully iron the layer beneath the text and border flat so it's as clean as possible.
License
You shall not share, sub-license, sell, rent, host, transfer, or distribute in any way the digital or 3D printed versions of this object, nor any other derivative work of this object in its digital or physical format (including - but not limited to - remixes of this object, and hosting on other digital platforms). The objects may not be used without permission in any way whatsoever in which you charge money, or collect fees.
Comment & Rating (207)