Filament Organiser - Book & Benchy - Custom Labels


Print Profile(1)

Description
Filament Organiser - Book & Benchy - Custom Labels
This is a custom label generator for the model Filament Organiser - Book & Benchy. The generator will allow you to create labels that will pin onto the book styled filament storage fronts.
How it works:
Customize:
- Press the customize button to go to the editor for the labels, there you will be able to change various features.
- You have control of the font size, and font of each line, however you will need to know the exact naming of the font style you wish to use if changing from default. I believe you can use any font you have installed on your system, let me know if that works!
- You can turn the border lines off or change the thickness.
- Do not change the pin spacing or pin radius as this aligns with the book fronts.
- You can change the number of layers from the default 12 if you want a thinner more flexible label, but remember the pins wont fit as well.
- Label width will be a maximum of 50mm before it no longer fits on the book fronts. 20mm is default.
- Once complete you can download the STL for your label.
Repeat for as many labels as you need.
Optional if you use BambuStudio:
- Open the print template print profile in BambuStudio.
- Import your new STLs into this template.
- Copy the Generic cube modifier from the template label into each of your labels. It's tedious, so if you come up with a better solution for the ironing, post in the comments! (See the Templates section for more detail on this).
Customize - I want more lines of text:
- The customize system will allow you to put up to 4 lines of text. The default is 2.
- In order to have more than the default 2 lines, you will likely need to expand the LabelWidth. The max size is 50mm, default 20mm.
- You can enable or disable each line 1 through 4.
- When you enable more than 2 lines you will have to adjust the VOffset of each line to set it in the correct location, default for 2 lines is 4.5 and -4.5. An example VOffset for 4 lines would be -12, -4.5, 4.5 and 12. It'll make sense when you play with it :)
Templates:
- If you want to use the template setup that I use for my own labels, the following information is relevant to you.
- If you plan to setup your own print for the labels, you can ignore the print profile and the following information, be free!
- If you don't want to colour swap at all you can always paint pen the colour, but I'd recommend the extra effort of colour switching. It's quite efficient if you put all labels on the bed at once.
Included in the supplied print profile are two build plate templates as a starting place for you to print your custom labels. Feel free to set the print up however you like best. The templates are just a starter so you can see the gilding technique I developed for mine. The plates are for AMS and no AMS printing.
Both templates have a modifier cut through the final layer of the flat label before the text. This modifier is set for ironing the entire layer, I'd advise changing the ironing settings for whatever you calibrate best for your material and printer. I used this technique so the ironing doesn't affect the text top layer, but also, by setting the entire layer to iron it doesn't create ugly patches around the text. It was my way of getting around it ironing only the visible gaps.
AMS
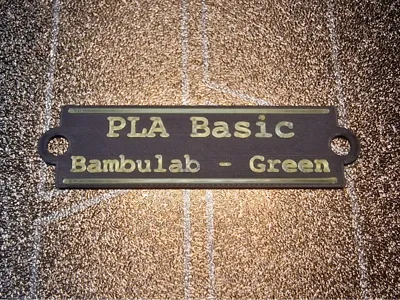
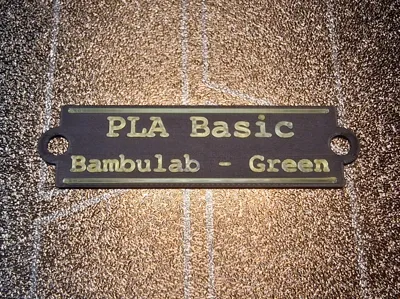
The AMS plate simply has a layer set to colour switch, this is the final layer of the print, meaning if you use gold like I have, it will be a very fine layer and look like gilding on a book label. Note that there is a single layer of the text printed before this in the base colour, then a second layer of highlight, this gives a muted finish to the lettering instead of a bold colour. This is different from painting the entire text, as that would print the whole feature in the selected colour. This technique is entirely personal taste, use whatever style you like.
No AMS
The no AMS plate is similar to the AMS one, however it required a pause to be inserted for a manual filament change, this is done where the AMS version has its colour change. However, due to not having an AMS, BambuStudio needs to be tricked into adding a prime tower to allow the nozzle to reach the correct pressure after the change. This requires the addition of a filament colour change command, this command can't be on the same layer as the pause, that's why there is a small cube primitive added to the side to add an additional layer after the print. This final layer is set to a dummy filament change, and enables the prime tower. It's a workaround for manual filament changing not being well set up in BambuStudio. Simply swap the filament to your highlight colour when the pause happens, then resume the print.
Thanks again!
Phew! This was a whole journey of learning crammed into a small time frame, I'd never used OpenSCAD or MakerLab until today, so this went ok I think. I hope this helps people get the labels sorted, I was worried it'd be a sticking point for many who didn't have the skillset for modifying the label models, and the in slicer text feature is truly terrible. I'd love to see the styles, colours, and things you come up with. Enjoy! :)
Here's the link to take you back to the main project if you need it Filament Organiser - Book & Benchy
License
You shall not share, sub-license, sell, rent, host, transfer, or distribute in any way the digital or 3D printed versions of this object, nor any other derivative work of this object in its digital or physical format (including - but not limited to - remixes of this object, and hosting on other digital platforms). The objects may not be used without permission in any way whatsoever in which you charge money, or collect fees.
Comment & Rating (5)