Search models, users, collections, and posts
P1S P1P X1C RISER - mp5works
IP Report


Print Profile(5)

0.2mm layer, 2 walls, 15% infill
Designer
14.7 h
7 plates

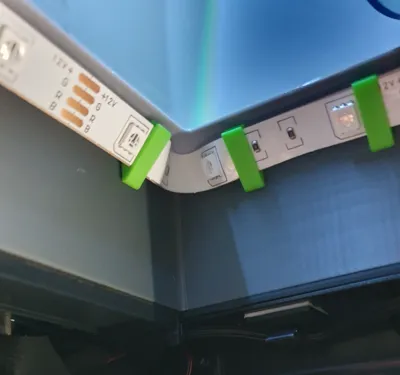
COB Style LED Clips
Designer
14 min
1 plate

双AMS堆叠/0.2mm layer, 2 walls, 15% infill
3.5 h
1 plate

0.2mm layer, 2 walls, 100% infill
1.2 h
1 plate
Click to see more
Open in Bambu Studio
Boost
164
461
61
57
314
158
Released
Description
Check out my P1S collection for other mods and upgrades:
https://makerworld.com/@mp5works/collections/4677543
Objectives:
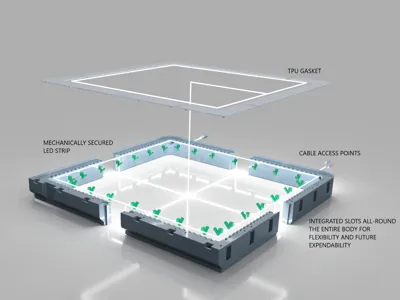
- Stop PTFE tube from rubbing against the glass
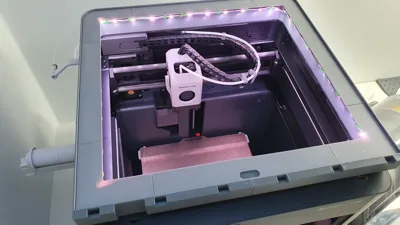
- Introduce more light into the enclosure
- Intergade a clip-on system onto the frame to carry on building future upgrades.
Notes:
- Designed to print entirely without any supports.
- Due to size of the print I suggest you scale objects accordingly to the material you`re planning on using to accomodate for shrinkage. (As included in my file I have used 100.25% scaling for Bambulab PETG HF, 100.40% for Bambulab TPU 95A and everything fits nice and snug with the main frame and glass panel)
- Attached file is set to print R/H LED cable feed-through. Mirror the objects (only cable feed-through inserts) if you plan on running cable through a left corner instead (tip: Right click on the object in BambuLab studio).
- Please note: (Plate 7) - Print sequence on these parts is set to “by object” for pure aesthetics only. Change it if you feel more comfortable with printing by layer instead.
- I have opted for a mechanically secured LED strip (Glue/adhesive inside a heated chamber and LED strips hanging right above the fast moving parts sounded like a bad idea). You can use any standard 10mm strip. No soldering required, just make gentle bends/loops around the corners (as included in my photos for your reference) and trim your LED strip to length.
- Print as many LED hooks you may need and located them as required per your strip (avoid delicate components). Press hooks into the frame until they sit flush.
- Leave adhesive tape sealed on the strip, Adhesive is not required and it will make installation messy.
- TPU gasket extends over the hooks/LED_strip to make sure strip stays in place and minimize light bleed.
- In case anyone wonder why no air vents included… I built my setup to work with an external exhaust system which can force a lot of air flow if needed and remove all the fumes.
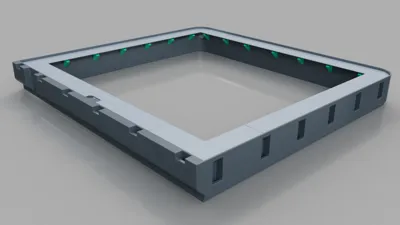
Main frame assembly:
- Tongue and groove latch has been designed to print snug.
- No glue/adhesive required.
- Press two parts together as far as you can with your hands at first. Set them on a flat surface (table, desk etc). Use soft sacrificial piece and tap it down gently with a small hammer. You will hear and feel each print layer with each tap. Carry on slowly, layer by layer until both parts are perfectly flush.
Clip-on system:
- I have attached a couple .step files with this project for your CAD. I figured some people would like to design their own upgrades. Attached are couple clips for your reference.
- I have already built several add-ons which I will share next.
I hope that helps.
@mp5works
License
This user content is licensed under a Standard Digital File License.
You shall not share, sub-license, sell, rent, host, transfer, or distribute in any way the digital or 3D printed versions of this object, nor any other derivative work of this object in its digital or physical format (including - but not limited to - remixes of this object, and hosting on other digital platforms). The objects may not be used without permission in any way whatsoever in which you charge money, or collect fees.
Comment & Rating (61)