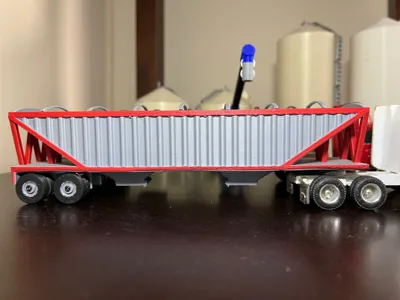
1/64 Tandem Grain Trailer


Print Profile(2)

Description
A 1/64 scale Tandem Axle Grain Trailer
Hardware Needed for supplied wheels
4 x 1.7mmx 6mm Screws
CA Glue for mounting Hopper Hoops and Strengthening 5th Wheel King Pin
Only weak spot I have had problems with from dropping or the toy being tossed is the King Pin snapping. I would recommend applying CA Glue on the King Pin to Strengthen it. However if it does break, using another 1.7mm Screw you can screw it into where the plastic one was and continue on.
There is 3 variations of axle designs if you would prefer to use metal axles with custom wheels. Snap on Wheel and Hub and the using the hardware to mount the supplied wheels.
If you would consider boosting, rating, and posting your prints of my design it would be greatly appreciated. I am continually improving the design and take your feedback into consideration.
Boost Me (for free)
When assembling the wheels/axles, you will have two different sizes of bushings. The skinnier one goes on first, then the wheel, then the thicker bushing, with the second wheel following and then putting the 1.7mm Screw the printed washer start snugging up the screw while rolling the wheels until they are tight to move. Then back the screw out slowly until you have free movement of the wheel. If you have a kid that is gonna get some miles on the wheels you can add CA glue to the screws like you would Loctite. I haven't Had this issue yet.
Assembling the Gates for the Hoppers. Feed the Gates in from the middle with the bottom tab facing down, so you can be able to open the gates by sticking your fingers underneath and sliding. You may have to adjust the size of the gates +/-1% de[pending on your printer. Should have a small amount of friction to keep the gates from sliding out but not where you have to fight moving them in or out as that can rip the Gate Slides off of the Hopper.
Assembling the Hoops onto the Top of the Trailer, you can bend the hoops to fit in their slots and then using CA Glue, apply it to the edge to bond each end of the hoops to the Trailer.
License
You shall not share, sub-license, sell, rent, host, transfer, or distribute in any way the digital or 3D printed versions of this object, nor any other derivative work of this object in its digital or physical format (including - but not limited to - remixes of this object, and hosting on other digital platforms). The objects may not be used without permission in any way whatsoever in which you charge money, or collect fees.
Comment & Rating (46)