Mario Kart 8 Ladybug Kart Multi-part Assembly No AMS Required


Print Profile(1)
Description
Assembly Video:
Model Description:
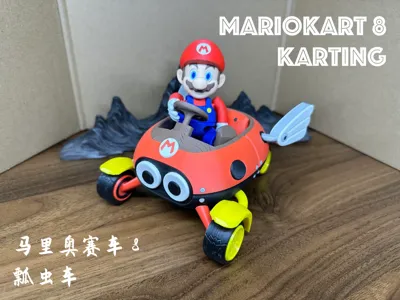
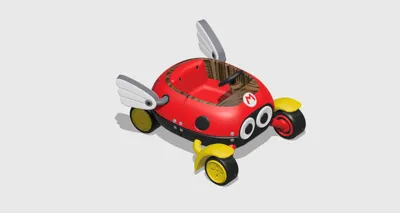
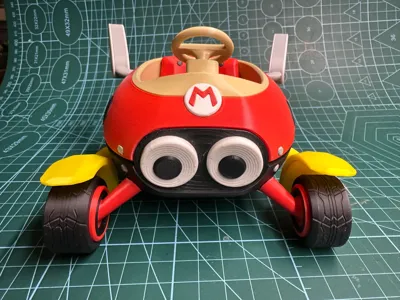
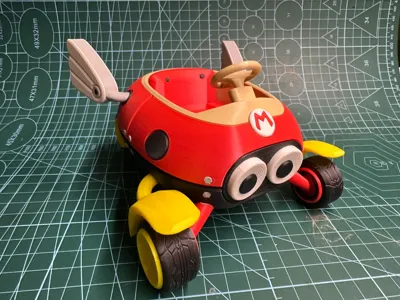
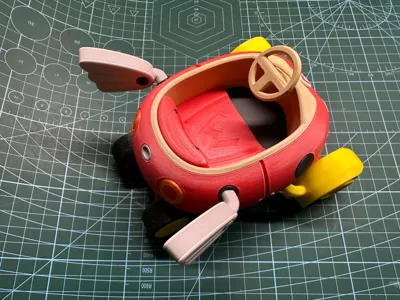
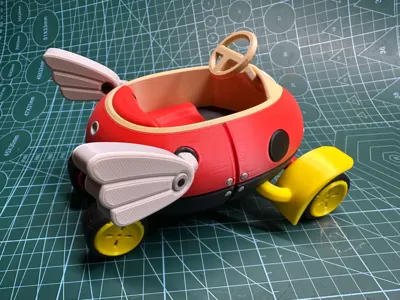
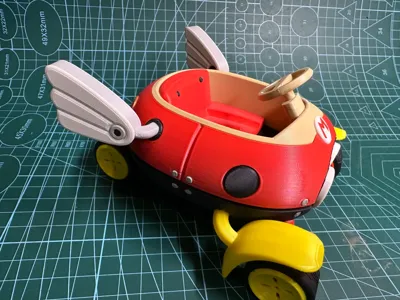
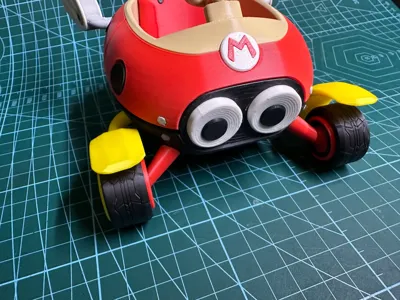
The exterior design is inspired by the ladybug from Mario Kart 8 Deluxe, employing the original game's color scheme. 3/100 scale.
Recommended Filaments:
Matte PLA: Red, Black, White, Yellow, Light Grey, Brown.
Refrain from using brands with excessive shrinkage or a tendency to stick. Matte finishes are recommended for superior aesthetics.
The colors used in the actual photographs are: Red, Black, Grey, White, Yellow, Desert Yellow.
Upon receiving the brown filament, I will conduct tests using PandaN's wood grain modifier on the brown sections to replicate the original material's texture.
The filaments used in the test photographs are all R3D's matte PLA (this is not an advertisement, I received no payment), exhibiting excellent stability. Avoid [redacted brand].
In colder regions, unenclosed printers may benefit from increased ambient temperature.
For enclosed printers, to achieve optimal print quality, avoid positioning the model near the door to prevent significant localized shrinkage.
Assembly Instructions:
Observe the height of the six grey decorative rings at the locations indicated. The shortest is near the front eyes; the longest is in the upper red body section. Misplacing rings, except the shortest, will have minimal impact.

For the black wing rings, the larger gap should face the rear of the vehicle. Ensure the wings are fully seated before securing with glue.

Assembly Sequence:
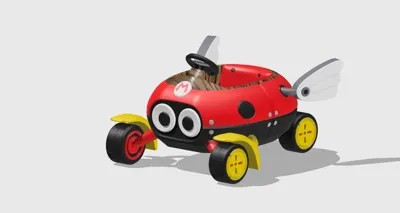
1. Assemble the chassis and its decorative rings, including the eyes;
2. Assemble the wheels and wings, excluding the chassis; avoid using glue on the wheels to ensure rotation. Glue is required for the wings.
3. Install the rear wheels (glue required). The front wheels require no glue; simply insert, ensuring correct left/right orientation.
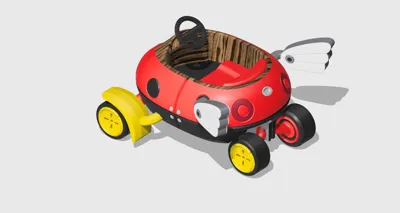
4. Install the wings (glue required). Assembly complete.
Comparison with Standard Kart:
Length is comparable, but it is noticeably wider.


Feel free to download, print, and share any issues encountered in the comments.
Boost Me (for free)
More models from this Mario Kart series:
Click to view directly
Model 1: Mario Kart 8 Standard Kart
Model 1.1: Mario Kart 8 Standard Kart - Wheel Remastered Version (recommended for display purposes)
Model 2: Mario Kart DS Cover Model
Model 3: Mario Kart 8 Biddybuggy
Model 3.1: Mario Kart 8 Biddybuggy - Figure Compatible Version (recommended to print this version)
Model 4: Mario Kart 8 Pipe Frame
Model 4.1: Mario Kart 8 Pipe Frame - Figure Compatible Version (recommended to print this version)
Model 5: Mario Kart 8 Standard Motorcycle
Model 6: Mario Kart 8 B Dasher
Model 7: Mario Kart 8 - Flower Child Off-Roader
Model 8:Mario Kart 8 - Zelda Master Cycle Zero
Model 8.1:Mario Kart 8 - Zelda Master Cycle Zero (recommended to print this version)
License
You shall not share, sub-license, sell, rent, host, transfer, or distribute in any way the digital or 3D printed versions of this object, nor any other derivative work of this object in its digital or physical format (including - but not limited to - remixes of this object, and hosting on other digital platforms). The objects may not be used without permission in any way whatsoever in which you charge money, or collect fees.
Comment & Rating (1)