Solving a problem I couldn’t ignore
If you have ever uploaded a model you are proud of and felt that the photos did not reflect the actual quality, you already know the problem.
For me, the issue was not occasional but consistent. Getting usable lighting for photos was a constant struggle. I do not have a studio setup, and living in the Nordics means natural light is limited to begin with. More importantly, the only time I usually have for this hobby is late evening, after the kids are in bed, when there is hardly any natural light.
The result was predictable. I was taking photos in poor conditions, with uneven lighting and harsh shadows, and even good prints ended up looking average. At some point it became clear that this was not really a photography problem. It was a tool problem.
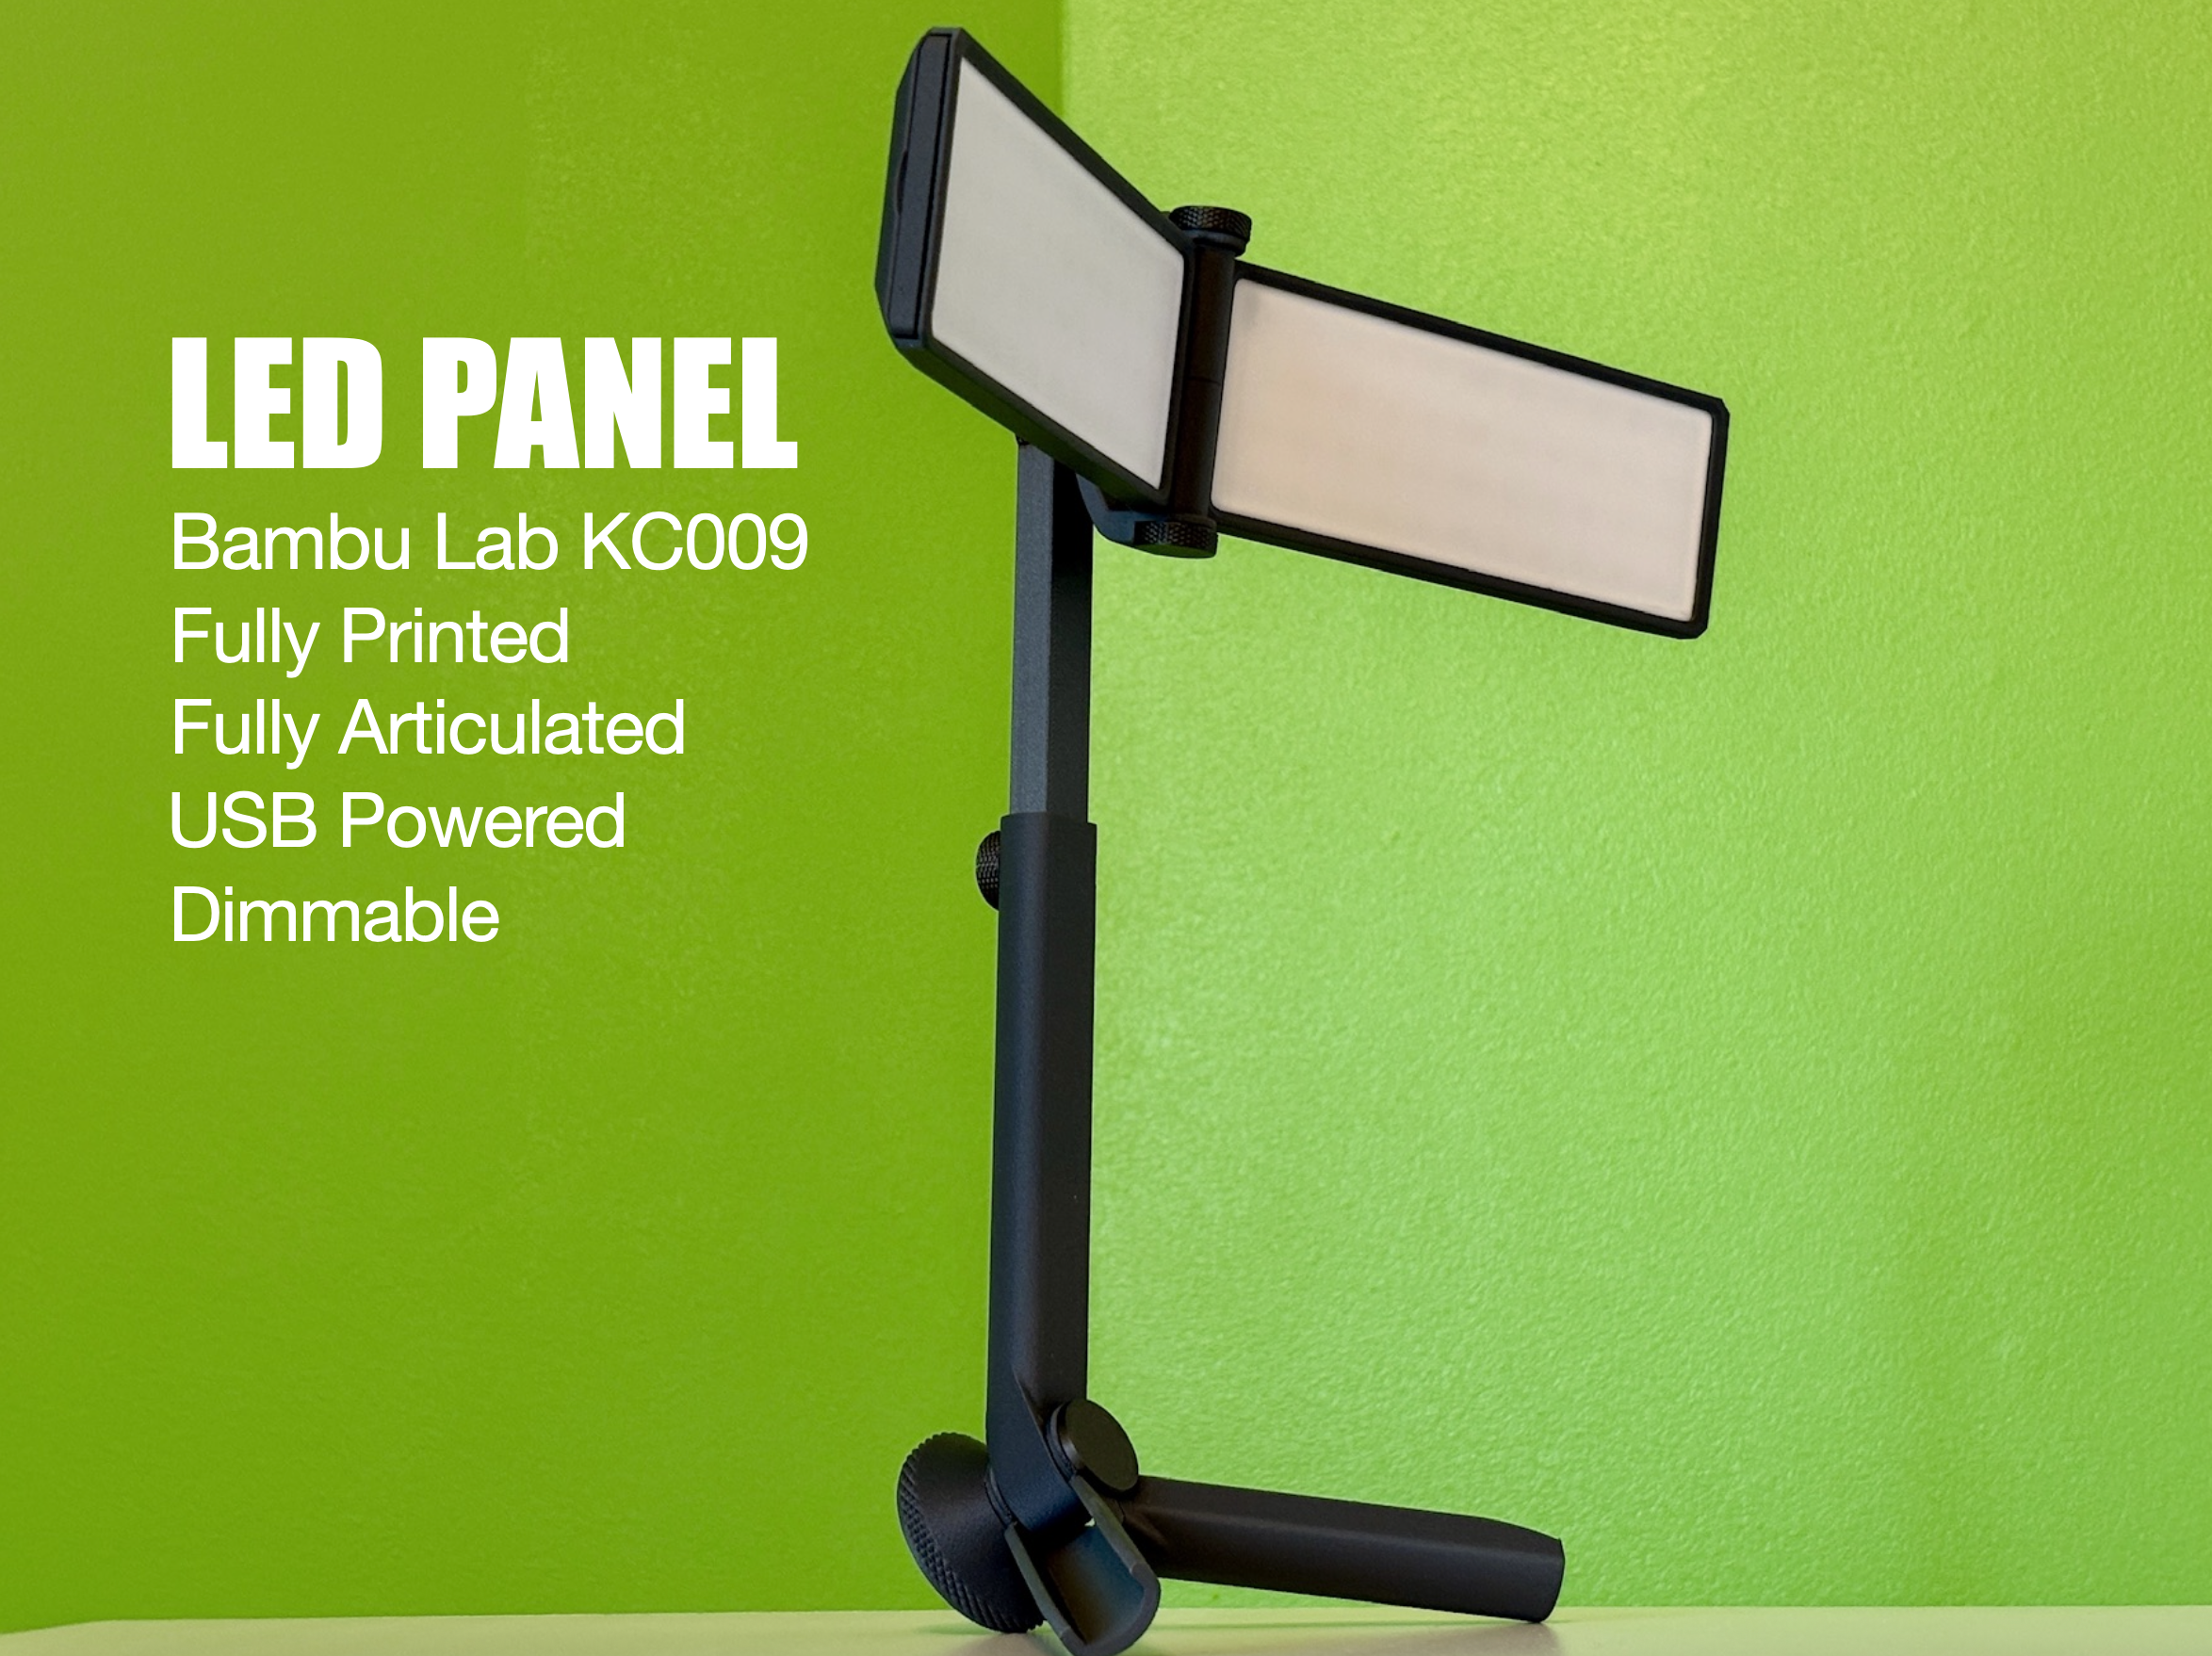
Like any other maker, I stopped trying to work around the issue and decided to build something to solve it. Moreover, instead of purchasing a light, I used the Lithophane LED Backlight Board Kit from Bambu Store that I already had waiting for a project.
Building a Tool Instead of a Workaround
The goal was not to replicate studio lighting. That would have made the project unnecessarily complex and bulky, especially as I don't usually print and photograph very large models. Instead, I wanted something compact, repeatable, and easy to take out and setup and then put back to storage.
I based the design around the Lithophane LED Backlight Board Kit since it provides large LED panels that can be chained together. It offers a clean and consistent light source, which allowed me to focus on the mechanical design. The challenge then became how to shape, position, and control that light in a way that is actually useful when photographing prints.
The Design Process
Like in many of my designs, I wanted to minimize number of components and use of fasteners or glue. I started with the design of the LED board chassis that also houses the diffuser. Making prototypes of just this part exposed problems quickly.
One of the most significant issues was the light frame warping off the bed when printing. It was severe enough that parts did not align properly, which made assembly unreliable or, in some cases, impossible. Fixing this required more than minor adjustments. I had to rethink wall thickness, reinforce specific areas, and tune the print profile carefully to make the result stable across different prints.
Accessibility was also a priority. I prototype on an A1 mini, which meant validating that the design works reliably on a smaller, open printer. If it works there, it will work on all Bambu machines. Printability was treated as a constraint from the beginning. Supports are minimal and only used where they are functionally necessary.
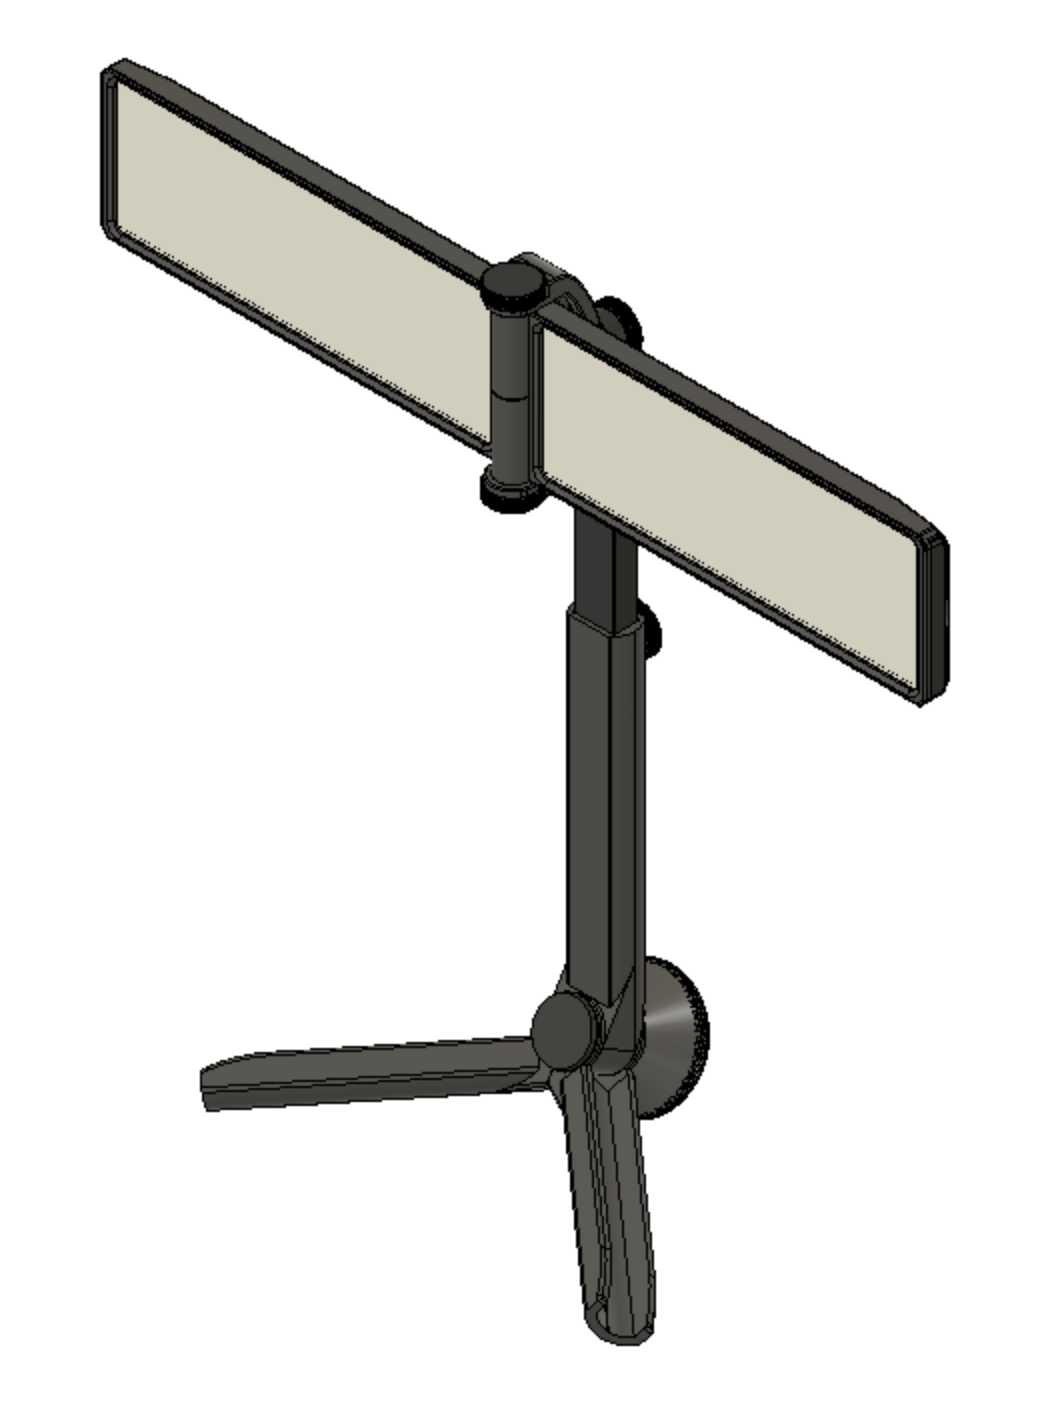
I then continued the design moving down from the light panels, adding the two way articulating hinge and the vertical strut. Again, I printed early prototypes of these parts while I was designing the next parts. This way I was able to solve problems in real-time and tweak things quickly as soon as the parts finished and start the next print, whether it was structural stability, tolerance fit, or assembly feel.
The folding legs required more thought. I wanted the light to store compactly, but still remain stable in use. Since most of the weight is at the front, a short rear support was sufficient. This led to a solution where the two long front legs fold against the vertical strut, and the tightening knob also functions as the back leg.
Assembly was another area where I wanted a reliable outcome. The final model requires no glue or separate fasteners. Parts snap or thread into place, and tolerances were tuned across multiple iterations to make that process consistent. The goal was to avoid the typical friction points where a model technically works but is frustrating to put together.
Once the design met my criteria for print quality, fit, and usability, I printed two complete builds. These are the units shown in the model photos, and they are also the ones I use in practice.
This step was important. It verified that the print profile holds up outside of isolated part testing and works as a complete system.
Arriving at a Usable Design
What emerged from that process is a lighting panel that is simple in concept but flexible in use.
The articulated stand became the central feature. Instead of fixing the light in a single position, it allows controlled and precise adjustment. In practice, this makes a noticeable difference. Small angle changes can soften shadows or bring out surface detail in a way that ambient lighting cannot.
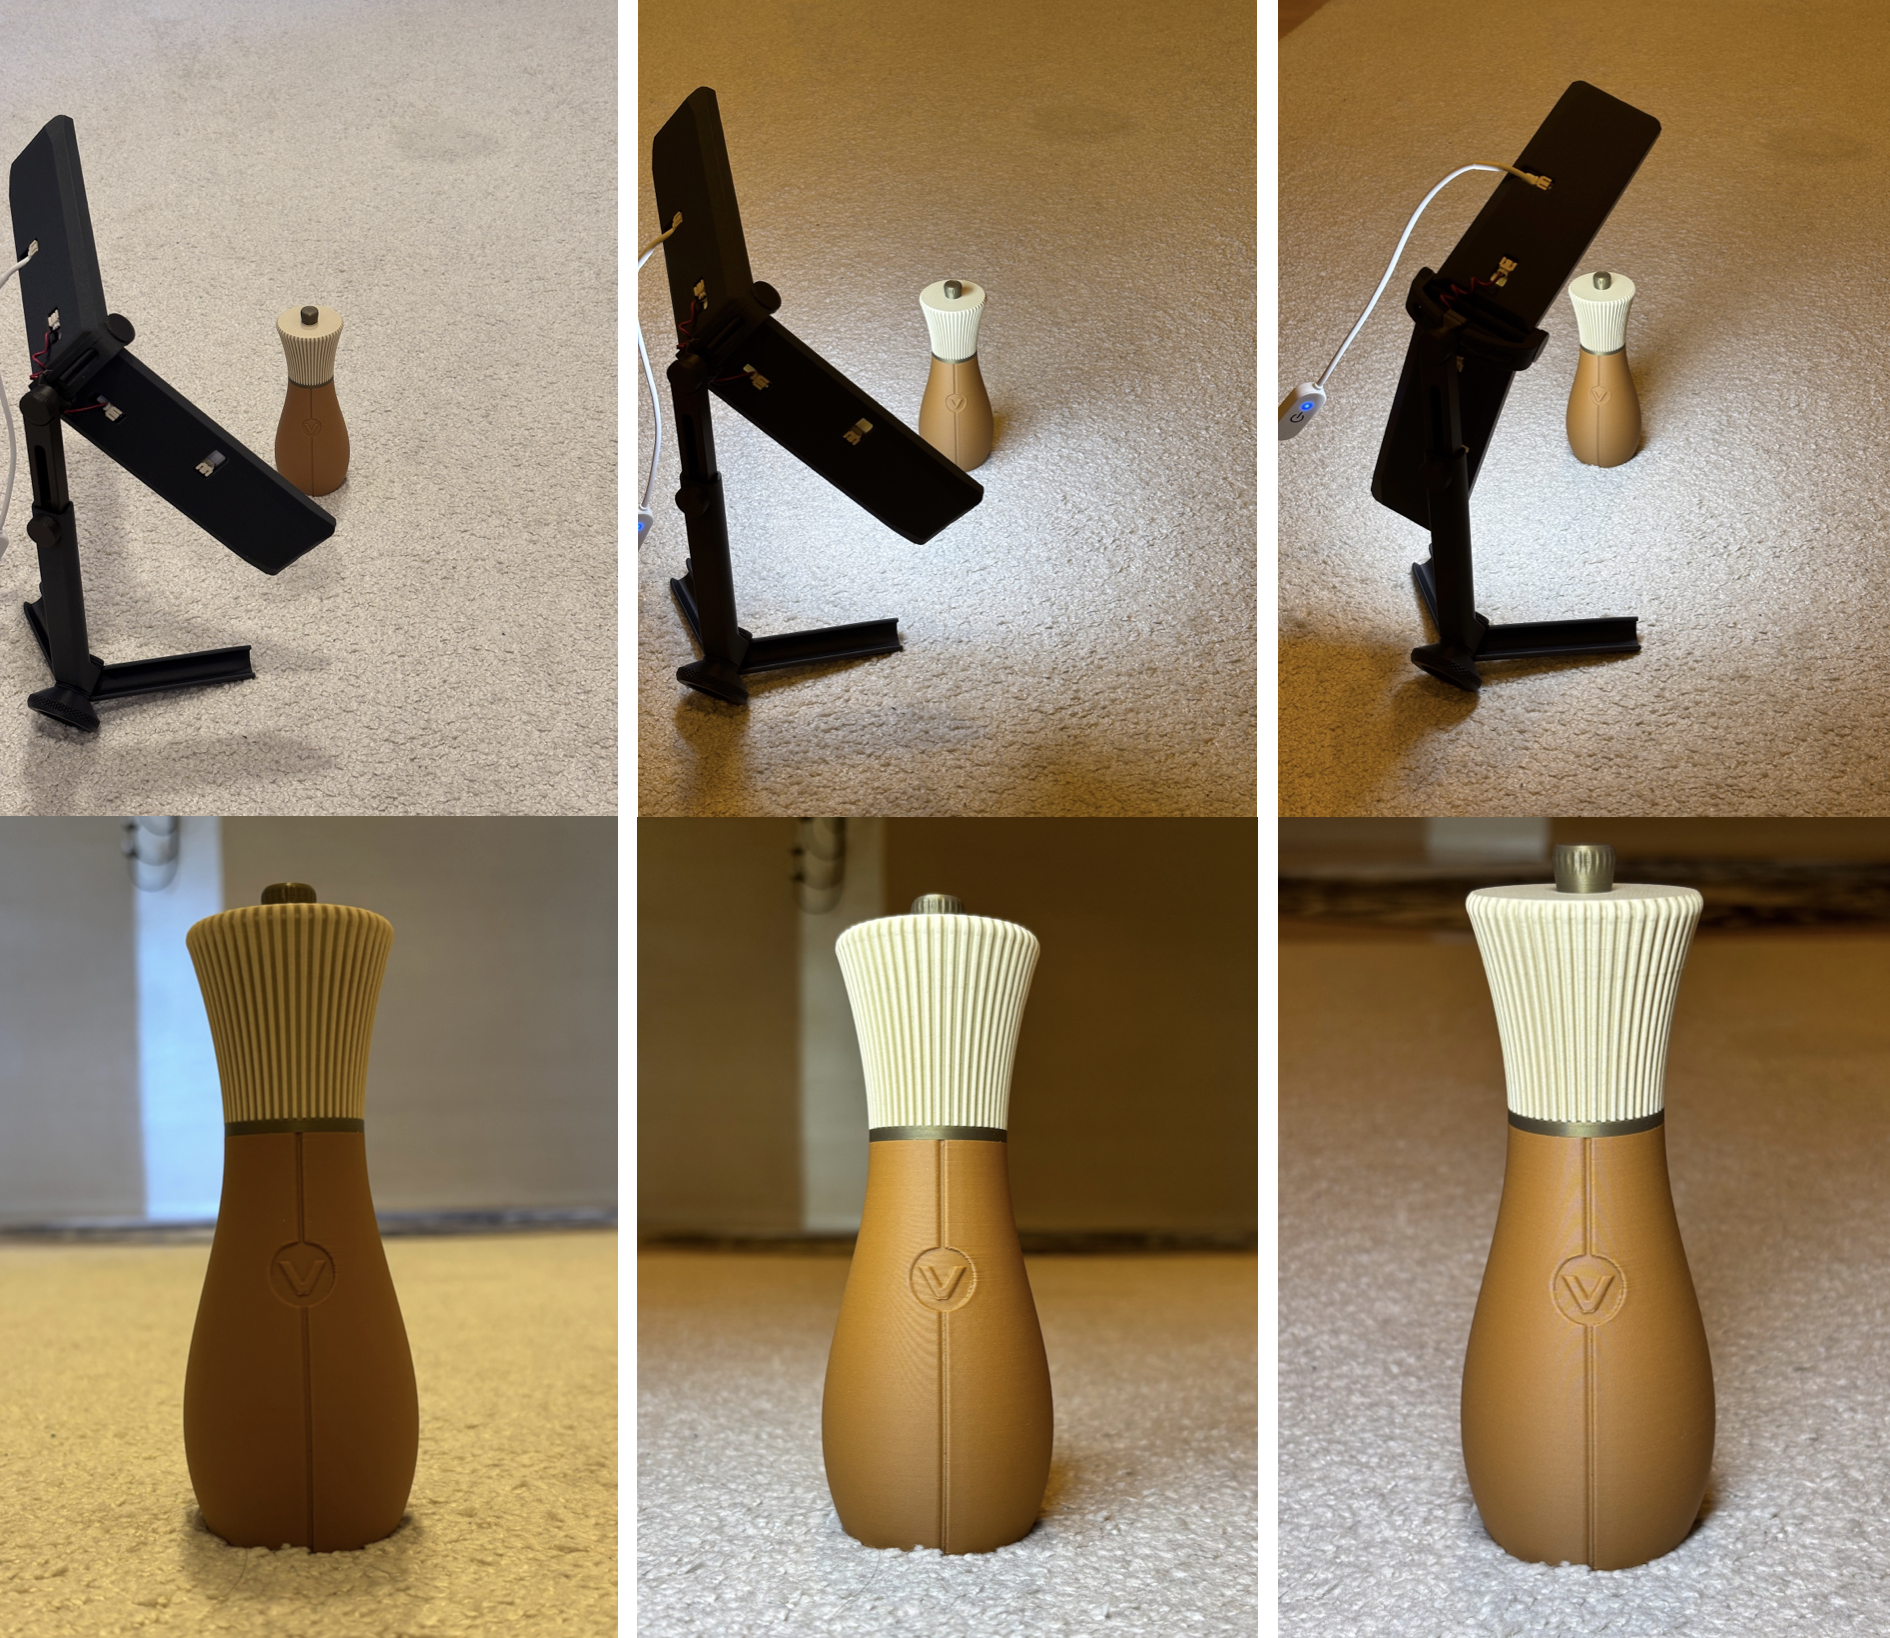
The first photo below shows the setup with the light off. In the second setup the model is well illuminated but a shadow is cast to the right. The final setup shows how the light can illuminate the print from the front, eliminating shadows, as well as from the top in case details on top surface need highlighting.
What Actually Changed
I'm not an expert in photography or lighting, but the results are clear in practice.
The main improvement is not brightness, but control. Instead of dealing with uncontrolled shadows and inconsistent exposure, I can adjust the light position precisely and get repeatable results.
It does not replace a full studio setup, but it removes a major limitation in a typical home environment. Surface details are easier to capture, and the overall presentation is more accurate.
Why This Matters
On MakerWorld, the first impression is almost always visual. Even well-designed models can be overlooked if the lighting hides detail or makes the result look flat and easy to scroll-over.
This project started as a way to solve my own problem, but the problem is common. Many makers are working in similar conditions, without access to dedicated lighting or consistent natural light.
Providing a simple, purpose-built tool for that gap felt like a worthwhile direction. For me, it turned an inconsistent process into a controlled one. That alone made the project worth pursuing.
You can find the model here: