Mini Arcade Cabinet


Print Profile(2)

Description
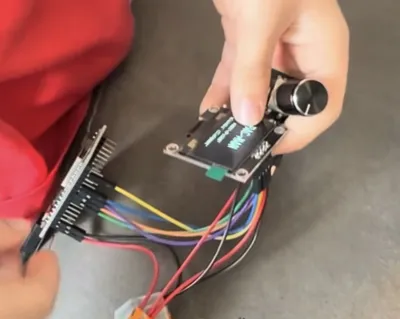
My son is eight. He wired the whole thing himself.
Every connector. Every color. I called out the pin, he pushed the wire in. No soldering the whole build is female jumper wires and a couple of Wago lever connectors. Twenty minutes after the last wire went in, he was playing Pac-Man on a screen inside a cabinet he built with his own hands.
That was the goal. A real electronics project a kid can actually do.
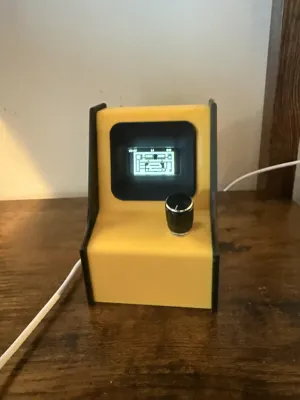
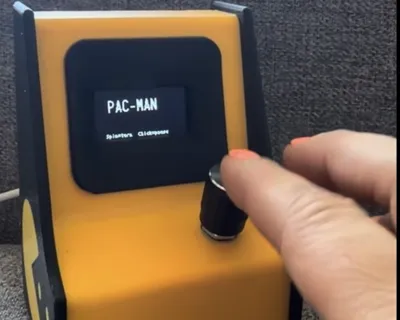
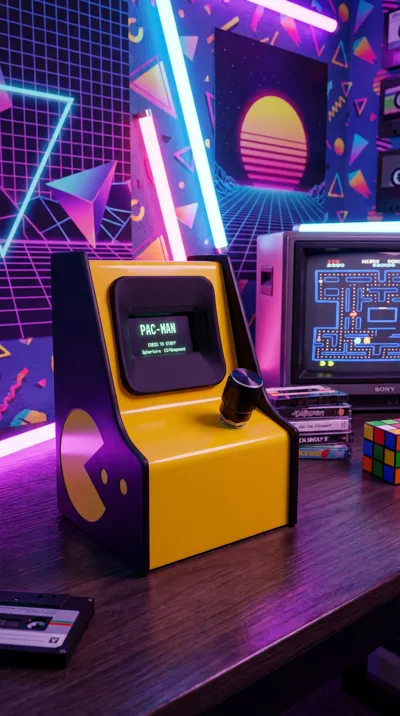
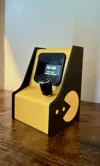
Fully playable Pac-Man clone running on an ESP32 with a 1.3" OLED and a rotary encoder for the controller. Three levels with distinct mazes. Ghosts with chase and scatter they hunt you down in chase mode and retreat to their corners in scatter, just like the arcade. Two ghosts at level 1, up to four by the end.
Three printed parts: the cabinet body, the screen bezel, and the snap-fit back panel. Yellow and black PLA. Pac-Man artwork on the side panels. Encoder knob on top. USB-C power on the back.
The snap-fit back panel is the last assembly step. I handed it to my son. The click when it shut is the moment the project was done.
WHAT'S INCLUDED
• 3 STL files (cabinet body, screen bezel, back panel)
• Arduino game code (.ino)
• Full build guide PDF BOM, wiring diagrams, step-by-step assembly, troubleshooting
ELECTRONICS NEEDED
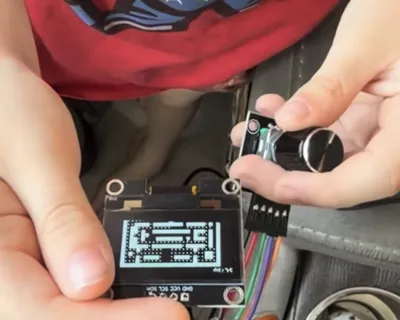
• ESP32 dev board, 30-pin WROOM-32
• 1.3" OLED, SH1106, I2C (128x64)
• KY-040 rotary encoder
• Wago 221-413 lever connectors x2 (one for 3.3V, one for GND)
• USB-C power breakout board
• Female-to-female jumper wires (need 9, buy a 40-pack)
• Micro USB data cable for programming
About $25–30 in parts. Most of it goes into your bin for the next project.
PRINT SETTINGS
• PLA — yellow body, black details
• 0.20mm layer height, 3mm walls, 15% infill
• Print the cabinet body face-down for the cleanest front surface
• PETG interface layer makes supports release clean
All files are free. Build it with your kid.
You are the limitation — not the circumstances.
Boost Me (for free)
boost
Documentation (2)
License
You may create derivative works based on this object, provided that all such derivative works are published exclusively on the MakerWorld platform and include proper attribution to the original creator. You may not share, upload, host, distribute, or publish this object—or any derivative work of this object—on any other digital platform, marketplace, or distribution channel. Commercial use of this object and any derivative works is strictly prohibited. This includes, but is not limited to, selling, renting, sublicensing, or using the object in any context in which you receive monetary compensation or other financial benefits.
Comment & Rating (0)